

A short while ago, I had a text from a very good friend, saying that she had managed to get her husband to clear out all the old bits of wood he had hoarded for some time. Knowing how much I love a bit of reclaimed wood, she texted me first and said that they had literally just been put in a big pile on her driveway and they were also going to text “the men with sheds” (whoever they were!) to let them know too and that we could all just come and take what we wanted.

Well, I literally got in my car and drove straight to her house and she was not kidding when she said it was a big pile. It was literally up to my waist and the longest piece was probably just under 3 metres long.
After searching through the pile I found some lovely old wide floorboards and then yes, you’ve guessed it, I wanted the longest piece, which I believed to be oak and was ridiculously heavy. The moment I saw it I knew exactly where I wanted it to go. My lovely friend was out and there was no one around to help and I knew I would never get it into my car on my own due to the weight, but I had to do something with it before ‘the men with sheds’ came! I also didn’t want it to get wet and spoil.
As she is a special friend and I know her very well, I knew that her garage was never locked so I thought if I could somehow drag it over to her garage a couple of metres away, maybe I could summons the strength to stand it up………..Yeah right!
You really have no idea how ridiculously heavy this solid oak, almost 3 metre long, piece of wood weighed and clearly, nor did I. At a rough guess I would say it took me about 20 minutes to literally drag it bit by laborious bit, to the garage just a couple of metres away. Then, when I opened the garage, it was like all my piles of ‘need to deal with stuff’ and my ‘fit to bursting Summerhouse’ and my ‘everything falls out when you open the door Shed’ were all rolled into one before my eyes. OMG Ok ok, lets take a deep deep breath, let’s close my eyes and envisage the beautiful shelves I am going to make with this piece of wood and then, let’s picture the ‘shed men’ running towards me with axes and now let’s gather all my strength and move everything……Hmmm.
Yes, it probably took me another half an hour at least, to get this piece of wood to an upright position and I really did struggle and I kept thinking I can’t do this. It was like a comedy sketch and would have been hilarious to watch but eventually, due to sheer determination and the fact that I never give up, I did it. I quickly closed the garage, loaded up my other squirreled bits of wood and texted my friend to let her know. All I needed now, was to persuade Mr Chandelier to come with me to collect it as in our house, the boot is on the other foot so to speak, as he is always trying to persuade me to get rid of my hoard……Hmmm!
Anyway, Mr Chandelier bless him, did indeed come with me to collect the wood and he agreed that it was perfect for our Kitchen shelves, which was exactly what I had in mind for it when I first saw it. Although there were couple of imperfections in the wood, it was the exact thickness and look that I wanted for my kitchen shelves and I knew I was either going to paint or use liming wax on them.
Liming wax is very easy to use but you do need an unfinished piece of wood that hasn’t already been painted, varnished or waxed. You can use wood that has been previously finished, but you do then need to remove all previous product to ensure it is free from any other finishing materials. The idea behind using liming wax is to give a sort of whitewashed look to highlight the grain and brighten the wood up.
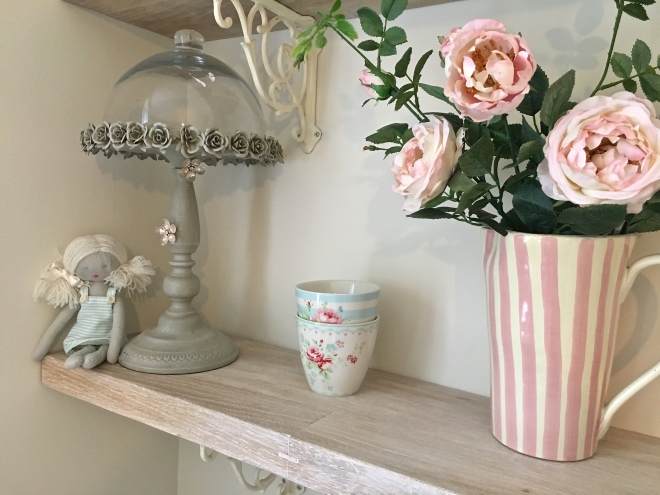
If you look at the image below, I have already done the 2 left hand shelves but the right hand one has not been done. You can see they are quite different and for me, it gave me exactly the look I was after with the least amount of effort, which frankly in this house, is desperately needed.
You should start by brushing/rubbing the wood with a wire brush to ‘lift/open’ the grain of the wood. The liming paste/wax will then work its way deeper into the grain and won’t lift off as soon as you wipe off the excess. I however, didn’t feel the need to do this as I felt my wood was already very ‘grainy’ and a little rough so I knew it would absorb the wax well enough. I used Liberian Special Effects Liming Wax but there are many different brands which will work equally as well.
The technically correct way to apply the wax is to use Extra Fine or Fine Steel Wool. However, you can also literally just brush it on with either a paintbrush which I used, or you can apply it using a soft lint free cloth. The whole process is exactly like waxing except it has liming paste in it. You are meant to wait around 3 minutes for it to dry and I did a stretch of about a foot at a time, and then, using a soft lint free cloth – an old tea towel or similar – you just buff it off to a shine. You can go over it if you would like it a little brighter but to be honest, it won’t make a great deal of difference as the grain will already be full of liming wax so any excess tends to come away when you buff it. If you need it to be waterproof you can use a finishing oil and obviously, the more coats of oil you apply, the greater the water resistance.


You can see from these photos that each piece of wood will absorb the wax differently as it is a product of nature and every piece of wood will of course, be very different. I love that, as it shows you have real wood and highlights all that beautiful texture and character.
So there you have it, really easy but effective. I have quite a few pieces of wood that are calling out to me to ‘come and lime me’! I think my little one’s Vintage school desk would definitely benefit from it but that is a whole other day!
How about you, do you have anything that would benefit from liming or do prefer a darker look?
Happy Liming!
Much Love,
Sarah xx
