Farrow & Ball’s Ammonite & Slipper Satin & Painting Kitchen Units

chandeliersandroses.com

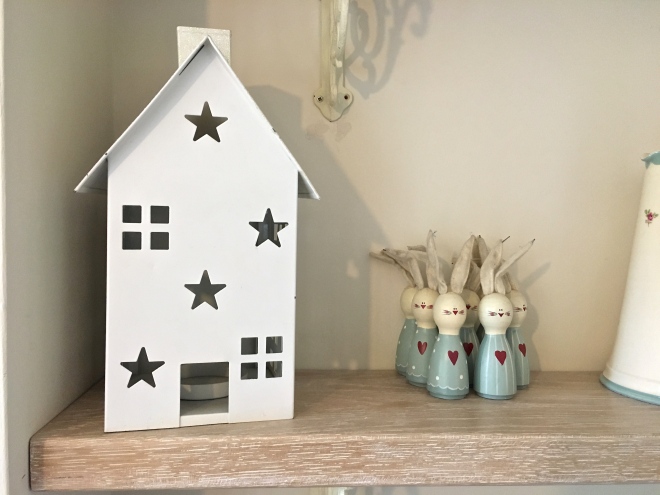
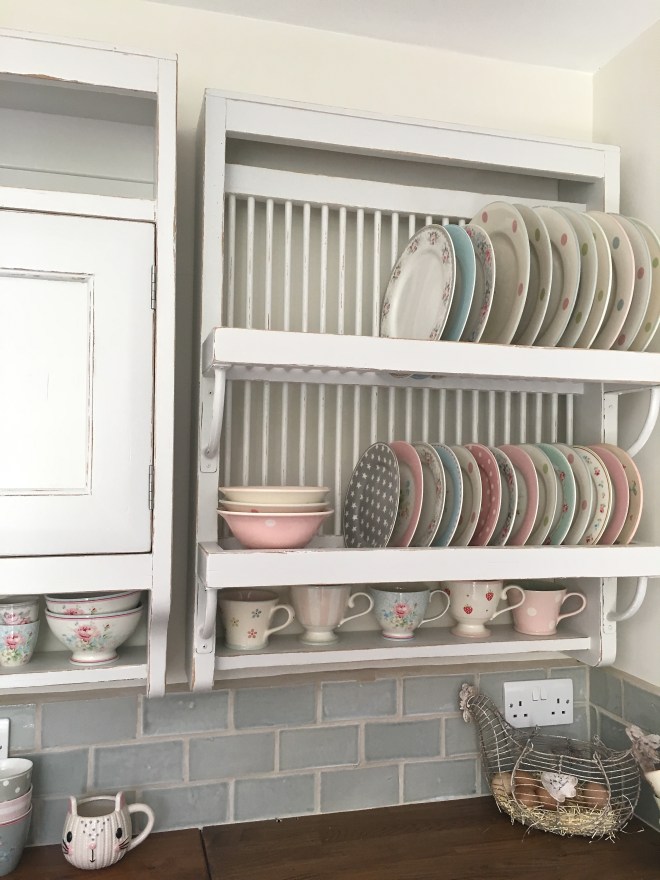
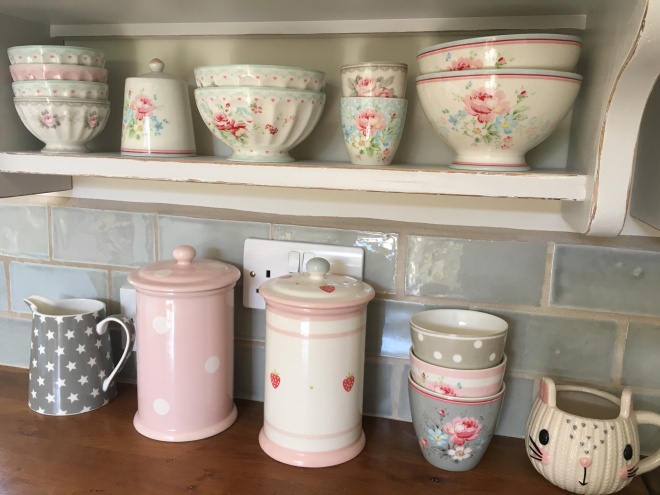
Farrow & Ball’s Ammonite on Fired Earth Bastide plate rack with Greengate & Susie Watson pottery

For a long, long time now, let’s not say exactly how many years, painting my kitchen units has been on my ridiculously long list of things to do.  As you may or may not know, I am a bit of a savvy shopper and when Mr Chandelier & I first saw the Fired Earth French Oak Kitchen in their showroom I plotted and planned, (a very favourite pastime) a way to be able to afford it.

My plotting and planning paid off and we pretty much have a complete kitchen now, only 9 years later!  However, yes there is always a however in this household, this has meant that we have purchased the kitchen bit by bit.  The main units were bought by repeatedly going to their factory sales and purchasing either ex-display pieces or cancelled customer orders which generally tended to be roughly half price.  Also because we weren’t buying everything all at once, we could semi-recover financially before the next piece came up – I’m not sure Mr Chandelier would not agree with the semi-recover financial bit at all, but you know what I mean… hmmm….!

chandeliersandroses.com

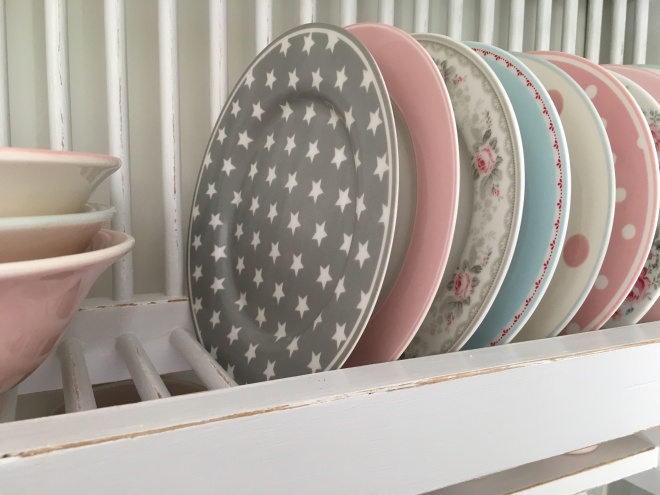
Beautiful Greengate & Susie Watson pottery

We have also purchased one wall unit and an island unit from Ebay and my very clever builder / carpenter Mr Chandelier, has adapted a base unit into a wall unit.  We still have quite a bit of adapting to do, particularly on the Island unit, and it has been more than a little painful at times, but it has meant that we will soon (well soon meaning a few months!) have a complete lovely solid French Oak Kitchen which we would otherwise not have been able to afford. Obviously, I am not accounting for the time and love we have lavished on it as it may well have come out more expensive, but we will just brush on by that shall we.
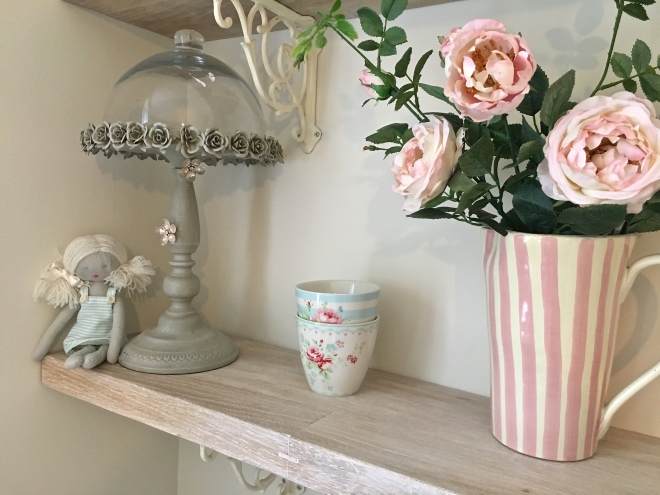
chandeliersandroses.com

Cupcakes & Roses

The downside of buying a kitchen in this way does of course mean that even though all the units are meant to be the same colour, the tone never quite matches, although we are perfectionists and most people probably wouldn’t have noticed.  However, if I had been happy with the colour then I probably would have left it.  The units were meant to be cream but they were a very yellow cream and, much as there is nothing wrong with that, it ‘jars’ with my pottery and the colours that I have in my kitchen so they had to go.

chandeliersandroses.com

Gorgeous Greengate & Susie Watson pottery

So, paint colours.  I absolutely adore my Greengate & Susie Watson pottery and it adorns my home in many different locations but it is in abundance in my kitchen.  I tend to go for the very soft pastels, always soft pinks, soft greys, soft blues & duck eggs and quite a bit of off white.  With all that colour going on I needed to have a soft background and I tried many different off whites and greys and even duck egg greens before settling on Farrow & Balls Ammonite.  I have used this in my Craft Room and as soon as I tried it in there I just knew it would be right for the kitchen and thankfully it is.

chandeliersandroses.com

The ‘Chatting’ end of the kitchen with Laura Ashley chairs

Our kitchen is very long, it is approximately 31 foot and has 2 windows and 2 sets of french doors, one side faces South and the other North so the paint colours we chose do change throughout the day.  Sometimes Ammonite appears to be very Taupe in colour and sometimes more grey.  You can see from the photo below of the units I have painted, that the far right one is more grey and the others more taupe.  The more taupe ones are a little more blocked from light by the island unit.  We put Farrow & Ball’s Slipper Satin on the walls which is pretty neutral, but again can appear more white or cream in the darker areas and even seems to have a tinge of green in some lights but overall it all works and more importantly, we love it and it is of course, another tick on my never ending list!


chandeliersandroses.com

Kitchen Units painted in Farrow & Ball’s Ammonite

I started painting the units in January (so Mr Chandelier says!) and I have done 7 so far and have another 3 plus the island to do.  They are extremely laborious and time consuming and cause quite a mess just doing one, plus I am running a business and have 3 children and I am doing many other house projects, so I kind of have to do it that way.

chandeliersandroses.com

Some heavy sanding required!

The problem is, that I have to really heavily sand them back as I am distressing the edges of the units.  I then have to apply 5 coats of paint – 2 good quality undercoats and 3 of my chosen Ammonite eggshell.  If I don’t sand back that heavily, then when I distress them you will see the cream and I don’t want that.  Unfortunately, I really dislike the sanding element but as Mr Chandelier likes to remind me when I complain about it, I could have left them cream!

I know it is predominantly self inflicted hard work but, as they are hard working kitchen units and, our house is often on show to both current and potential clients for both myself and Mr Chandelier, and it is my nature if I do a job to do it properly, then that is how it has to be.  The worst is over now as the plate rack was just horrendous, made considerably worse as I had just had a small surgical procedure on my leg and had to try and paint it with my leg raised (yes I know, utter madness – don’t try this at home – never again!)  We are also going to pay for a little sanding help for the remaining top units so I just need to motivate myself to picking up the ‘Kitchen Units paintbrush’ again to give it another boost.  Then I ‘just’ need to finish the walls, finish grouting the floor and tiles, paint round the doors, paint the main door, paint the table and bench…………….omg  –  I can’t list any more  –  insert head in hands emoji here now!

How about you, ever thought about painting your kitchen units and what colour I would love to see.

Much Love,

Sarah xx

I


How to use Liming Wax / Paste


IMG_7979

A short while ago, I had a text from a very good friend, saying that she had managed to get her husband to clear out all the old bits of wood he had hoarded for some time.  Knowing how much I love a bit of reclaimed wood, she texted me first and said that they had literally just been put in a big pile on her driveway and they were also going to text “the men with sheds” (whoever they were!) to let them know too and that we could all just come and take what we wanted.

kitchen shelves liming wax blog

Well, I literally got in my car and drove straight to her house and she was not kidding when she said it was a big pile.  It was literally up to my waist and the longest piece was probably just under 3 metres long.

After searching through the pile I found some lovely old wide floorboards and then yes, you’ve guessed it, I wanted the longest piece, which I believed to be oak and was ridiculously heavy.  The moment I saw it I knew exactly where I wanted it to go.  My lovely friend was out and there was no one around to help and I knew I would never get it into my car on my own due to the weight, but I had to do something with it before ‘the men with sheds’ came!  I also didn’t want it to get wet and spoil.

As she is a special friend and I know her very well, I knew that her garage was never locked so I thought if  I could somehow drag it over to her garage a couple of metres away, maybe I could summons the strength to stand it up………..Yeah right!

You really have no idea how ridiculously heavy this solid oak, almost 3 metre long, piece of wood weighed and clearly, nor did I.  At a rough guess I would say it took me about 20 minutes to literally drag it bit by laborious bit, to the garage just a couple of metres away. Then, when I opened the garage, it was like all my piles of ‘need to deal with stuff’ and my ‘fit to bursting Summerhouse’ and my ‘everything falls out when you open the door Shed’ were all rolled into one before my eyes.  OMG Ok ok, lets take a deep deep breath, let’s close my eyes and envisage the beautiful shelves I am going to make with this piece of wood and then, let’s picture the ‘shed men’ running towards me with axes and now let’s gather all my strength and move everything……Hmmm.

Kitchen Shelves liming wax

Yes, it probably took me another half an hour at least, to get this piece of wood to an upright position and I really did struggle and I kept thinking I can’t do this.  It was like a comedy sketch and would have been hilarious to watch but eventually, due to sheer determination and the fact that I never give up, I did it.  I quickly closed the garage, loaded up my other squirreled bits of wood and texted my friend to let her know.  All I needed now, was to persuade Mr Chandelier to come with me to collect it as in our house, the boot is on the other foot so to speak, as he is always trying to persuade me to get rid of my hoard……Hmmm!

Anyway, Mr Chandelier bless him, did indeed come with me to collect the wood and he agreed that it was perfect for our Kitchen shelves, which was exactly what I had in mind for it when I first saw it.  Although there were couple of imperfections in the wood, it was the exact thickness and look that I wanted for my kitchen shelves and I knew I was either going to paint or use liming wax on them.

Liming wax is very easy to use but you do need an unfinished piece of wood that hasn’t already been painted, varnished or waxed.  You can use wood that has been previously finished, but you do then need to remove all previous product to ensure it is free from any other finishing materials.  The idea behind using liming wax is to give a sort of whitewashed look to highlight the grain and brighten the wood up.

If you look at the image below, I have already done the 2 left hand shelves but the right hand one has not been done.  You can see they are quite different and for me, it gave me exactly the look I was after with the least amount of effort, which frankly in this house, is desperately needed.

IMG_7498

You should start by brushing/rubbing the wood with a wire brush to ‘lift/open’ the grain of the wood.  The liming paste/wax will then work its way deeper into the grain and won’t lift off as soon as you wipe off the excess.  I however, didn’t feel the need to do this as I felt my wood was already very ‘grainy’ and a little rough so I knew it would absorb the wax well enough.  I used Liberian Special Effects Liming Wax but there are many different brands which will work equally as well.

The technically correct way to apply the wax is to use Extra Fine or Fine Steel Wool.  However, you can also literally just brush it on with either a paintbrush which I used, or you can apply it using a soft lint free cloth.  The whole process is exactly like waxing except it has liming paste in it.  You are meant to wait around 3 minutes for it to dry and I did a stretch of about a foot at a time, and then, using a soft lint free cloth  –  an old tea towel or similar  –  you just buff it off to a shine.  You can go over it if you would like it a little brighter but to be honest, it won’t make a great deal of difference as the grain will already be full of liming wax so any excess tends to come away when you buff it.  If you need it to be waterproof you can use a finishing oil and obviously, the more coats of oil you apply, the greater the water resistance.

You can see from these photos that each piece of wood will absorb the wax differently as it is a product of nature and every piece of wood will of course, be very different.  I love that, as it shows you have real wood and highlights all that beautiful texture and character.

So there you have it, really easy but effective.  I have quite a few pieces of wood that are calling out to me to ‘come and lime me’!  I think my little one’s Vintage school desk would definitely benefit from it but that is a whole other day!

How about you, do you have anything that would benefit from liming or do prefer a darker look?

Happy Liming!

Much Love,

Sarah xx

How to make a Patchwork Heart Card Tutorial

So, here we are, February already and Valentine’s day literally just around the corner.  Every year I struggle to be organised with this day and this year is no exception.

IMG_5513.JPG

As you know, September to Christmas is my absolutely manic time of year and from January until at the very least the end of February I am still dealing with the aftermath of that frantic time.  I have only just found a permanent home for my 4 very large boxes of Christmas Decorations which has caused bedlam  –  nothing new there then!  We also launched full-scale into loads of work on the house the very minute all our guests went home but that is another story and a whole load more blog posts.

IMG_5309.jpg

During last season’s events, I was approached by no less than 3 lovely WI ladies who run groups locally.  I was so flattered to be asked to go and talk about myself (really it’s true!) and my creative life and perhaps do a demonstration.  My first one was on Wednesday and I thought as Valentine’s day is almost upon us, and I create a lot of heart products, it would be rather lovely to do a tutorial for a pretty Patchwork Heart Valentine Card.  The fabulous thing about this is, that it would look even better on fabric or even on a canvas and the process is exactly the same.  What a lovely birthday gift it would make for someone special – I would be so touched if someone spent the time to make me one of these and I would keep it forever.

First of all, you need to choose your card.  I love to make cards with a lovely scalloped edge and especially as it is Valentine’s day I feel this adds to the Romantic look and feel of this theme.  I find it easier to work on it with the card open flat, as it won’t keep ‘bouncing’ open whilst you are working on it which is rather annoying, especially when it is so fiddly and time-consuming.

IMG_5348.jpg

Secondly, either cut from paper or find a heart shape that works for the front of your card.  Remember to allow a little space at the top for either stamping or hand writing your message.  If your stamping skills are a little dubious to say the least, (you know who you are!) then do your stamping or message writing now, so that you do not ruin your beautiful card.  If you have been on one of my workshops, then frankly you have no excuses whatsoever……….Hmmm.

I have chosen to use one of the wooden heart blanks I make a lot of, as it is the perfect size for my card.  I sell a lot of these so if you have bought one from me then draw round the edge very carefully, making sure it is both central and there is room for your message.

IMG_5411.JPG

Red scraps basket

Now we are ready to start applying the fabric.  I have chosen, rather obviously, red.  This is brilliant for using up your little scraps of fabric, of which I have far, far too many.  This is just my ‘reds’ department, with a little bit of green sneaked in to the corner but I have a basket like this for each colour and 2 overflowing ones for pink!

The idea is to hand cut each patchwork piece in lots of different fabrics to fit your heart exactly.  And no, you cannot cheat and just ‘stick and overlap’ each piece of fabric because it will look like your child has made it  –  you know I am right.

IMG_5424.jpg

Here is a pink patchwork bird my now not so ‘little man’ Ben, made for me when he was around 7 and below is a red patchwork elephant Charlotte made for her baby sister when I was in hospital in labour with Ruby, she was 11 at the time.  I think they are absolutely adorable, although I am somewhat biased, but I do think you can tell that they have been done by a child.

Valentine Heart Blog

Try and pick co-ordinating fabrics whereby the ‘tone’ is the same – i.e; don’t put a deep raspberry or burgundy (no-one uses that word anymore but you know what I mean) with a scarlet or bright red unless of course you love it in which case, carry right on!  Make sure you have a variety and bear in mind that if you use all different weights of fabric, such as cottons and canvas, it will have a much more uneven look and be a little more rustic.  I do tend to use all different weights, generally because I love all the different fabric patterns that I have.  I also try to ensure that I have a stronger piece like a dark background with a tiny dot next to a less strong piece such as a flower on a white background.  If you follow this throughout, when finished, this will give a far more cohesive and even look.  You could also just use say 2 or 3 different fabrics, say blue stripe and blue and white dotty and the simplicity of that design can look stunning.  You could also use scraps of ribbon too if they work with your colour scheme.  Always remember, it’s whatever makes you smile.

Valentine Heart Blog

Here is a large patchwork elephant I haven’t quite finished!

Valentine heart

I always start in the middle and work outwards.  I tend to cut a few first, into little squares or rectangles and see how they gel together.  Use little tiny ‘snips’, embroidery or very small scissors.  Once you have quite a few cut and you are happy with the ‘flow’ of the colours then stick those down.  You may need to lightly trim the edges so they sit neatly side by side.  You are not necessarily aiming for them all to be the same size, just no overlapping and nice straight edges on the middle pieces of fabric. If a fabric piece overlaps slightly once glued, gently nudge it with your fingernail or something like scissors or the wrong end of your brush to move it over a millimetre or two so it lays nice and straight.  Don’t put too much glue out at once, as you will soon realise, it is very time-consuming and the glue dries out.

Patchwork Heart Tutorial. - chandeliersandroses.com.jpg

Use a nice little flat bristled brush if you have one as it will be much easier to paste with.  I tend to use this very sticky glue a lot as it is fab but any PVA glue is absolutely fine.  Do not put too much glue on – use just a thin layer – as you do not want to soak the card as it will want to warp and bend.  If that happens, keep it flat and put a book or heavy object on it whilst it dries.

I should make you very aware at this point, that it is far too easy to get lost into a rather lovely creative little world and you really could take all day to play around with the positioning of your little squares.  It really is rather therapeutic and is now being widely recognised as such, especially when recovering from illness.

Valentine Heart

Once you get to the edges, place your fabric square onto your card and draw a pencil line onto the fabric so you know where to cut.  Try to be as neat as you can but don’t fret too much if you struggle, as we will be putting a trim around the edge to hide any rather dubious cutting!

You will inevitably be left with some teeny tiny gaps which are minuscule to cut, as you can see on the bottom of my heart.  Try to use fabrics which are a contrast to the pieces used around them as otherwise they will just blend in.  You are best to apply the glue to the card when you do these and you may well need to get the tweezers out!!  However, if you really cannot cope with these teeny areas then you could always colour them in with pen, however, practice really does make perfect.

IMG_3528.JPG

Once your, now rather beautiful looking heart is complete, it is time to add a trim around the edge to finish it off.  You really can use anything for this but one of the easiest trims to use is ric rac.  Firstly, it is quite widely available in a large amount of scrumptious colours and indeed widths, secondly, due to the fact that it is ‘wavy’, it not only adds interest and depth but it is easy to bend and shape, particularly along the curved edges.  It probably goes without saying that I have rather a lot of it so, after just a teensy amount of deliberation as to quite which tone of red I was going to use, out came the narrow crimson ric rac.

IMG_5476.JPG

Again, start at the top in the centre and try to cut a nice mitred edge (as you would find on the corner of a picture frame) so that when you have gone right round your heart and you join the trim at the top it will sit nicely together.  Whatever you do, do not cut at this stage, what you feel is the right length of trim, as it is far too easy to cut it too short, only realising when it is too late!

You might wish to change your brush at this stage, as your nice flat one will probably be too big.  Choose a little pointed brush head no wider than your trim.  Only glue approximately 2cms at a time, as the fabric trim will readily absorb the glue and dry really quickly, causing you to re-glue.  When you lift the trim to glue the next section, hold the part you have just glued down with one or two fingers as it will want to lift.  Again, do not use too much glue as it will squeeze out the sides.  Try not to get it onto the card.

When you get to the bottom point of the heart you can either bend the trim into a v-shape and carry on or, if it does not sit well like this and the back is the same as the front, you can bend it back on itself so you are effectively now using the back as I have done.

chandeliersandroses.com.JPG

Once finished, you can decide if you would like to add a little embellishment such as a button or a flower etc.  Remember, if you are creating this as a card and you wish to post it, don’t choose an embellishment that is too high.  I have chosen a tiny sparkly flower.

Finally, choose what, if any, message you would like to stamp or write on the top  –  or indeed wherever else you would like your message to appear.  After deliberating over these stamps, as much as I love the top large stamp,  I felt it was too fussy and would have detracted from the patchwork heart.  Less is more!

img_5513

So there you have it, I so want to make a pink one on fabric and put it in a little frame but alas, I must move rapidly on to Mother’s Day and Easter.

I would like to say a huge thank you to all the lovely WI ladies for having me.  I was a little nervous that they may not find it interesting but I need not have worried, as they listened avidly and lots of sweet and delightful ladies came up to me afterwards and told me how fascinating they found my talk and demonstration.  I could have stayed and chatted for ages………..Hmmm……..nothing new there then.

I am booked in to do another talk and demonstration to make little Handmade Christmas Trees in the Autumn with another group and I can’t wait!

I would really love to see your creations and see what you think.

Happy Valentines Day.

Much Love,

Sarah xx

How to make a Bunny Trug – Tutorial

I always try to make presents for the special people in my life whenever I can.  I don’t know about you, but for me, to be given a gift that someone has lovingly made just for me  means so much more than any shop bought present.

This week, I had to make a present for a cute little one year old baby, whose nursery theme is little taupe bunnies. It is a very small room with not much space so I wanted to come up with something that not only looked adorable, but didn’t take up much room and was practical too!  Hmmm………..quite a lot of thought needed for that one.

IMG_8641


After much deliberation, I decided I would buy a sweet little heart trug and add some wooden bunny shapes which I would paint and distress.

You could of course adapt anything, from a box to a tray or any other item you have skulking around just waiting to be loved!


First of all, you need to decide what the end purpose of your item will be and what wooden shapes you would like to add.  Think carefully about the size of both your trug (or other item) and the size of your wooden shapes – how much do you want them to dominate and how many –  if you don’t have your wooden shapes yet, you can always cut out rough paper templates and ‘play’.  For me, this is by far the best bit as I absolutely love to play with all my materials.

This is also when my clear and tidy workspace quickly becomes absolute bedlam as I do tend to get a little ‘lost in my world’ and become a tad over excited and start pulling at jars and drawer contents, tipping everything out all over the place and grabbing at stuff wildly like a child in a sweetie shop – although Mr Chandelier might liken it more to a crazy mad woman who really needs a straight jacket – really!

IMG_8631.jpg


Ok, now you have, (unlike some), calmly chosen your shapes it’s time to paint them.  I know they are only tiny shapes but I always do the job properly and prime everything first.  You however, could skip this if you are not a perfectionist like me.  I also knew that I was going to paint the bunnies taupe and would also distress them so I wanted the white to show through when I sanded the edges.  You could just use two different colour paints instead.  Don’t forget to paint the edges  –  but not the back!


bunny trug chosen


Once your first coat is dry (which is usually pretty quick), give a good second coat of your chosen colour and then when that’s dry a ‘lick’ over one more time for depth when you sand.  Let the paint cure thoroughly before you lightly sand the edges.

For me, much as the little bunnies look ‘ok’ at this point, I wanted more definition around the edges and I wanted them to stand out a lot more, as I felt the edges were too insipid.  This was easily remedied by pulling out the wax.  I literally dabbed my finger into the wax and rubbed it into the bunny edges and then onto the top of the bunny as well.

IMG_8680.JPG


See the vast difference between the two – now the left hand bunny stands out really well and gives a far greater contrast which is exactly what I wanted.


Finally, glue the bunnies on and add some little bunny tails (tiny pom-poms).  I chose grey as the Mummy of the child I’m giving this too adores grey and also the white was far too stark against the cream trug.  Last but not least, add a little dotty ribbon tie and voila, one sweet little Bunny Trug.  I love it so much and hope she adores it too.

IMG_8702.JPG

IMG_8727.jpg


Last of all, I made a little gift tag with some gold beading and wrapped it in gold star tissue paper for the final touch and when I handed it over, my friend was really chuffed and said she really, really loved it!  You just can’t beat that feeling, makes me so happy!


Go create something this weekend and show me what you made – I would so love to see.

Happy creating.

Much Love,

Sarah xx

Painting and Distressing Furniture – Ruby’s bed.

Baby Chandelier’s move from a cot to a bed was long overdue.

IMG_1411

This was due to several reasons, the main one being her new little bed needed to be stripped, re-painted and a new unusual size mattress sourced.

The other reason, was that both Ruby Blue and I, adored her cot and were in no hurry, Ruby being my last child (dab eyes quickly), to pack the cot away for good – very sad face.

I originally purchased this bed for Master Chandelier, my son Benjamin, now a teenager and I originally hand painted it blue and stencilled little stars on it as his room, at that time, was done out in a gorgeous Laura Ashley fabric which had little boy’s in rockets flying to the moon, cute little aliens, moons and stars.

IMG_4265

I made him this canvas wallhanging, now obviously looking a little worse for wear, to match one of the rockets in his bedding and the little boy was him and the BL1 stood for Ben and Lottie 1.  He adored this, but having long outgrown it, I am sadly about to dismantle it and recycle it into something else.

Although I subsequently re-painted the bed white for Lottie, for Ruby’s room I wanted it to be distressed to match the other furniture I have painted for her so unfortunately, this meant having it stripped, as I couldn’t have the blue showing through when I distressed it.

Fortunately, I had painted it in oil based paints as knowing myself very well (obvs!), I knew I would probably repaint it in the future and having painted lots of furniture, knew very well that usually, oil based primer could be stripped, unlike a lot of acrylics.

IMG_3416

There was quite a lot of preparation involved and the whole job was very laborious from start to finish.

The pine stripper did a great job, and after letting it dry in my summerhouse for a week or so, I painted it with white vinegar and then let that dry.  This takes away the acid crystals that can appear after stripping furniture and is relatively quick to do.

I then gave it a light sand, catching a few small areas the stripping had missed and then finally painted two coats of white knotting compound onto the knots as, even though they are old, they could still ‘bleed through’.

Finally, it was ready to be painted – I was receiving comments from all the family at this point, wondering how much longer it was going to be in the kitchen!  Little did they – or me – know it would take me many more weeks to complete, he he!

As I was painting the bed white – Farrow and Ball’s All White – I knew if it were ever to be repainted, there would be no problem over white, so I did it in F & B’s Acrylics.  Also, nowadays, I very rarely use oils as they are no longer readily available and they are very bad for the environment. It took quite a lot to cover the knotting compound – even though it was ‘white’ – I think 2 coats of primer and then a really thin and light brush just over the knots.

IMG_4711

I then painted two topcoats and let the paint cure before I started the messy job of distressing.  I always tell my students that come on my paint and furniture distressing workshops, that this is where you have to be brave as, at this point in time, the piece you have just finished looks absolutely perfect.  However, I am always so on a mission, and once I have made up my mind which way I am going with a piece, I just get on with it (although I’m not sure that Mr Chandelier would agree with this statement!).

Finally, a dust off, a sad farewell to the cot bedding – our much loved, gorgeous Susie Watson quilt and bumper – will have to re-use this somehow – then up to Ruby’s bedroom to dress her bed with her new bedding, just a bit exciting!

IMG_2453

IMG_4726

I chose the White Company’s ‘Fairies’ hand embroidered bed linen as her wallpaper is a strong pink and pink bedding would have been too much and Ruby and I both adored it.  It also has a 200 thread count and is amazing quality and so very soft.  I have always bought all my children nightwear from the White Company and although it can be expensive, (check out their sales) it just washes and washes beautifully every time and as I recycle a lot of my children’s clothing, this is even more important. It was also reduced a little, as it is now discontinued and it was literally the very last one in the whole company, which does of course make it even lovelier!  We all love her new bed so very much, particularly Ruby, and I am delighted with how it turned out.  As always, it is eventually worth the all the many hours of painting, sanding and hard work that was put into it and it will be several years before she will be ready for the next size up!

IMG_4727IMG_4720

There is just one small, teensy problem – nothing too serious – because the bed is slightly larger than the cot was, it has thrown all the other furniture into slight disarray so I now need to re-arrange the whole room, possibly replace the odd chest of drawers or table? It also looks a tad bare over her bed and Ruby misses her cot canopy as I had lovely things hanging on it for her to see – I sense at least a little shelf creeping in and my imagination is seeing some sort of tree branches above her bed with hanging, twirling fairies and maybe a woodland garland… Hmmm – definitely a strong case for some magic and sparkle!  I also need a bedside cabinet and I know just the perfect piece, loitering in my summerhouse – Hmmm, job for another long day, (or many long days!) I think.

Much Love,

Sarah xxx

N.B. No ‘Lambie’s’ were hurt during the laundry process and he is definitely not being packed away – just so you know!

Making a Prom Dress from another dress.

When my eldest Princess Chandelier asked me if I would create her prom dress, I was both secretly pleased and flattered, but also filled with apprehension and a little bit of horror at the same time – (I mean really, basic communication can be very painful on occasion with teenagers can’t it, so imagine all the hours of trying on, pinning, general faffing around and constant communication making a prom dress would need!)  I responded immediately with “of course I will darling” but I knew at that very moment it would be grief and stress, no matter how much time I allowed and how much I tried for it not to be.

I have tried mostly in life, to be a little different from ‘the crowd’, and this seems to have installed itself into my children.  Nearly every girl at the proms we have watched, always seemed to have a long dress, but my lovely Charlotte, having done lots of research, decided she wanted a shorter dress.  During her research, she found a dress you could buy, which she absolutely loved the top of – which of course was in Australia, where else would it be! – but the skirt was no good and after much deliberation we decided to take a gamble and order it so I could then ‘create’ her dream dress from that!  Hmmm! IMG_4309

So this is where I started, after asking Princess Charlotte what she would like me to create for her and looking at some pictures, I went to John Lewis and several other fabric shops I frequent, to buy some samples of chiffon, tulle, organza and various other floaty dreamy fabrics.  Then, I went to my both my organza and tulle and my net departments, pulled everything out and we played – for many hours – over a period of days – to decide which one we would go with.  Eventually we decided upon organza as it was the best fabric for creating that floaty dreamy look we were aiming for.  We were still undecided at that point wether to have a layer of tulle or possibly netting under it and Lottie did not really have any idea of either how full she wanted it to be, or the exact length, which made it very difficult to estimate how much fabric I was going to need.

Ok then!

To try and get round this problem, I took one metre of organza and hand gathered it to get an idea of how much fabric I needed to create the fullness Lottie wanted.  I pinned this onto the dress and we played again until we eventually decided on roughly how full and how many layers of fabric – yes, don’t think it was as simple as just one gathered layer, oh no.  We finally settled on 7 1/2 metres, incredible I know.  After shopping around, The Fabric Warehouse in Cheltenham offered ‘the best shade of Ivory’ (yes really) and the best price.  We also bought some floppy solid Ivory fabric similar to lining fabric to make a sash and a bow on the back – probably!

Now I make a lot of fairies and angels and frequently cut all sorts of organza, tulle and net type fabrics and trust me, not only are they an absolute nightmare to cut but it is incredibly difficult to get a straight line.  So when it took me about 20 minutes to do a tiny bit with a metre rule, I decided to take a rather large gamble and tear it.  Don’t react with horror – having worked at Laura Ashley I knew you could tear 100% cotton fabrics and it gives you a perfect straight line but I must admit I just couldn’t see it happening with organza.  However, much to my disbelief and delight, it worked beautifully and I had the most perfect straight line although it was a tad frayed – you learn something new every day! IMG_4317

I then sat in bed at night, watching TV, and hand gathered all that fabric (of a fashion, as much as one can watch TV with a sharp needle working hard in one’s hand!)

I pinned it onto the flimsy skirt part, avoiding the ‘very much of a pain in the butt’ side zip and we had our first ‘fitting’! Then something terrible happened – oh my gosh no – she cried, not good.  It was not hanging or looking at all how she wanted it to.  I was very sad and worried at this point and thinking why on earth did I agree to this, I am so not a dressmaker.  Anyway, we messed around with it for ages but it was very late and I said, as breezily as I could, “Let’s just start again tomorrow” as if it was absolutely fine and tomorrow it would of course, miraculously be ok.

I had to go out the next day, but left her with strict instructions to put both her prom shoes and the right underwear on, with the dress, and really try to establish, no matter how long it took, what she wanted to achieve.  Was it too full, not full enough, too long, too short – the list was a touch endless at this point.  When I returned in anticipation, in typical teenage fashion, she had done not one thing – no trying on, nothing.  Give me 5 toddlers to 1 teenager always.IMG_4910

Finally, again late that night, we established the problem – it needed the sash as, without it, it just did not hang right at all.  Once we had resolved this, we then – after considerably more time – established as best we could the finished length.  I then repinned it, Lottie tried it on again and I attached it on my sewing machine, hoping it would be plain sailing from here on!  Sure it would – NOT.

Thankfully, the length was perfect and after I took the longest time ever, to hand sew all that organza round the side zip with invisible thread – yes really – I then machine sewed the hem, turning it up a teeny bit twice, which although it was easy, seemed to go on and on and on!  Finally, it hung beautifully.

Then came ‘THE SASH’.  Goodness me what a saga. I tried so, so hard to not leave any of this until the last minute but, with the odd teenage tantrum interrupting proceedings and life generally with all that is constantly going on, ‘the sash’ was very last minute and stressful.  Too thick, too thin, too wide, not wide enough, interlining, no interlining, floppy fabric, organza, ivory, pink, duck egg to match shoes and to top it all, where exactly, to the dot, is it going to sit? 

Then – really – ‘THE BOW’.  All of the above and more AND HOW LONG?   I even drove, at so the eleventh hour, 50 miles to get more fabric, which we did not even use BUT,  it all turned out ok eventually and most importantly of all, Charlotte was over the moon with it and I finished it on time – just.

IMG_4364Lottie prom car Charlotte prom

Doesn’t she look absolutely gorgeous and so many mummies complemented me on how beautiful she looked and how fabulous her dress was and they couldn’t believe I had made it, even when I explained how I did it – I just smiled constantly, as all proud mummies do – if only they knew the drama!

Much Love

Sarah xxx

How to make a Fairy Birthday card or Mother’s Day card

Well now, here we at the beginning of my blog and at the end of the week and I’m thinking that I had better make a Mother’s Day card as it is on Sunday.  Hmmm!

Love me, Make me!

IMG_3776

Let’s start with some fabric scraps – I think I will go with pink as it’s one of mine and my mum’s fave colours – you could pick your mum’s favourite colour.  Ditsy fabrics are best, you need a tiny print as you use such a small amount of fabric.

IMG_3693

Then we need some wool for her hair (match your mama’s!) and some cotton buds for her arms and legs.  If you don’t have cotton buds you could use whatever you do have in stock; string, wool, pipe cleaners or whatever – she’s your creation, use whatever makes you smile.

IMG_3709

Now we need to make her dress.  Cut a rectangle of fabric approx 9 x 7cms.  Cut the top and bottom 9cm edges nice and straight so they fray evenly then fray them.  Pull strands of thread from left to right (not on 7cm sides) – I tend to go to about 4mm.  Then I pull at it and ‘scruff it up’ a bit as I want it to look a little vintage.  Next, sew a tack line of stitches about 1cm from the top of her dress turning the sides under approx 3-4mm as you go.  Gather her dress by pulling on the stitches when you have finished and do a double stitch to secure.

IMG_3722

Now we have to bring her to life and make her face.  The best fabric for this is flesh coloured felt but use whatever fabric you have or, if you are reading this ‘the night before’ and really don’t have anything you could paint directly onto your card (raiding your children’s paintbox if necessary) mixing your colour yourself.  Believe me, your mum will absolutely love it no matter what, because YOU made it with such love.

Cut an oval shape from the felt approx an inch high and sew some tiny beads on for the eyes (black pen could suffice!).  Next sew her a teeny, tiny nose from dark grey or black cotton by sewing 3 stitches into an upside down u shape.  Now for her mouth, the hardest part.  Using crimson or red cotton sew a little mouth by using tiny stitches into a big U shape.  Don’t worry about being too perfect – the handmade look is part of the charm.  Just take your time, be patient and draw a fine pencil line if you really need to.

IMG_3738

See now – isn’t it exciting when you sew her little mouth and she starts to come alive!  You’ve made her into a little person –  I bet she’s adorable – you might want to name her at this point – it could be rude not too!!!  Lastly her cheeks.  I use pink felt for these and you will need some very sharp and small scissors – snips are best.  Just cut some tiny circles for her cheeks.

We are almost ready for glueing but her arms and legs need some colour.  Off to the paint department.  Pick a colour to match her dress and hand paint her cotton bud arms and legs – you might need 2 coats as the plastic is slippery.  Let these dry.

IMG_3736

Now we are ready for glueing.  Start by using a fabric glue to stick her cheeks on.  Next, align everything up just to check proportions etc., – don’t forget to leave space at the top for your message.  Firstly, glue the face down with fabric and paper glue. For the rest of the card, I use a glue gun as it is instant and I feel there is less chance of the card bending and warping but you certainly can use pva or a similar glue suitable for fabric and card.  Glue her arms and legs down next  – check the positioning of the dress first to ensure your glue does not show once the dress is placed on top – then glue her dress down by glueing along the neckline and carefully down the sides only – make sure the sides of her dress are turned under for neatness.  Next, glue her hair on.  Cut the wool to the  length you want her hair and use approx 2/3 strands – again it is whatever looks right dependent on the thickness of the wool.

IMG_3774

Finally, give her a little bow and a flower in her hair and omg, how adorable is she now – just look what you have done.  I absolutely love my little fairy girl and don’t want to give her away, bet you don’t either!

Hope your mum loves her as much as you do!

Much love,

Sarah  xxx