These cute little wooden hearts are fab to hang around the house as Valentine’s Decor.
They are available in the shop now.


These cute little wooden hearts are fab to hang around the house as Valentine’s Decor.
They are available in the shop now.
Children’s Summer Workshops
Held in Chipping Campden at Rick Cottage, Blind Lane, GL55 6ED
Wednesday 26th July 10.30am – 12.45pm
Tuesday 1st August 10.30am – 12.45pm
Wednesday 9th August 10.30am – 12.45pm
£20 per workshop – Includes all materials & refreshments

Wooden Pencil Boxes
Always popular, all 3 of these delightful children’s workshops will teach your child some new craft skills whilst they make some adorable items to take home.
We make something new each time according to the season.
Each workshop will make different items in case your child wishes to attend all 3.
To book, or if you would like any further information about any of the workshops, please don’t hesitate to contact me either via email chandeliersandroseshq@gmail.com or by calling me on 07706 426037.
Click here for more information on Children’s Workshops.
I have just put this adorable little Deer Coat Peg Hook into my shop. I had best not tell Little Miss Chandelier as she has fallen in love with it, as have I.
So, here we are, February already and Valentine’s day literally just around the corner. Every year I struggle to be organised with this day and this year is no exception.

As you know, September to Christmas is my absolutely manic time of year and from January until at the very least the end of February I am still dealing with the aftermath of that frantic time. I have only just found a permanent home for my 4 very large boxes of Christmas Decorations which has caused bedlam – nothing new there then! We also launched full-scale into loads of work on the house the very minute all our guests went home but that is another story and a whole load more blog posts.

During last season’s events, I was approached by no less than 3 lovely WI ladies who run groups locally. I was so flattered to be asked to go and talk about myself (really it’s true!) and my creative life and perhaps do a demonstration. My first one was on Wednesday and I thought as Valentine’s day is almost upon us, and I create a lot of heart products, it would be rather lovely to do a tutorial for a pretty Patchwork Heart Valentine Card. The fabulous thing about this is, that it would look even better on fabric or even on a canvas and the process is exactly the same. What a lovely birthday gift it would make for someone special – I would be so touched if someone spent the time to make me one of these and I would keep it forever.
First of all, you need to choose your card. I love to make cards with a lovely scalloped edge and especially as it is Valentine’s day I feel this adds to the Romantic look and feel of this theme. I find it easier to work on it with the card open flat, as it won’t keep ‘bouncing’ open whilst you are working on it which is rather annoying, especially when it is so fiddly and time-consuming.

Secondly, either cut from paper or find a heart shape that works for the front of your card. Remember to allow a little space at the top for either stamping or hand writing your message. If your stamping skills are a little dubious to say the least, (you know who you are!) then do your stamping or message writing now, so that you do not ruin your beautiful card. If you have been on one of my workshops, then frankly you have no excuses whatsoever……….Hmmm.
I have chosen to use one of the wooden heart blanks I make a lot of, as it is the perfect size for my card. I sell a lot of these so if you have bought one from me then draw round the edge very carefully, making sure it is both central and there is room for your message.
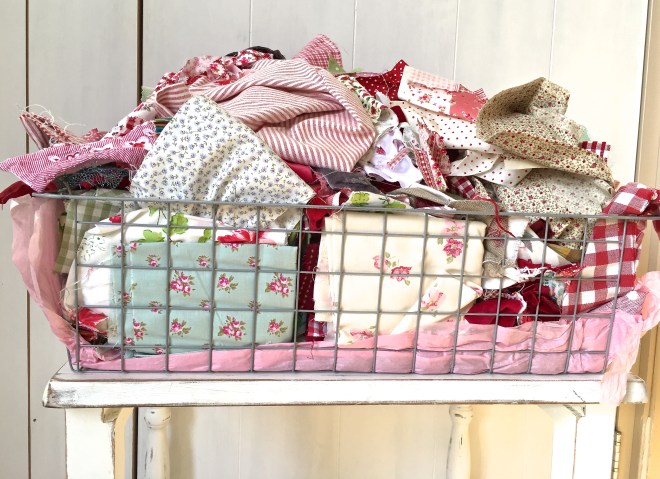
Red scraps basket
Now we are ready to start applying the fabric. I have chosen, rather obviously, red. This is brilliant for using up your little scraps of fabric, of which I have far, far too many. This is just my ‘reds’ department, with a little bit of green sneaked in to the corner but I have a basket like this for each colour and 2 overflowing ones for pink!
The idea is to hand cut each patchwork piece in lots of different fabrics to fit your heart exactly. And no, you cannot cheat and just ‘stick and overlap’ each piece of fabric because it will look like your child has made it – you know I am right.

Here is a pink patchwork bird my now not so ‘little man’ Ben, made for me when he was around 7 and below is a red patchwork elephant Charlotte made for her baby sister when I was in hospital in labour with Ruby, she was 11 at the time. I think they are absolutely adorable, although I am somewhat biased, but I do think you can tell that they have been done by a child.

Try and pick co-ordinating fabrics whereby the ‘tone’ is the same – i.e; don’t put a deep raspberry or burgundy (no-one uses that word anymore but you know what I mean) with a scarlet or bright red unless of course you love it in which case, carry right on! Make sure you have a variety and bear in mind that if you use all different weights of fabric, such as cottons and canvas, it will have a much more uneven look and be a little more rustic. I do tend to use all different weights, generally because I love all the different fabric patterns that I have. I also try to ensure that I have a stronger piece like a dark background with a tiny dot next to a less strong piece such as a flower on a white background. If you follow this throughout, when finished, this will give a far more cohesive and even look. You could also just use say 2 or 3 different fabrics, say blue stripe and blue and white dotty and the simplicity of that design can look stunning. You could also use scraps of ribbon too if they work with your colour scheme. Always remember, it’s whatever makes you smile.

Here is a large patchwork elephant I haven’t quite finished!

I always start in the middle and work outwards. I tend to cut a few first, into little squares or rectangles and see how they gel together. Use little tiny ‘snips’, embroidery or very small scissors. Once you have quite a few cut and you are happy with the ‘flow’ of the colours then stick those down. You may need to lightly trim the edges so they sit neatly side by side. You are not necessarily aiming for them all to be the same size, just no overlapping and nice straight edges on the middle pieces of fabric. If a fabric piece overlaps slightly once glued, gently nudge it with your fingernail or something like scissors or the wrong end of your brush to move it over a millimetre or two so it lays nice and straight. Don’t put too much glue out at once, as you will soon realise, it is very time-consuming and the glue dries out.

Use a nice little flat bristled brush if you have one as it will be much easier to paste with. I tend to use this very sticky glue a lot as it is fab but any PVA glue is absolutely fine. Do not put too much glue on – use just a thin layer – as you do not want to soak the card as it will want to warp and bend. If that happens, keep it flat and put a book or heavy object on it whilst it dries.
I should make you very aware at this point, that it is far too easy to get lost into a rather lovely creative little world and you really could take all day to play around with the positioning of your little squares. It really is rather therapeutic and is now being widely recognised as such, especially when recovering from illness.

Once you get to the edges, place your fabric square onto your card and draw a pencil line onto the fabric so you know where to cut. Try to be as neat as you can but don’t fret too much if you struggle, as we will be putting a trim around the edge to hide any rather dubious cutting!
You will inevitably be left with some teeny tiny gaps which are minuscule to cut, as you can see on the bottom of my heart. Try to use fabrics which are a contrast to the pieces used around them as otherwise they will just blend in. You are best to apply the glue to the card when you do these and you may well need to get the tweezers out!! However, if you really cannot cope with these teeny areas then you could always colour them in with pen, however, practice really does make perfect.

Once your, now rather beautiful looking heart is complete, it is time to add a trim around the edge to finish it off. You really can use anything for this but one of the easiest trims to use is ric rac. Firstly, it is quite widely available in a large amount of scrumptious colours and indeed widths, secondly, due to the fact that it is ‘wavy’, it not only adds interest and depth but it is easy to bend and shape, particularly along the curved edges. It probably goes without saying that I have rather a lot of it so, after just a teensy amount of deliberation as to quite which tone of red I was going to use, out came the narrow crimson ric rac.

Again, start at the top in the centre and try to cut a nice mitred edge (as you would find on the corner of a picture frame) so that when you have gone right round your heart and you join the trim at the top it will sit nicely together. Whatever you do, do not cut at this stage, what you feel is the right length of trim, as it is far too easy to cut it too short, only realising when it is too late!
You might wish to change your brush at this stage, as your nice flat one will probably be too big. Choose a little pointed brush head no wider than your trim. Only glue approximately 2cms at a time, as the fabric trim will readily absorb the glue and dry really quickly, causing you to re-glue. When you lift the trim to glue the next section, hold the part you have just glued down with one or two fingers as it will want to lift. Again, do not use too much glue as it will squeeze out the sides. Try not to get it onto the card.
When you get to the bottom point of the heart you can either bend the trim into a v-shape and carry on or, if it does not sit well like this and the back is the same as the front, you can bend it back on itself so you are effectively now using the back as I have done.

Once finished, you can decide if you would like to add a little embellishment such as a button or a flower etc. Remember, if you are creating this as a card and you wish to post it, don’t choose an embellishment that is too high. I have chosen a tiny sparkly flower.
Finally, choose what, if any, message you would like to stamp or write on the top – or indeed wherever else you would like your message to appear. After deliberating over these stamps, as much as I love the top large stamp, I felt it was too fussy and would have detracted from the patchwork heart. Less is more!

So there you have it, I so want to make a pink one on fabric and put it in a little frame but alas, I must move rapidly on to Mother’s Day and Easter.
I would like to say a huge thank you to all the lovely WI ladies for having me. I was a little nervous that they may not find it interesting but I need not have worried, as they listened avidly and lots of sweet and delightful ladies came up to me afterwards and told me how fascinating they found my talk and demonstration. I could have stayed and chatted for ages………..Hmmm……..nothing new there then.
I am booked in to do another talk and demonstration to make little Handmade Christmas Trees in the Autumn with another group and I can’t wait!
I would really love to see your creations and see what you think.
Happy Valentines Day.
Much Love,
Sarah xx
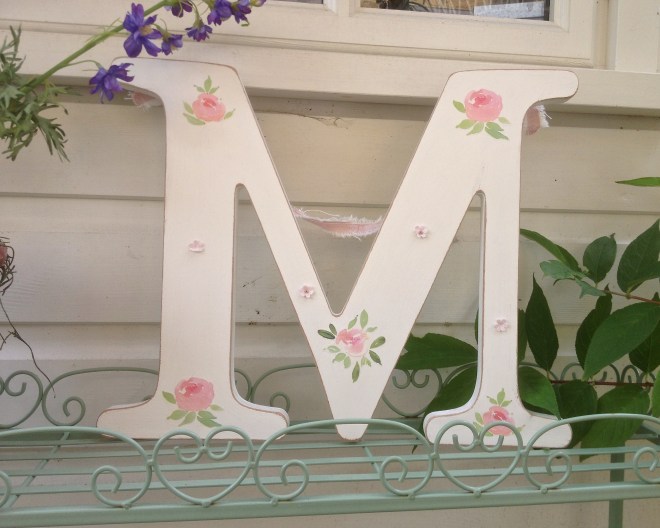
I have just added these gorgeous Large 30cm high Letters to my Etsy shop today.
I have been making rather a lot of these lately and have lots more different designs to photograph and then add to my shop, including lots more floral ones and the most adorable Vintage Style letters I have designed for children’s rooms with little wooden stars and bunnies added to them.
I really can’t wait to share them with you but right now I definitely do not have enough hours in my day!


Some of my Vintage Style Velvet Bookmarks
Firstly, I have this Cotswolds Vintage and Handmade Fair I am frantically making stock for. I have only ever been as a customer in the past and have always spent lots of money on the genuinely fabulous stalls they have. It is predominantly Vintage with some Handmade stalls whose goods all have a Vintage style. I will of course be sharing that style with my handmade products, which is mostly my style anyway, and I will also have some Vintage pieces with me too. I will also take some Vintage Laura Ashley and Cath Kidston fabrics with me to sell, probably as fat quarters and will try to have some of the new Creative Kits ready to take that I am currently designing and creating. I am really looking forward to it and, as a shopper, I can’t recommend it highly enough – I just hope I get a chance to shop too!

I am also running a few painting and distressing workshops right now and it is of course the wonderful Summer holidays and I am trying to prepare for a holiday. Added to that Prince Chandelier Ben, my 18 year old is, under my constant supervision, painting all the outside windows and doors on our cottage. He has actually been working for Mr Chandelier and I for several years and is doing an excellent job and I am just about managing to keep any teenage tantrums at bay (phew!). I am also doing numerous different house refurbishment jobs around the house, as is Mr Chandelier, and I am trying to help him as well as doing my own stuff, kind of running between the two of them, Princess Chandelier Charlotte and my Littlest Chandelier Ruby Blue, who are thankfully being as good as gold……..Hmmm…..so hope I haven’t spoken too soon……don’t read this out loud!
Lots to share with you soon, including some fabulous makeovers, scrumptious new products and exciting new workshops coming up.
Happy holidays.
Much Love,
Sarah xx
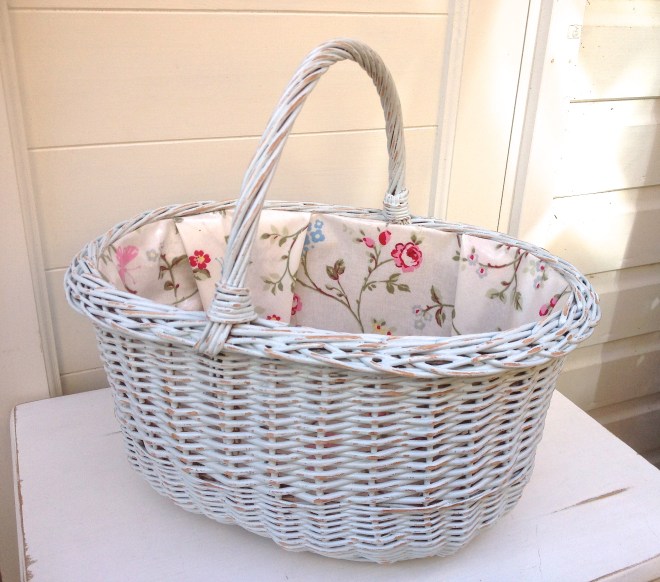
Vintage Shopping Basket lined with Floral Oilcloth £45 Click to buy
For a very long time I have wanted to do a little batch of Vintage Wicker Shopping Baskets and line them with oilcloth.
As you are probably aware, I have been creating since I was a very little girl and one of my first businesses as a teenager (yes, you did read that right, I did start very young) was making baby items.
I used to make really beautiful broderie anglaise moses baskets with elaborate hoods and canopies and gorgeous trimmings and I even made tiny little quilts and fitted sheets. I also made little children’s rocking chair covers, teddy bear mobiles and nursery decor such as fabric balloon wall hangings from different coloured pastel fabrics, which I padded out and strung with ribbon and made them look like they were floating across the wall.
Another product I made was a gift basket full of gifts such as socks and bibs and various other useful items which I would adorn with little bows and embellishments. The basket which they all came in was a gift in itself, as I used to line them with wadding and then broderie anglaise fabric and trimming as well. They would always be adorned with at least 1 bow and were meant to be used as Nursery storage for things like nappies.

Pink Paisley Fabric Lined Basket – SOLD
Much as I have come on an incredibly long journey with my creativity since then, I find it slightly amusing that all these years on, I am still making and selling fabric lined baskets which lots of my customers love.

Taupe Gingham Fabric Lined Basket – SOLD
Nowadays, I paint and distress the baskets and use many other beautiful fabrics and my customers and I use them for all sorts of storage from papers to toiletries, from children’s toys to hair accessories, varied kitchen storage, books and magazines and also as picnic baskets where I have lined them with oilcloth, as the oilcloth can be wiped clean.

Cupcake Fabric Lined Basket £25 Click to buy
In my own house, they are used for Doll’s Tea Sets, Bedroom Storage and Papers and I use my oilcloth lined Vintage Shopping Baskets for Ruby’s Lego and shopping locally in my village. I do love a basket and, as Mr Chandelier will confirm, I definitely do have far too many – with a rather large percentage of those hanging in abundance from my summerhouse ceiling.

Pink Paisley Fabric Lined Vintage Hamper – SOLD

Taupe Roses Fabric Lined Vintage Hamper – SOLD
I also transform Vintage Picnic Hampers and Old Fishing Baskets but the few that I have had time to do have sold very quickly, so I there are very few photographs of them – these two being no exception. I sold the Taupe Roses Hamper to my hair colourist whilst having my hair done and telling her about them, she didn’t even see it and said she had to have it – how fab was that!

Vintage Baskets waiting to be loved and used again.
It did however, take me over a year to find and gather enough Vintage Shopping Baskets so that I could create a batch of 5. I did have one more, but unfortunately it was damaged, which I did not notice when I purchased it so that has been relegated to the garden and will be painted and filled with something, probably flowers – I will show you what I do with it when I finally get round to dealing with it!
As they are shopping baskets, I had decided a long time ago before I started trying to find them, to line them with oilcloth so that they could be wiped clean which hugely increases what they can be used for.

Vintage Shopping Basket £45 Click to buy
I knew they would be hard work and I was right – I really dislike sanding down but unfortunately the process I use means they need to be sanded 2 or 3 times. I also knew that working with the oilcloth was going to be grief and I was so right. It is an absolute nightmare to iron – which you have to keep doing – and an even bigger nightmare to line each basket and work with oilcloth, particularly when you need perfectly folded corners. I have lined hundreds of baskets with normal fabrics over the years so I don’t say that lightly.

Vintage shopping basket £45 Click to buy
However, I never give up and I persevered with them and I am so delighted with how they have turned out. They all look so pretty in their soft colours, Shabby Chic paint and lovely oilcloths. The problem is, as always, I make them as if they were for my own home so of course, they look as if they belong with me and I never want to sell them! Hmmm…………I wonder how many will make it to my Etsy shop!
Do you have lots of baskets in your home and what do you use yours for, I would love to know?
Happy Shopping!
Much Love,
Sarah xx
Even though I have been creating and selling things I make since I was very young, it still makes me soooo happy when anyone loves and admires my work. As well as events, I sell so many things just as a result of people visiting my house, either from my children’s friends mummy’s or our friends and family and it secretly thrills me to visit their houses and see my items on their walls or sitting on the side.
Even though I should be used to it by now after all these years, it is just such a wonderful feeling to think that they love it that much they want to see it all the time and I really don’t think I will ever ‘grow out of that feeling!’ I do however, resist the urge to squeal and point whilst shouting “That’s mine – I made that – it was me!” like a child (even though my family frequently tell me I do behave like a child, Hmmm……..)
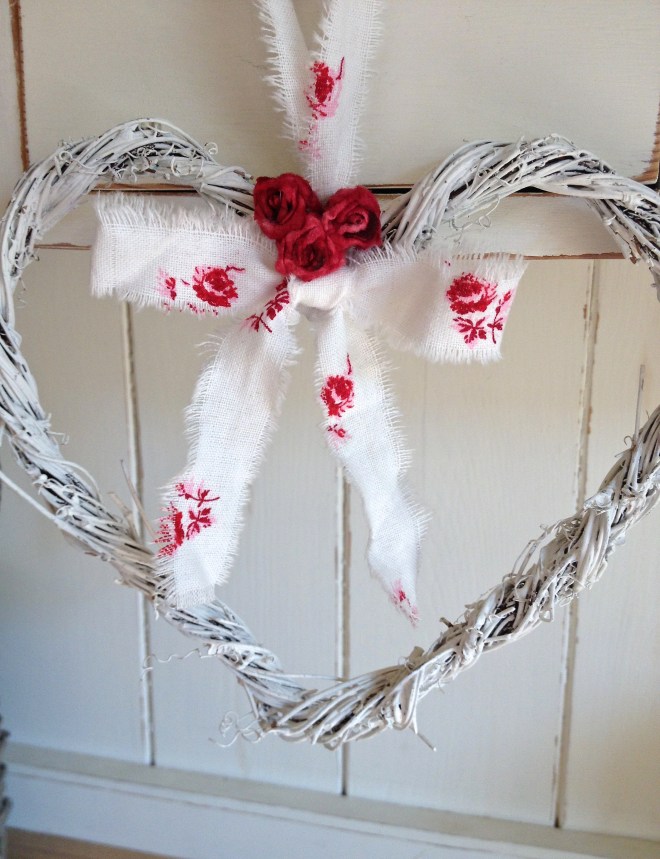
So how wonderful to wake up to a lovely message from Lilybelshomedecor saying that she really loved my work and had featured me on her blog in a post about ‘things you absolutely must buy!’
She featured my Shabby Chic Hearts and this is the post here – go check out her really beautiful pictures, my favourite is the love birds!
Go create some hearts – I am creating Easter Bunny things today – Love them so much – show you soon!
Much Love,
Sarah xx
As you know, I use a massive amount of craft supplies and although I do buy a lot of them in large quantities through my trade contacts, I am also constantly picking up all sorts of materials and supplies from retail shops on a weekly basis.

Divine Trimmings!
I am constantly asked where I purchase my craft supplies from and if I can remember…… Hmmm…., I will always share, as I want the shops I frequent, to carry on stocking all these wonderful materials. The more that we all buy from them, the more they will stock, and the better the prices will be – it’s a win, win!
To this end, I am going to do a regular feature, showcasing the supplies I have bought in the last week or two. Wherever possible I will do a link to that product to make your life even easier – do you need to traipse around the shops in all weathers – No, you don’t! I will have done that for you, gosh what a chore! Obviously, there will be a lot of products that are not available online or are ‘one-off’ items, or possibly even sale but I will still let you know where they are from and how much they were.
I do love a button (or 60 pack) and ribbons are a bit irresistible to me, especially velvets (can cause palpitations), fabric is a weakness obvs – check out this fabric storage post – little wooden pieces and rubber stamps jump off the shelf into my basket (that so happens!). As for Trimmings, actually, let’s stop now and not even go there. Who am I kidding, I adore all Haberdashery (my love – no not obsession – started age 6), always have and always will.
Ok, where shall I begin…..Hmmm…

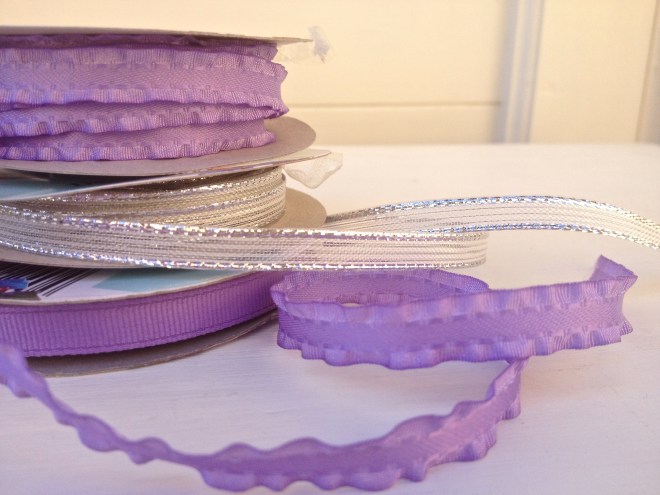
Let’s start with The Range. I just ‘popped in’ to see if I could pick up some art books for the teens schoolwork (yes really!). I ‘bumped’ into a tub of ribbons which were ALL priced at £1.00 per roll. I think I have approx 350-400 reels of ribbon and thousands of ribbon pieces so I didn’t think I would find anything but I had to have a little rummage and…… No – OMG – 12.5m of Duck-egg velvet ribbon for £1.00 Nooooo…. My heart seriously started beating faster and I actually started furtively looking around to make sure no-one else was near me, that might see my unbelievable bargain ribbon and run over! (I know, I do actually think I have a problem too). Well, here’s what I found; 2 reels of duck-egg velvet (I did actually leave a few reels behind) and 1 reel of brown velvet. 1 pretty gathered lilac ribbon reel – I could see this on dolls clothes and lots of my customers love lilac, 1 reel of simple ribbed lilac and lastly 1 fabulous reel of white ribbon with a silver glitter edge which, ‘I absolutely had to have’ for all the fairies and angels I make. I know you won’t believe me but I really was being ‘restrained’!!!

Then, whilst looking at the oilcloths I saw this gorgeous duck-egg fabric which was a perfect match for the ribbon.
I rarely know what I am going to use my materials for but I just ‘see’ things in my head and I could ‘see’ Easter bows. I don’t know why these things just ‘pop’ into my head but they just do and look, how gorgeous is that bow – it’s almost edible.
It was £3.20 per metre and I just bought 1/2 metre.

Can you see how wispy it is, like hessian? Duck-egg hessian, love it. They call it Slub Linen Voile. Do you think they might have some in pink next time I go?
I probably should have left at this point as I hadn’t picked up a basket and actually couldn’t carry any more but no, I was in a wonderful trance of prettiness and sparkle, my imagination was in overload and I was having far too much fun.
Then, I spotted some roses trimming strips in 3 different colour ways. I actually made a gift for a friends daughter with the multicoloured one and used up my stock, so was pleased to find it as I have been on the look out for about absolutely ages for some more – yes I really have.

Again, just £1.00 per pack, fabulous and soooo pretty.

Finally, whilst trying to pick up all the things I kept dropping on my way to the tills, I saw these buttons which for just, you guessed it, £1.00 would simply have to come home with me – I ‘needed’ them, no question, none whatsoever!


Pretty Buttons

I also visited The Works this week and purchased some more brilliant inexpensive craft supplies, some more buttons – well I do use a lot and some of them are very sparkly, which you just don’t see……anywhere…….ever…… and again just £1.00! Mr Chandelier raised his eyebrows too…….Hmmm…..!


I also purchased these pretty little flower petals to add to my faux flower department – I felt sure they would be used very soon!

At present they only have them in pink but I will keep my eyes peeled in case other colours come in as my flower department will need them.
It is all business you understand, poor me, all that visual stimulation is exhausting, really! I don’t know why Mr Chandelier has no sympathy for my exhaustion!
Where do you buy your craft supplies from, can they compete with these prices?
Happy shopping!
Much Love,
Sarah xx
I always try to make presents for the special people in my life whenever I can. I don’t know about you, but for me, to be given a gift that someone has lovingly made just for me means so much more than any shop bought present.
This week, I had to make a present for a cute little one year old baby, whose nursery theme is little taupe bunnies. It is a very small room with not much space so I wanted to come up with something that not only looked adorable, but didn’t take up much room and was practical too! Hmmm………..quite a lot of thought needed for that one.

After much deliberation, I decided I would buy a sweet little heart trug and add some wooden bunny shapes which I would paint and distress.
You could of course adapt anything, from a box to a tray or any other item you have skulking around just waiting to be loved!
First of all, you need to decide what the end purpose of your item will be and what wooden shapes you would like to add. Think carefully about the size of both your trug (or other item) and the size of your wooden shapes – how much do you want them to dominate and how many – if you don’t have your wooden shapes yet, you can always cut out rough paper templates and ‘play’. For me, this is by far the best bit as I absolutely love to play with all my materials.
This is also when my clear and tidy workspace quickly becomes absolute bedlam as I do tend to get a little ‘lost in my world’ and become a tad over excited and start pulling at jars and drawer contents, tipping everything out all over the place and grabbing at stuff wildly like a child in a sweetie shop – although Mr Chandelier might liken it more to a crazy mad woman who really needs a straight jacket – really!

Ok, now you have, (unlike some), calmly chosen your shapes it’s time to paint them. I know they are only tiny shapes but I always do the job properly and prime everything first. You however, could skip this if you are not a perfectionist like me. I also knew that I was going to paint the bunnies taupe and would also distress them so I wanted the white to show through when I sanded the edges. You could just use two different colour paints instead. Don’t forget to paint the edges – but not the back!

Once your first coat is dry (which is usually pretty quick), give a good second coat of your chosen colour and then when that’s dry a ‘lick’ over one more time for depth when you sand. Let the paint cure thoroughly before you lightly sand the edges.
For me, much as the little bunnies look ‘ok’ at this point, I wanted more definition around the edges and I wanted them to stand out a lot more, as I felt the edges were too insipid. This was easily remedied by pulling out the wax. I literally dabbed my finger into the wax and rubbed it into the bunny edges and then onto the top of the bunny as well.

See the vast difference between the two – now the left hand bunny stands out really well and gives a far greater contrast which is exactly what I wanted.
Finally, glue the bunnies on and add some little bunny tails (tiny pom-poms). I chose grey as the Mummy of the child I’m giving this too adores grey and also the white was far too stark against the cream trug. Last but not least, add a little dotty ribbon tie and voila, one sweet little Bunny Trug. I love it so much and hope she adores it too.


Last of all, I made a little gift tag with some gold beading and wrapped it in gold star tissue paper for the final touch and when I handed it over, my friend was really chuffed and said she really, really loved it! You just can’t beat that feeling, makes me so happy!
Go create something this weekend and show me what you made – I would so love to see.
Happy creating.
Much Love,
Sarah xx
When my eldest Princess Chandelier asked me if I would create her prom dress, I was both secretly pleased and flattered, but also filled with apprehension and a little bit of horror at the same time – (I mean really, basic communication can be very painful on occasion with teenagers can’t it, so imagine all the hours of trying on, pinning, general faffing around and constant communication making a prom dress would need!) I responded immediately with “of course I will darling” but I knew at that very moment it would be grief and stress, no matter how much time I allowed and how much I tried for it not to be.
I have tried mostly in life, to be a little different from ‘the crowd’, and this seems to have installed itself into my children. Nearly every girl at the proms we have watched, always seemed to have a long dress, but my lovely Charlotte, having done lots of research, decided she wanted a shorter dress. During her research, she found a dress you could buy, which she absolutely loved the top of – which of course was in Australia, where else would it be! – but the skirt was no good and after much deliberation we decided to take a gamble and order it so I could then ‘create’ her dream dress from that! Hmmm! 
So this is where I started, after asking Princess Charlotte what she would like me to create for her and looking at some pictures, I went to John Lewis and several other fabric shops I frequent, to buy some samples of chiffon, tulle, organza and various other floaty dreamy fabrics. Then, I went to my both my organza and tulle and my net departments, pulled everything out and we played – for many hours – over a period of days – to decide which one we would go with. Eventually we decided upon organza as it was the best fabric for creating that floaty dreamy look we were aiming for. We were still undecided at that point wether to have a layer of tulle or possibly netting under it and Lottie did not really have any idea of either how full she wanted it to be, or the exact length, which made it very difficult to estimate how much fabric I was going to need.
Ok then!
To try and get round this problem, I took one metre of organza and hand gathered it to get an idea of how much fabric I needed to create the fullness Lottie wanted. I pinned this onto the dress and we played again until we eventually decided on roughly how full and how many layers of fabric – yes, don’t think it was as simple as just one gathered layer, oh no. We finally settled on 7 1/2 metres, incredible I know. After shopping around, The Fabric Warehouse in Cheltenham offered ‘the best shade of Ivory’ (yes really) and the best price. We also bought some floppy solid Ivory fabric similar to lining fabric to make a sash and a bow on the back – probably!
Now I make a lot of fairies and angels and frequently cut all sorts of organza, tulle and net type fabrics and trust me, not only are they an absolute nightmare to cut but it is incredibly difficult to get a straight line. So when it took me about 20 minutes to do a tiny bit with a metre rule, I decided to take a rather large gamble and tear it. Don’t react with horror – having worked at Laura Ashley I knew you could tear 100% cotton fabrics and it gives you a perfect straight line but I must admit I just couldn’t see it happening with organza. However, much to my disbelief and delight, it worked beautifully and I had the most perfect straight line although it was a tad frayed – you learn something new every day! 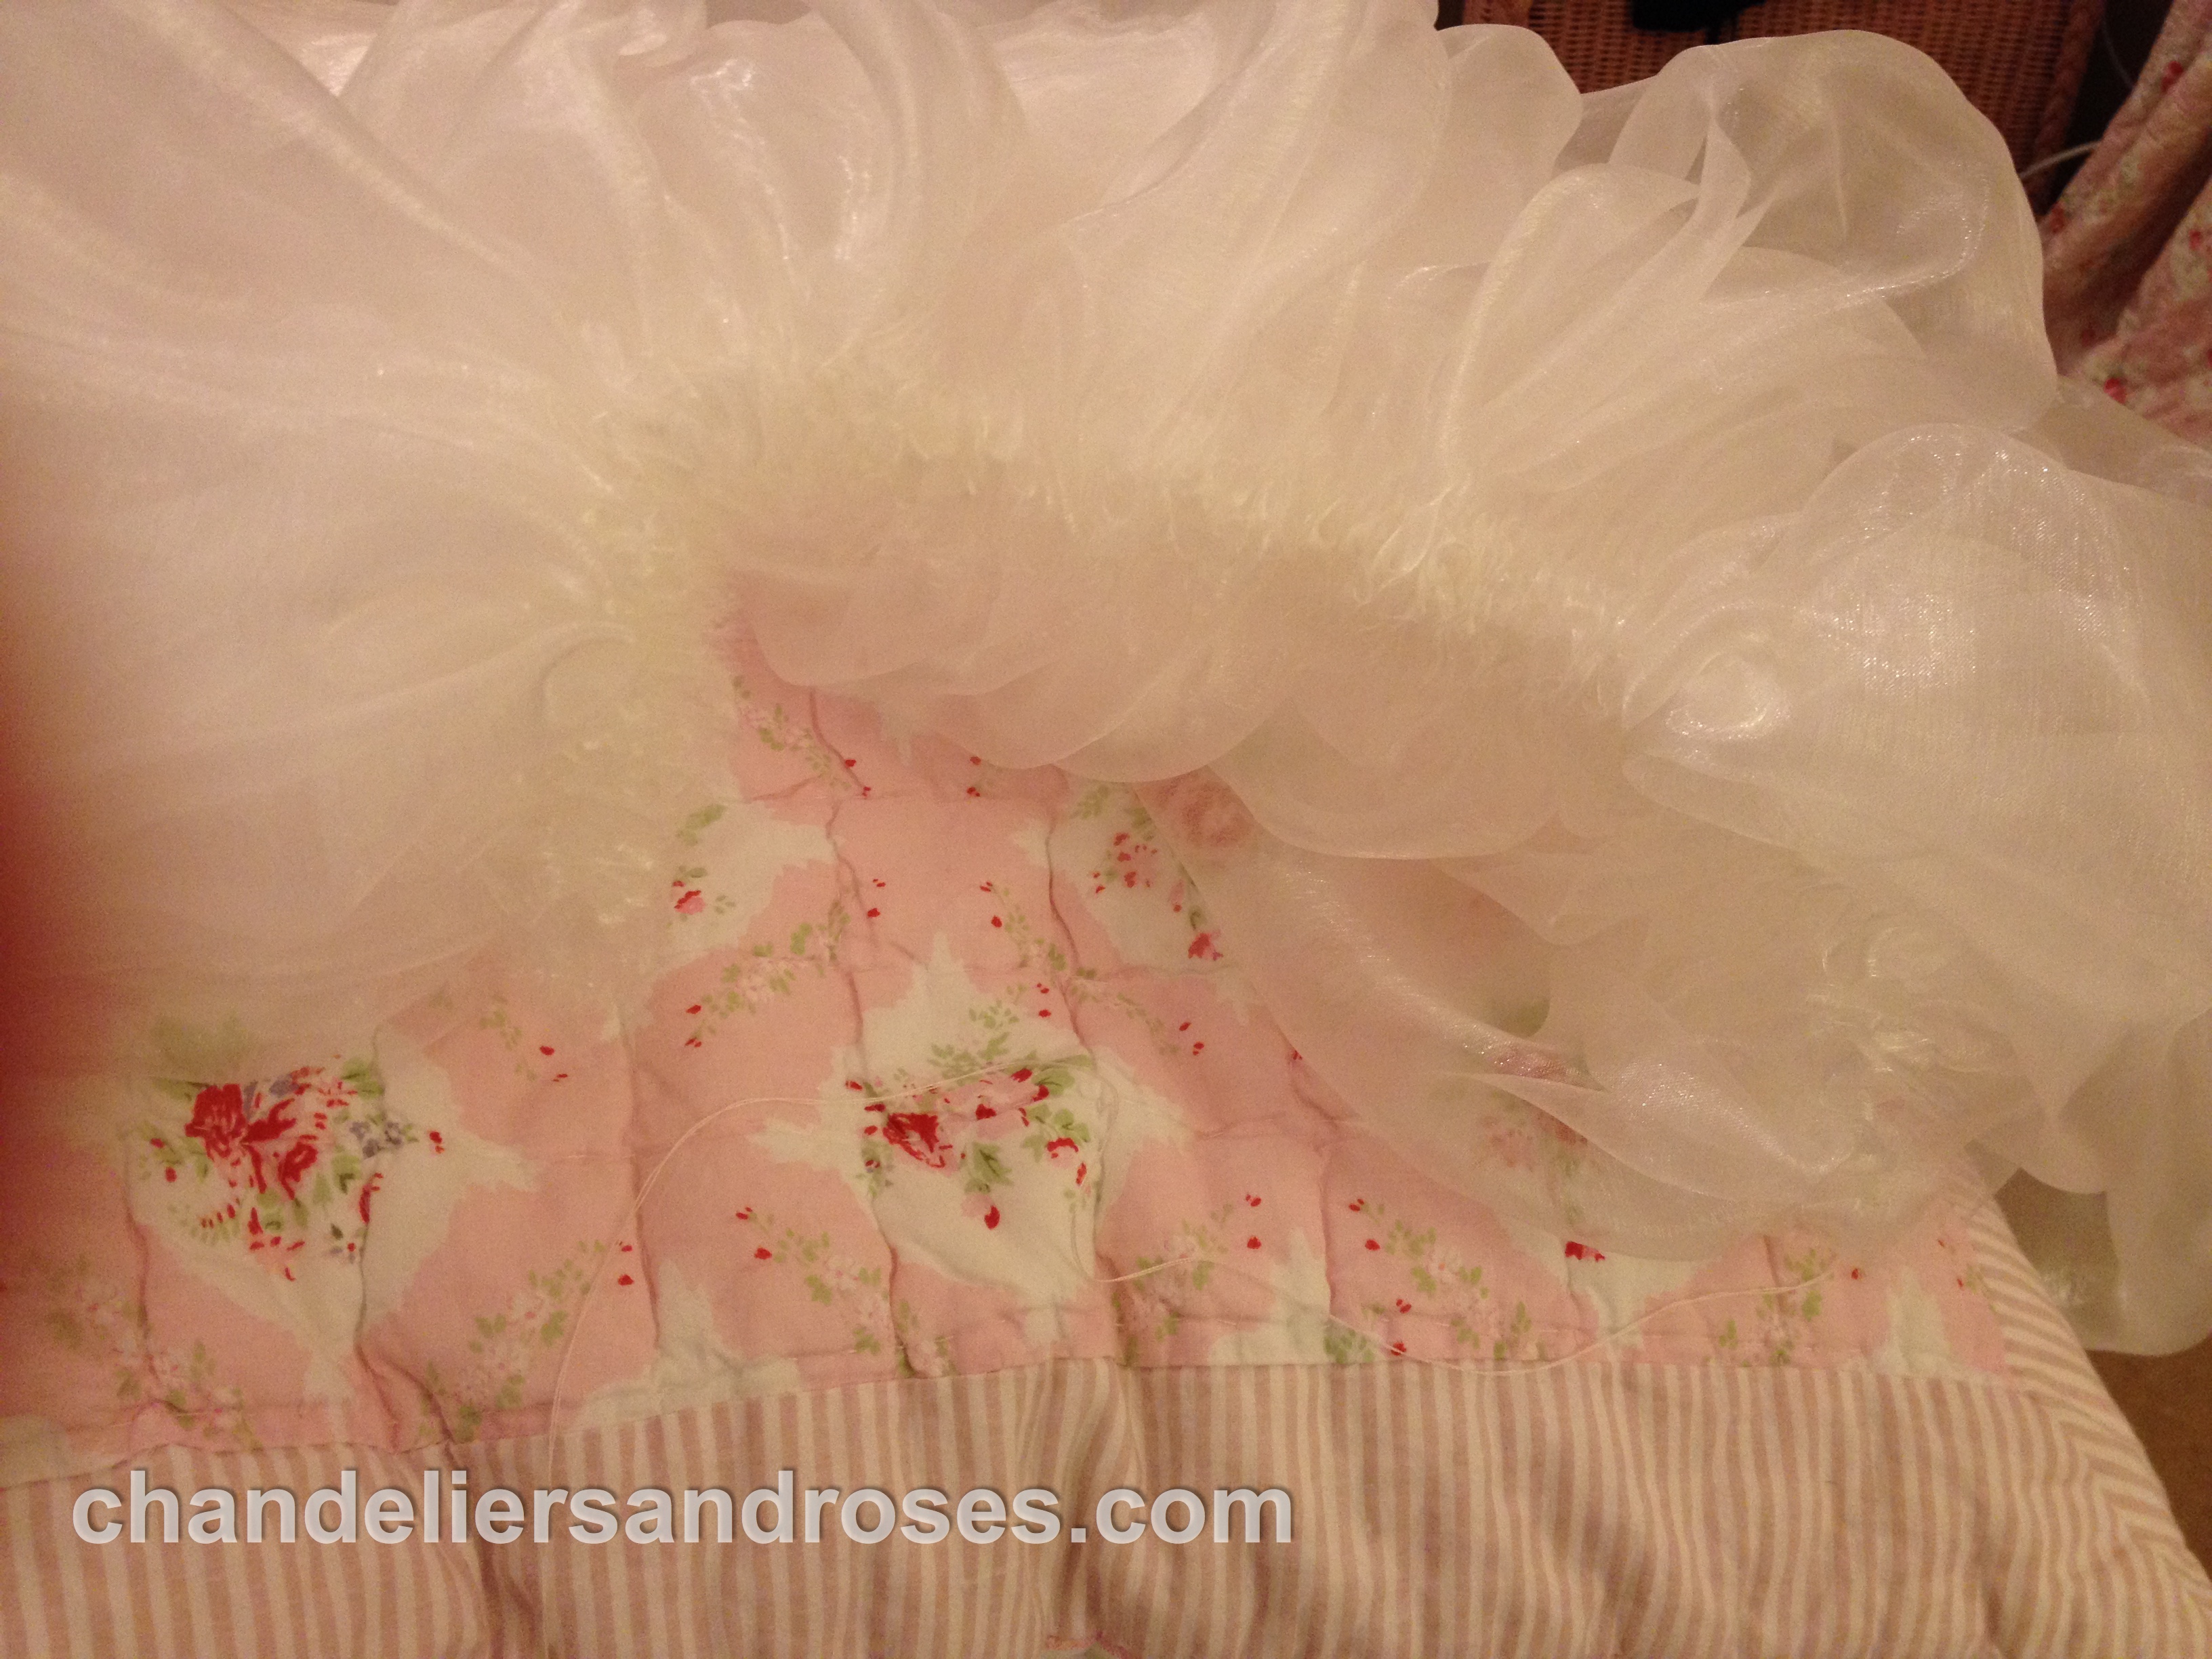
I then sat in bed at night, watching TV, and hand gathered all that fabric (of a fashion, as much as one can watch TV with a sharp needle working hard in one’s hand!)
I pinned it onto the flimsy skirt part, avoiding the ‘very much of a pain in the butt’ side zip and we had our first ‘fitting’! Then something terrible happened – oh my gosh no – she cried, not good. It was not hanging or looking at all how she wanted it to. I was very sad and worried at this point and thinking why on earth did I agree to this, I am so not a dressmaker. Anyway, we messed around with it for ages but it was very late and I said, as breezily as I could, “Let’s just start again tomorrow” as if it was absolutely fine and tomorrow it would of course, miraculously be ok.
I had to go out the next day, but left her with strict instructions to put both her prom shoes and the right underwear on, with the dress, and really try to establish, no matter how long it took, what she wanted to achieve. Was it too full, not full enough, too long, too short – the list was a touch endless at this point. When I returned in anticipation, in typical teenage fashion, she had done not one thing – no trying on, nothing. Give me 5 toddlers to 1 teenager always.
Finally, again late that night, we established the problem – it needed the sash as, without it, it just did not hang right at all. Once we had resolved this, we then – after considerably more time – established as best we could the finished length. I then repinned it, Lottie tried it on again and I attached it on my sewing machine, hoping it would be plain sailing from here on! Sure it would – NOT.
Thankfully, the length was perfect and after I took the longest time ever, to hand sew all that organza round the side zip with invisible thread – yes really – I then machine sewed the hem, turning it up a teeny bit twice, which although it was easy, seemed to go on and on and on! Finally, it hung beautifully.
Then came ‘THE SASH’. Goodness me what a saga. I tried so, so hard to not leave any of this until the last minute but, with the odd teenage tantrum interrupting proceedings and life generally with all that is constantly going on, ‘the sash’ was very last minute and stressful. Too thick, too thin, too wide, not wide enough, interlining, no interlining, floppy fabric, organza, ivory, pink, duck egg to match shoes and to top it all, where exactly, to the dot, is it going to sit?
Then – really – ‘THE BOW’. All of the above and more AND HOW LONG? I even drove, at so the eleventh hour, 50 miles to get more fabric, which we did not even use BUT, it all turned out ok eventually and most importantly of all, Charlotte was over the moon with it and I finished it on time – just.


Doesn’t she look absolutely gorgeous and so many mummies complemented me on how beautiful she looked and how fabulous her dress was and they couldn’t believe I had made it, even when I explained how I did it – I just smiled constantly, as all proud mummies do – if only they knew the drama!
Much Love
Sarah xxx