Yes, I know some of you have been asking me for at least 2 years and finally, I have actually started Instagram and I love it… clearly so do some of you!
Thank you lovelies xx
Click here for my Instagram page


Yes, I know some of you have been asking me for at least 2 years and finally, I have actually started Instagram and I love it… clearly so do some of you!
Thank you lovelies xx
Click here for my Instagram page
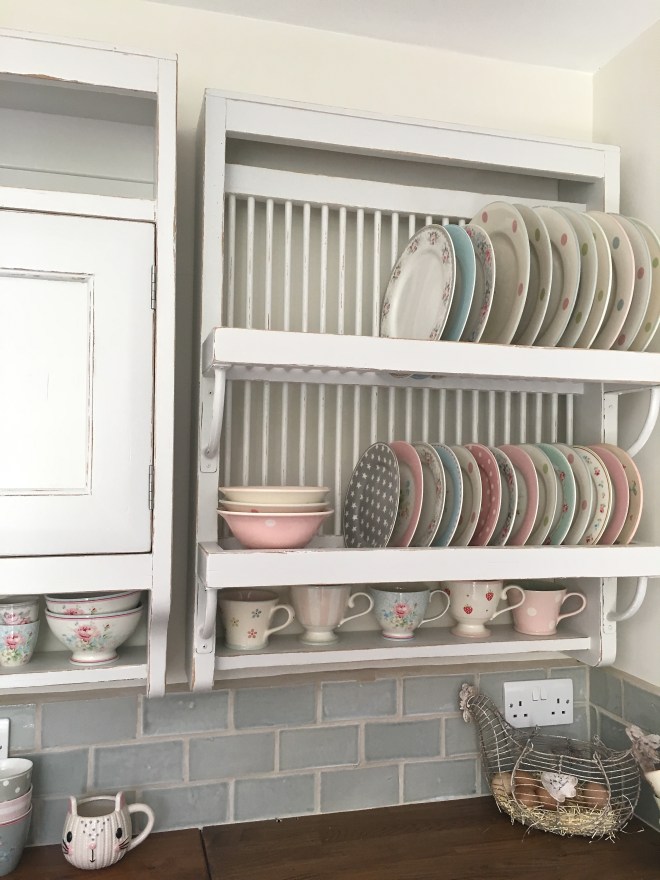
Farrow & Ball’s Ammonite on Fired Earth Bastide plate rack with Greengate & Susie Watson pottery
For a long, long time now, let’s not say exactly how many years, painting my kitchen units has been on my ridiculously long list of things to do. As you may or may not know, I am a bit of a savvy shopper and when Mr Chandelier & I first saw the Fired Earth French Oak Kitchen in their showroom I plotted and planned, (a very favourite pastime) a way to be able to afford it.
My plotting and planning paid off and we pretty much have a complete kitchen now, only 9 years later! However, yes there is always a however in this household, this has meant that we have purchased the kitchen bit by bit. The main units were bought by repeatedly going to their factory sales and purchasing either ex-display pieces or cancelled customer orders which generally tended to be roughly half price. Also because we weren’t buying everything all at once, we could semi-recover financially before the next piece came up – I’m not sure Mr Chandelier would not agree with the semi-recover financial bit at all, but you know what I mean… hmmm….!
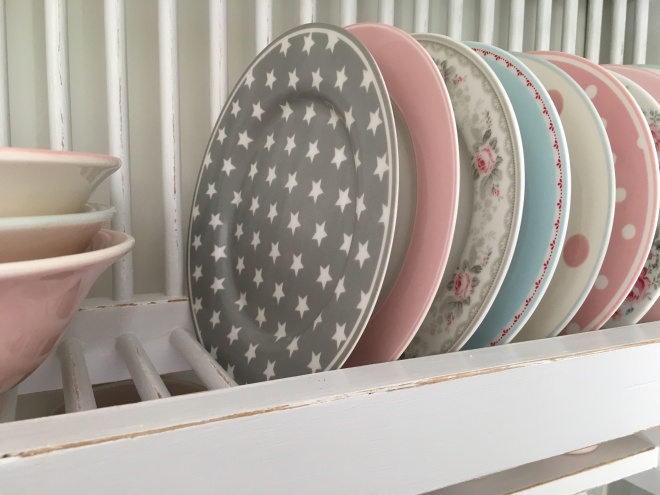
Beautiful Greengate & Susie Watson pottery
We have also purchased one wall unit and an island unit from Ebay and my very clever builder / carpenter Mr Chandelier, has adapted a base unit into a wall unit. We still have quite a bit of adapting to do, particularly on the Island unit, and it has been more than a little painful at times, but it has meant that we will soon (well soon meaning a few months!) have a complete lovely solid French Oak Kitchen which we would otherwise not have been able to afford. Obviously, I am not accounting for the time and love we have lavished on it as it may well have come out more expensive, but we will just brush on by that shall we.

Cupcakes & Roses
The downside of buying a kitchen in this way does of course mean that even though all the units are meant to be the same colour, the tone never quite matches, although we are perfectionists and most people probably wouldn’t have noticed. However, if I had been happy with the colour then I probably would have left it. The units were meant to be cream but they were a very yellow cream and, much as there is nothing wrong with that, it ‘jars’ with my pottery and the colours that I have in my kitchen so they had to go.
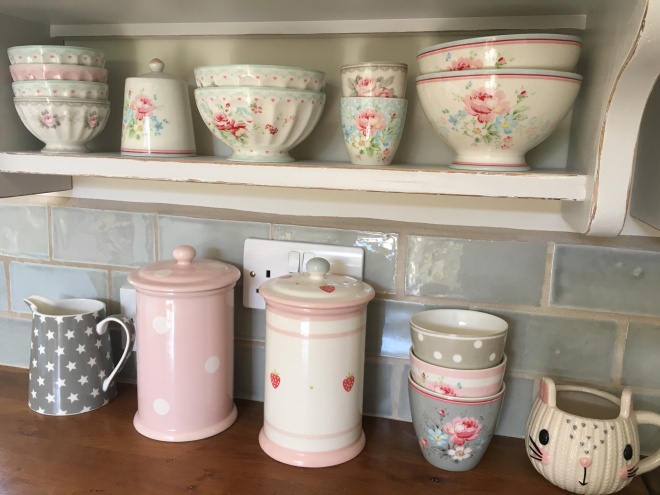
Gorgeous Greengate & Susie Watson pottery
So, paint colours. I absolutely adore my Greengate & Susie Watson pottery and it adorns my home in many different locations but it is in abundance in my kitchen. I tend to go for the very soft pastels, always soft pinks, soft greys, soft blues & duck eggs and quite a bit of off white. With all that colour going on I needed to have a soft background and I tried many different off whites and greys and even duck egg greens before settling on Farrow & Balls Ammonite. I have used this in my Craft Room and as soon as I tried it in there I just knew it would be right for the kitchen and thankfully it is.

The ‘Chatting’ end of the kitchen with Laura Ashley chairs
Our kitchen is very long, it is approximately 31 foot and has 2 windows and 2 sets of french doors, one side faces South and the other North so the paint colours we chose do change throughout the day. Sometimes Ammonite appears to be very Taupe in colour and sometimes more grey. You can see from the photo below of the units I have painted, that the far right one is more grey and the others more taupe. The more taupe ones are a little more blocked from light by the island unit. We put Farrow & Ball’s Slipper Satin on the walls which is pretty neutral, but again can appear more white or cream in the darker areas and even seems to have a tinge of green in some lights but overall it all works and more importantly, we love it and it is of course, another tick on my never ending list!

Kitchen Units painted in Farrow & Ball’s Ammonite
I started painting the units in January (so Mr Chandelier says!) and I have done 7 so far and have another 3 plus the island to do. They are extremely laborious and time consuming and cause quite a mess just doing one, plus I am running a business and have 3 children and I am doing many other house projects, so I kind of have to do it that way.

Some heavy sanding required!
The problem is, that I have to really heavily sand them back as I am distressing the edges of the units. I then have to apply 5 coats of paint – 2 good quality undercoats and 3 of my chosen Ammonite eggshell. If I don’t sand back that heavily, then when I distress them you will see the cream and I don’t want that. Unfortunately, I really dislike the sanding element but as Mr Chandelier likes to remind me when I complain about it, I could have left them cream!
I know it is predominantly self inflicted hard work but, as they are hard working kitchen units and, our house is often on show to both current and potential clients for both myself and Mr Chandelier, and it is my nature if I do a job to do it properly, then that is how it has to be. The worst is over now as the plate rack was just horrendous, made considerably worse as I had just had a small surgical procedure on my leg and had to try and paint it with my leg raised (yes I know, utter madness – don’t try this at home – never again!) We are also going to pay for a little sanding help for the remaining top units so I just need to motivate myself to picking up the ‘Kitchen Units paintbrush’ again to give it another boost. Then I ‘just’ need to finish the walls, finish grouting the floor and tiles, paint round the doors, paint the main door, paint the table and bench…………….omg – I can’t list any more – insert head in hands emoji here now!
How about you, ever thought about painting your kitchen units and what colour I would love to see.
Much Love,
Sarah xx
I
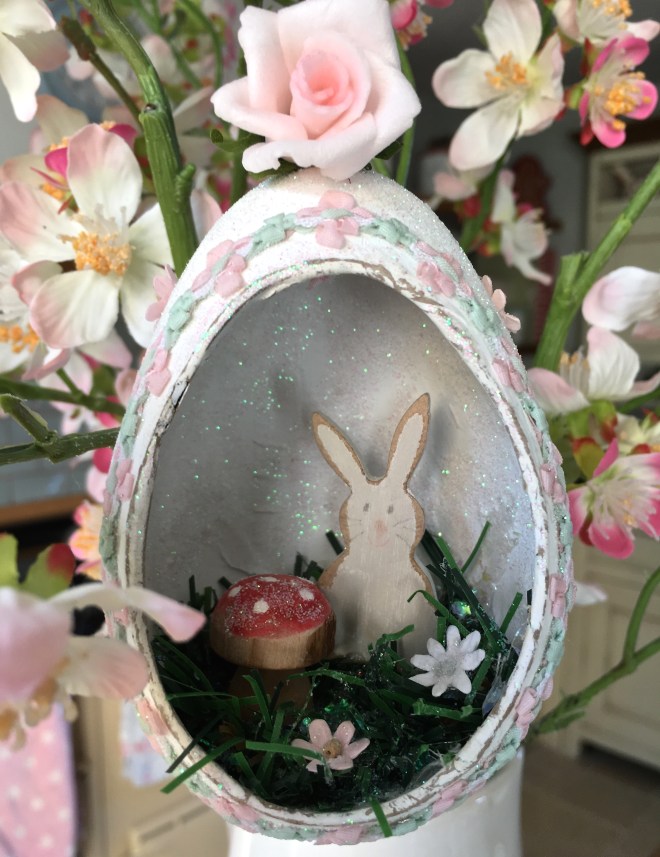
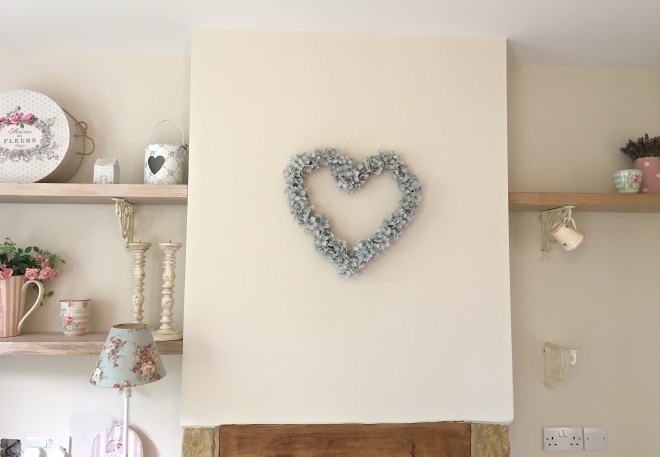
Easter Decor
Why not have a go at making one of these adorable Easter decorations. The paper mache eggs are available from Hobbycraft along with the little flowers. You could fill it with just about anything, how about some little chicks?
I truly love making display items like these – the best bit is ‘playing’ with all the little bits and pieces to put inside!
Have a very Happy Easter.
Much Love,
Sarah xx
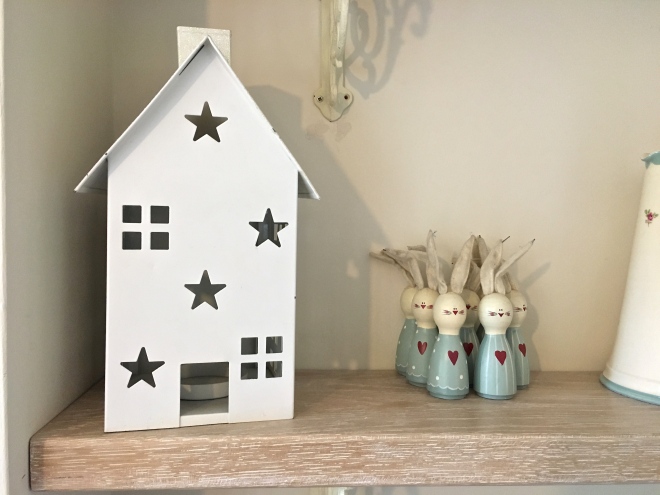
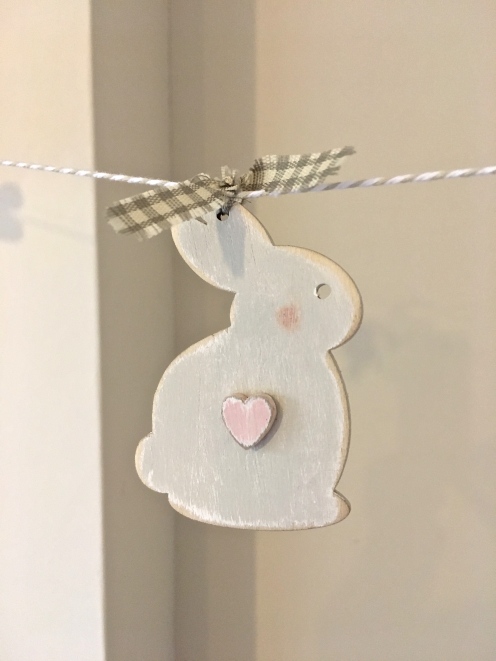
These cute little wooden hearts are fab to hang around the house as Valentine’s Decor.
They are available in the shop now.
A short while ago, I had a text from a very good friend, saying that she had managed to get her husband to clear out all the old bits of wood he had hoarded for some time. Knowing how much I love a bit of reclaimed wood, she texted me first and said that they had literally just been put in a big pile on her driveway and they were also going to text “the men with sheds” (whoever they were!) to let them know too and that we could all just come and take what we wanted.

Well, I literally got in my car and drove straight to her house and she was not kidding when she said it was a big pile. It was literally up to my waist and the longest piece was probably just under 3 metres long.
After searching through the pile I found some lovely old wide floorboards and then yes, you’ve guessed it, I wanted the longest piece, which I believed to be oak and was ridiculously heavy. The moment I saw it I knew exactly where I wanted it to go. My lovely friend was out and there was no one around to help and I knew I would never get it into my car on my own due to the weight, but I had to do something with it before ‘the men with sheds’ came! I also didn’t want it to get wet and spoil.
As she is a special friend and I know her very well, I knew that her garage was never locked so I thought if I could somehow drag it over to her garage a couple of metres away, maybe I could summons the strength to stand it up………..Yeah right!
You really have no idea how ridiculously heavy this solid oak, almost 3 metre long, piece of wood weighed and clearly, nor did I. At a rough guess I would say it took me about 20 minutes to literally drag it bit by laborious bit, to the garage just a couple of metres away. Then, when I opened the garage, it was like all my piles of ‘need to deal with stuff’ and my ‘fit to bursting Summerhouse’ and my ‘everything falls out when you open the door Shed’ were all rolled into one before my eyes. OMG Ok ok, lets take a deep deep breath, let’s close my eyes and envisage the beautiful shelves I am going to make with this piece of wood and then, let’s picture the ‘shed men’ running towards me with axes and now let’s gather all my strength and move everything……Hmmm.
Yes, it probably took me another half an hour at least, to get this piece of wood to an upright position and I really did struggle and I kept thinking I can’t do this. It was like a comedy sketch and would have been hilarious to watch but eventually, due to sheer determination and the fact that I never give up, I did it. I quickly closed the garage, loaded up my other squirreled bits of wood and texted my friend to let her know. All I needed now, was to persuade Mr Chandelier to come with me to collect it as in our house, the boot is on the other foot so to speak, as he is always trying to persuade me to get rid of my hoard……Hmmm!
Anyway, Mr Chandelier bless him, did indeed come with me to collect the wood and he agreed that it was perfect for our Kitchen shelves, which was exactly what I had in mind for it when I first saw it. Although there were couple of imperfections in the wood, it was the exact thickness and look that I wanted for my kitchen shelves and I knew I was either going to paint or use liming wax on them.
Liming wax is very easy to use but you do need an unfinished piece of wood that hasn’t already been painted, varnished or waxed. You can use wood that has been previously finished, but you do then need to remove all previous product to ensure it is free from any other finishing materials. The idea behind using liming wax is to give a sort of whitewashed look to highlight the grain and brighten the wood up.
If you look at the image below, I have already done the 2 left hand shelves but the right hand one has not been done. You can see they are quite different and for me, it gave me exactly the look I was after with the least amount of effort, which frankly in this house, is desperately needed.
You should start by brushing/rubbing the wood with a wire brush to ‘lift/open’ the grain of the wood. The liming paste/wax will then work its way deeper into the grain and won’t lift off as soon as you wipe off the excess. I however, didn’t feel the need to do this as I felt my wood was already very ‘grainy’ and a little rough so I knew it would absorb the wax well enough. I used Liberian Special Effects Liming Wax but there are many different brands which will work equally as well.
The technically correct way to apply the wax is to use Extra Fine or Fine Steel Wool. However, you can also literally just brush it on with either a paintbrush which I used, or you can apply it using a soft lint free cloth. The whole process is exactly like waxing except it has liming paste in it. You are meant to wait around 3 minutes for it to dry and I did a stretch of about a foot at a time, and then, using a soft lint free cloth – an old tea towel or similar – you just buff it off to a shine. You can go over it if you would like it a little brighter but to be honest, it won’t make a great deal of difference as the grain will already be full of liming wax so any excess tends to come away when you buff it. If you need it to be waterproof you can use a finishing oil and obviously, the more coats of oil you apply, the greater the water resistance.


You can see from these photos that each piece of wood will absorb the wax differently as it is a product of nature and every piece of wood will of course, be very different. I love that, as it shows you have real wood and highlights all that beautiful texture and character.
So there you have it, really easy but effective. I have quite a few pieces of wood that are calling out to me to ‘come and lime me’! I think my little one’s Vintage school desk would definitely benefit from it but that is a whole other day!
How about you, do you have anything that would benefit from liming or do prefer a darker look?
Happy Liming!
Much Love,
Sarah xx
I have just released the dates for Christmas Workshops for this year, which are detailed below. Please bear in mind that spaces are limited and can fill up fairly quickly.
To book email Chandeliersandroseshq@gmail.com
or call / text on: 07706 426 037
Adult Christmas Workshops


A Host of Angels
Come and make some of these adorable little wispy angels from vintage lace which you can either keep, or if you can can bear it, give away as gifts.
Workshop date; Wednesday 6th December – 7.30pm – 9.45pm
Cost – £30 – includes all materials, a lovely Christmas ambience and of course prosecco!
* * * * * * *
Hanging Christmas Robins
Come and make some sweet little Christmas Robins to hang around your home. They h ang from pretty beaded wax strings and are much admired.
Workshop date;
Wednesday 13th December – 7.30pm – 9.45pm
Cost – £30 – includes all materials, a lovely Christmas ambience and of course prosecco!
Children’s Christmas Workshop
Hanging Glass Bauble with Christmas Scene
The children will make the most adorable Winter Christmas Scene within a hanging glass bauble with a tiny snow tipped fir tree, a wooden stag, snow and embellishments. These Glass Baubles are truly magical and are similar to the Easter Hanging Decorations that the children absolutely loved making.
Workshop date; Tuesday 19th December – 10.30am – 12.45pm
Cost – £20 – includes all materials and refreshments
Children’s Summer Workshops
Held in Chipping Campden at Rick Cottage, Blind Lane, GL55 6ED
Wednesday 26th July 10.30am – 12.45pm
Tuesday 1st August 10.30am – 12.45pm
Wednesday 9th August 10.30am – 12.45pm
£20 per workshop – Includes all materials & refreshments

Wooden Pencil Boxes
Always popular, all 3 of these delightful children’s workshops will teach your child some new craft skills whilst they make some adorable items to take home.
We make something new each time according to the season.
Each workshop will make different items in case your child wishes to attend all 3.
To book, or if you would like any further information about any of the workshops, please don’t hesitate to contact me either via email chandeliersandroseshq@gmail.com or by calling me on 07706 426037.
Click here for more information on Children’s Workshops.
Well now, we really did have some fun just before and over Easter with my Workshops, and everyone that came really did produce a most beautiful product to take home and they were, quite rightly, very proud of their creations.
As always, there were lots of gorgeous materials to choose from…………….


And lots of laughter and fun…………….
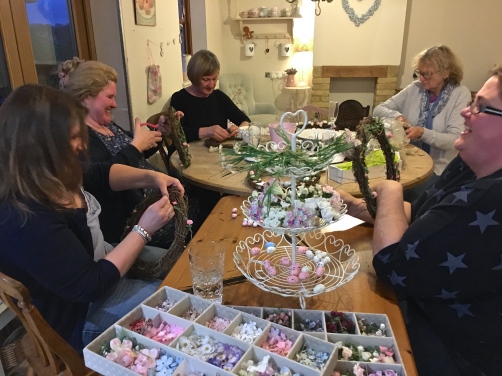
And they all created the most gorgeous wreaths…………..


And there were Bunny Garlands too…………….
And then there were the Easter Children’s Workshops…………….


Just look at the little hand drawn bunny faces………..they so make my heart melt as do the children’s sweet little proud faces when they hold up their finished creations.
I am just setting the next lot of dates and lovely products we will make, click here to take you to the Workshops page for the latest adult and child workshops or click here specifically for the latest children’s workshops.
I would love to see you on one very soon.
Much Love,
Sarah xx
I have just put this adorable little Deer Coat Peg Hook into my shop. I had best not tell Little Miss Chandelier as she has fallen in love with it, as have I.
Happy Easter Lovelies xx
Children’s Easter Workshop – Cute Bunny Eggs


