Farrow & Ball’s Ammonite & Slipper Satin & Painting Kitchen Units

chandeliersandroses.com

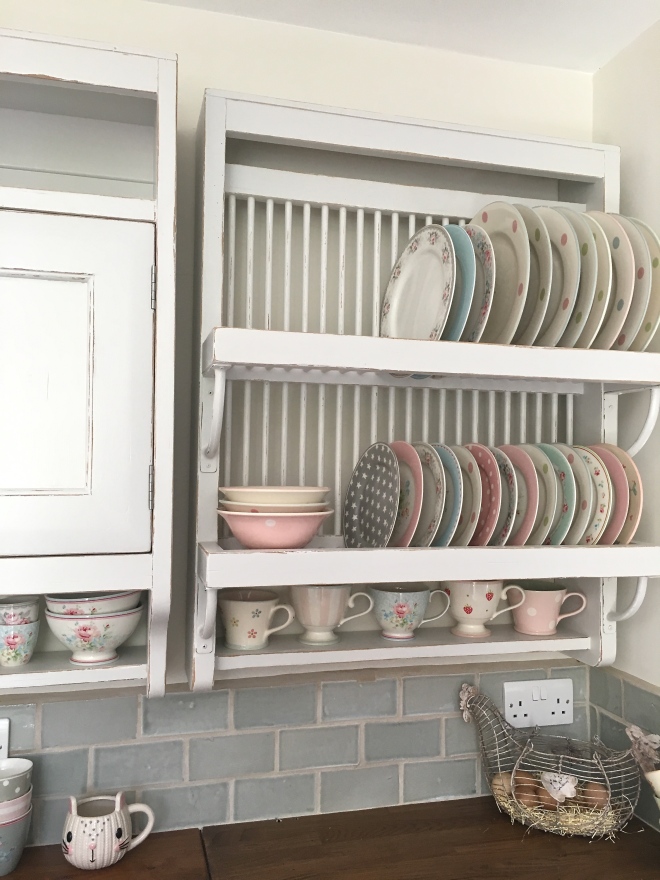
Farrow & Ball’s Ammonite on Fired Earth Bastide plate rack with Greengate & Susie Watson pottery

For a long, long time now, let’s not say exactly how many years, painting my kitchen units has been on my ridiculously long list of things to do.  As you may or may not know, I am a bit of a savvy shopper and when Mr Chandelier & I first saw the Fired Earth French Oak Kitchen in their showroom I plotted and planned, (a very favourite pastime) a way to be able to afford it.

My plotting and planning paid off and we pretty much have a complete kitchen now, only 9 years later!  However, yes there is always a however in this household, this has meant that we have purchased the kitchen bit by bit.  The main units were bought by repeatedly going to their factory sales and purchasing either ex-display pieces or cancelled customer orders which generally tended to be roughly half price.  Also because we weren’t buying everything all at once, we could semi-recover financially before the next piece came up – I’m not sure Mr Chandelier would not agree with the semi-recover financial bit at all, but you know what I mean… hmmm….!

chandeliersandroses.com

Beautiful Greengate & Susie Watson pottery

We have also purchased one wall unit and an island unit from Ebay and my very clever builder / carpenter Mr Chandelier, has adapted a base unit into a wall unit.  We still have quite a bit of adapting to do, particularly on the Island unit, and it has been more than a little painful at times, but it has meant that we will soon (well soon meaning a few months!) have a complete lovely solid French Oak Kitchen which we would otherwise not have been able to afford. Obviously, I am not accounting for the time and love we have lavished on it as it may well have come out more expensive, but we will just brush on by that shall we.
chandeliersandroses.com

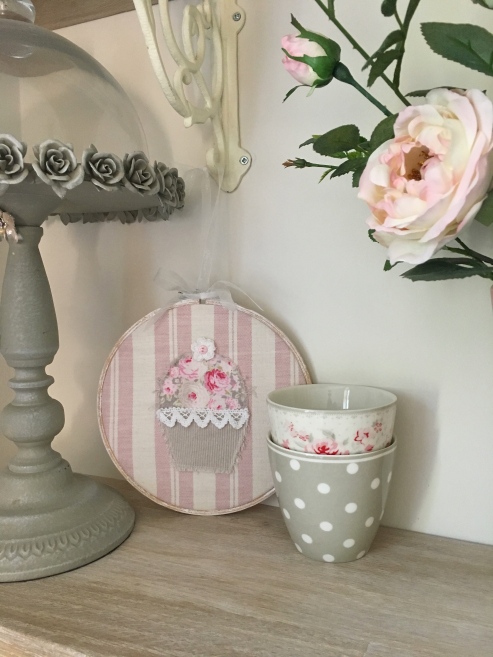
Cupcakes & Roses

The downside of buying a kitchen in this way does of course mean that even though all the units are meant to be the same colour, the tone never quite matches, although we are perfectionists and most people probably wouldn’t have noticed.  However, if I had been happy with the colour then I probably would have left it.  The units were meant to be cream but they were a very yellow cream and, much as there is nothing wrong with that, it ‘jars’ with my pottery and the colours that I have in my kitchen so they had to go.

chandeliersandroses.com

Gorgeous Greengate & Susie Watson pottery

So, paint colours.  I absolutely adore my Greengate & Susie Watson pottery and it adorns my home in many different locations but it is in abundance in my kitchen.  I tend to go for the very soft pastels, always soft pinks, soft greys, soft blues & duck eggs and quite a bit of off white.  With all that colour going on I needed to have a soft background and I tried many different off whites and greys and even duck egg greens before settling on Farrow & Balls Ammonite.  I have used this in my Craft Room and as soon as I tried it in there I just knew it would be right for the kitchen and thankfully it is.
chandeliersandroses.com

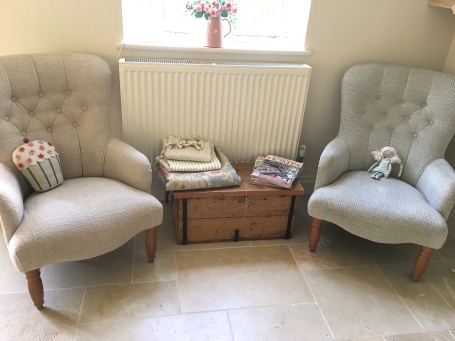
The ‘Chatting’ end of the kitchen with Laura Ashley chairs

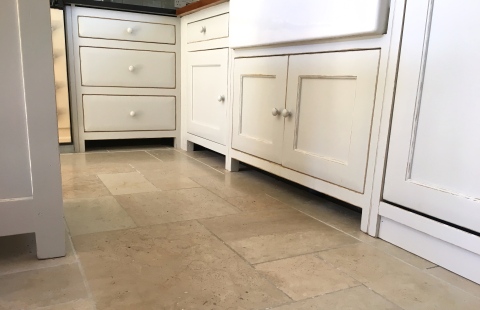
Our kitchen is very long, it is approximately 31 foot and has 2 windows and 2 sets of french doors, one side faces South and the other North so the paint colours we chose do change throughout the day.  Sometimes Ammonite appears to be very Taupe in colour and sometimes more grey.  You can see from the photo below of the units I have painted, that the far right one is more grey and the others more taupe.  The more taupe ones are a little more blocked from light by the island unit.  We put Farrow & Ball’s Slipper Satin on the walls which is pretty neutral, but again can appear more white or cream in the darker areas and even seems to have a tinge of green in some lights but overall it all works and more importantly, we love it and it is of course, another tick on my never ending list!
 

chandeliersandroses.com

Kitchen Units painted in Farrow & Ball’s Ammonite

I started painting the units in January (so Mr Chandelier says!) and I have done 7 so far and have another 3 plus the island to do.  They are extremely laborious and time consuming and cause quite a mess just doing one, plus I am running a business and have 3 children and I am doing many other house projects, so I kind of have to do it that way.

chandeliersandroses.com

Some heavy sanding required!

The problem is, that I have to really heavily sand them back as I am distressing the edges of the units.  I then have to apply 5 coats of paint – 2 good quality undercoats and 3 of my chosen Ammonite eggshell.  If I don’t sand back that heavily, then when I distress them you will see the cream and I don’t want that.  Unfortunately, I really dislike the sanding element but as Mr Chandelier likes to remind me when I complain about it, I could have left them cream!

I know it is predominantly self inflicted hard work but, as they are hard working kitchen units and, our house is often on show to both current and potential clients for both myself and Mr Chandelier, and it is my nature if I do a job to do it properly, then that is how it has to be.  The worst is over now as the plate rack was just horrendous, made considerably worse as I had just had a small surgical procedure on my leg and had to try and paint it with my leg raised (yes I know, utter madness – don’t try this at home – never again!)  We are also going to pay for a little sanding help for the remaining top units so I just need to motivate myself to picking up the ‘Kitchen Units paintbrush’ again to give it another boost.  Then I ‘just’ need to finish the walls, finish grouting the floor and tiles, paint round the doors, paint the main door, paint the table and bench…………….omg  –  I can’t list any more  –  insert head in hands emoji here now!

How about you, ever thought about painting your kitchen units and what colour I would love to see.

Much Love,

Sarah xx

I


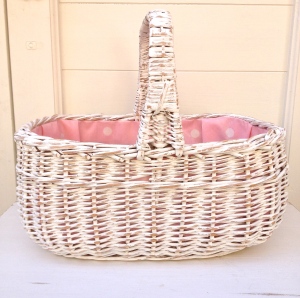
Oilcloth Lined Vintage Shopping/Storage Baskets

IMG_1890.JPG

Vintage Shopping Basket lined with Floral Oilcloth           £45                       Click to buy

For a very long time I have wanted to do a little batch of Vintage Wicker Shopping Baskets and line them with oilcloth.

As you are probably aware, I have been creating since I was a very little girl and one of my first businesses as a teenager  (yes, you did read that right, I did start very young)  was making baby items.

I used to make really beautiful broderie anglaise moses baskets with elaborate hoods and canopies and gorgeous trimmings and I even made tiny little quilts and fitted sheets.  I also made little children’s rocking chair covers, teddy bear mobiles and nursery decor such as fabric balloon wall hangings from different coloured pastel fabrics, which I padded out and strung with ribbon and made them look like they were floating across the wall.

Another product I made was a gift basket full of gifts such as socks and bibs and various other useful items which I would adorn with little bows and embellishments.  The basket which they all came in was a gift in itself, as I used to line them with wadding and then broderie anglaise fabric and trimming as well.  They would always be adorned with at least 1 bow and were meant to be used as Nursery storage for things like nappies.

Pink Paisley Fabric Lined Basket  SOLD

Pink Paisley Fabric Lined Basket  –  SOLD

Much as I have come on an incredibly long journey with my creativity since then, I find it slightly amusing that all these years on, I am still making and selling fabric lined baskets which lots of my customers love.

IMG_0707

Taupe Gingham Fabric Lined Basket   –     SOLD

Nowadays, I paint and distress the baskets and use many other beautiful fabrics and my customers and I use them for all sorts of storage from papers to toiletries, from children’s toys to hair accessories, varied kitchen storage, books and magazines and also as picnic baskets where I have lined them with oilcloth, as the oilcloth can be wiped clean.

IMG_9007

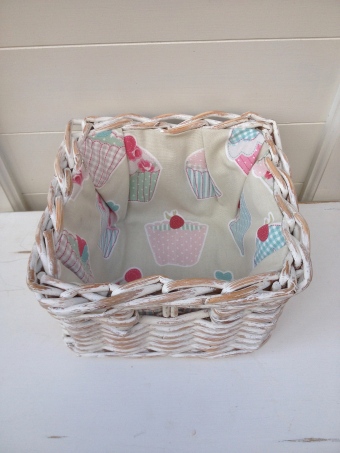
Cupcake Fabric Lined Basket    £25     Click to buy


In my own house, they are used for Doll’s Tea Sets, Bedroom Storage and Papers and I use my oilcloth lined Vintage Shopping Baskets for Ruby’s Lego and shopping locally in my village.  I do love a basket and, as Mr Chandelier will confirm, I definitely do have far too many – with a rather large percentage of those hanging in abundance from my summerhouse ceiling.


IMG_0715

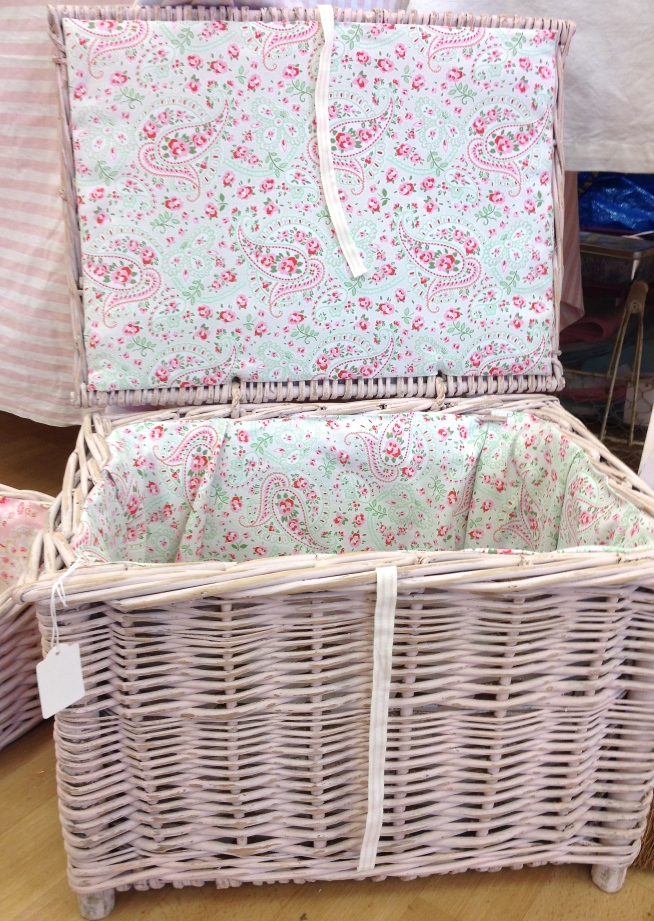
Pink Paisley Fabric Lined Vintage Hamper    –    SOLD

IMG_0720

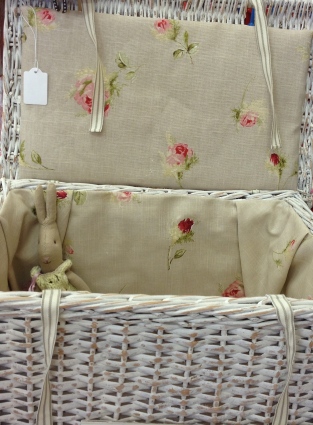
Taupe Roses Fabric Lined Vintage Hamper    –    SOLD


I also transform Vintage Picnic Hampers and Old Fishing Baskets but the few that I have had time to do have sold very quickly, so I there are very few photographs of them – these two being no exception.  I sold the Taupe Roses Hamper to my hair colourist whilst having my hair done and telling her about them, she didn’t even see it and said she had to have it – how fab was that!


IMG_6188

Vintage Baskets waiting to be loved and used again.


It did however, take me over a year to find and gather enough Vintage Shopping Baskets so that I could create a batch of 5.  I did have one more, but unfortunately it was damaged, which I did not notice when I purchased it so that has been relegated to the garden and will be painted and filled with something, probably flowers – I will show you what I do with it when I finally get round to dealing with it!

As they are shopping baskets, I had decided a long time ago before I started trying to find them, to line them with oilcloth so that they could be wiped clean which hugely increases what they can be used for.

chandeliersandroses.com Vintage Shopping Basket.JPG

Vintage Shopping Basket          £45          Click to buy

I knew they would be hard work and I was right – I really dislike sanding down but unfortunately the process I use means they need to be sanded 2 or 3 times.  I also knew that working with the oilcloth was going to be grief and I was so right.  It is an absolute nightmare to iron  –  which you have to keep doing  –  and an even bigger nightmare to line each basket and work with oilcloth, particularly when you need perfectly folded corners.  I have lined hundreds of baskets with normal fabrics over the years so I don’t say that lightly.

Vintage shopping basket

Vintage shopping basket       £45       Click to buy

However, I never give up and I persevered with them and I am so delighted with how they have turned out.  They all look so pretty in their soft colours, Shabby Chic paint and lovely oilcloths.  The problem is, as always, I make them as if they were for my own home so of course, they look as if they belong with me and I never want to sell them!   Hmmm…………I wonder how many will make it to my Etsy shop!

Do you have lots of baskets in your home and what do you use yours for, I would love to know?

Happy Shopping!

Much Love,

Sarah xx

Happy New Year – & a bit more demolition!

Happy New Year (better late than never – you know I come forth eventually!)

IMG_6790

I am more than a bit sad to pack it all away as I do love Christmas, but I am also more than a bit relieved to see the end of a mad, manic and crazy season which included my open house, workshops, a few events, a bad foot injury, 3 important birthdays – husband and 2 of the children – and of course Christmas, a big deal in itself.  So as I am sure you can appreciate, much as I truly adore the magic and sparkle of that time of year, it also leaves me in constant chaos and desperately trying to catch my breath and stop myself from drowning in events, materials, presents, food, really excessive late nights and much more!

IMG_6773


Now I must confess, I don’t really do New Year resolutions as such.  I used to many years ago but like a lot of people I really wasn’t brilliant at following them through.  One thing I do have a habit of doing though, is writing lists and my gosh are they long.  If I am honest, they are completely ridiculous and, particularly at times like my open house, Christmas, Easter or other events they are more than a little outrageous!


IMG_6777

I will put say, 20 things to do on my list for Monday and just item 1 could take all day and item 2, well, half the week if I’m lucky.  We won’t even mention the other 18 items – let’s just move swiftly on!  So, even though I don’t actually do New Year resolutions, I do however, ‘carry forward’ all the items that were on last years lists.  I did recently read an article on list making which was particularly pertinent to me.  It basically said that you should only ever have 5 items on your ‘to do’ list and the idea is that when you have finished 1 item you replace it with a new one – this is meant to stop you from feeling overwhelmed or stressed……….Right, but what actually happens to the rest of your list – I would probably end up sub categorising on a huge scale as I tend to do that anyway.  Ok ok let’s be calm about it and maybe not even do a list at all……Hmmm, bit scary, lets sleep on that one.

IMG_6887

I rather foolishly thought that I would have quite a bit of calm now and don’t get me wrong, in comparison to last season, of course it is.  However, we – in true Chandelier style – started on more work in another room – (as we do) over the holiday period and have just a smidgen more mess to deal with BUT….. it’s all good, yes really.  Every friend or visitor to our house walks in and says ‘Oh, goodness’ and looks about in disbelief (as well as sometimes looking at me very strangely!) as things change daily here, they really do!  Even the children come in and roll their eyes whilst enquiring why we can’t finish the other rooms we have started first.  I just roll my eyes right back and say “Well……Daddy had to do this now because we desperately need storage and………” then they are gone and I start to ponder that question myself but you know how it is, if you are struggling with things like storage, particularly after Christmas, and the rest of the house is semi-ok then certain jobs just seem to queue jump in a big way.  STOP thinking like that – No, it is not because Mr Chandelier is a builder and likes demolition – how could you even think that…………Hmmm.

We (well, when I say ‘we’ I have helped a lot) have also done lots of ‘little jobs’, well little by our standards, such as starting the tongue and groove boarding in the bathroom, moving baby Chandeliers hanging tent, blocking up a doorway – you know the sort of annoying and ‘faffy’ job that never gets done because you know it will take ages and not really seem to make much of an impact. Ok, maybe blocking up a doorway does, I take that one back but not moving a tent not so much, but, it does actually mean I can finish Ruby’s room as the ‘structure’ is now in place.  It only took me 3 days to decide where to put her furniture and tent!!!  More on that very soon.

Anyway, my ruthless streak persists and I am de-cluttering as I go and moving rooms around, still shuffling furniture and generally getting order – so there are many, many posts to follow from hereon in, with all the current projects and updates on the existing ones – Ooh how exciting – it’s a good job I get bored easily and like a change isn’t it!  I am on such a mission right now but with so very much needing to be done, I’m not quite sure which way to turn first.  But, as my dear friend used to say, ‘It doesn’t matter where you start, just start somewhere!” so I do tend to say that to myself repeatedly as I spin around like a weeble looking where to begin (just remember “weebles wobble but they don’t fall down”!!!)

IMG_6804


Oh, and I have also started setting up my Etsy shop and it really won’t be long before it has lots of items for sale – even more excitement – how will I contain myself.  I will of course link it to this blog.

As if that isn’t enough I joined Slimming World today.  I have done it before but stopped suddenly due to Mr Chandelier’s rather unfortunate Brain Haemorrhage, thank goodness he made a full recovery – we are very blessed.

What about you, are you calm or not…….tell me about your chaos, it will make me feel much better!

Much Love

Sarah xxx


Shopping for Pastel Kitchen Accessories

Anyone that knows me will agree that I have a lot of soft ‘vintagey’ (yes, I made that word up) colours and pastels in my home.  My kitchen is a particularly strong example of this as it is predominantly shades of duck egg, soft pinks and blues alongside whites and creams.

It would be fair to say then, that I do love a pastel coloured kitchen accessory, particularly a pink one, and when I see anything in pink or duck egg, my heart beats just a touch faster and I hurriedly snap it up!

Now I don’t know about you, but I strongly feel that anything assisting you with household chores such as cleaning should bring a smile to your face whenever possible.  You can imagine my delight then, when I saw these gorgeous pastel coloured dishcloths from Asda.

IMG_6025


Seriously, how yummy are they!  It gets better – they are only £1.00 for 4 – yes really – and they wash, and wash, and wash at 60 degrees and still remain as good as new!

I also spotted this adorable vintage style tea cup and saucer set from TK Maxx which was a ‘snip’ at just £6.99 – Mr Chandelier always laughs at that word, as I use it a lot when telling him about, or showing him, my shopping purchases –  I’m not sure he agrees  –  his ‘snip’ doesn’t quite match my ‘snip’!

IMG_6028


Just gorgeous and look how beautifully it goes with my other teacups and saucers which are genuine vintage pieces.


IMG_6050

So, we can make and drink tea from pretty cups, then we can wash them up with matching pretty dishcloths but frankly, we are missing the cake.

However, don’t be thinking about baking cakes with any old brown or black sieve – NO – get down to Poundstretcher where the lovely Jane Asher has produced a range of gorgeous baking products in soft pink, duck egg, soft blue and lilac.

I bought these yummy little pieces – I had to – my kitchen ‘needs‘ them and frankly, it would be rude not to at £1.00 per item – yes really – bit shocking I know!  Just don’t blame me when you find you’ve wasted an hour choosing which pieces to buy……Hmmm…….


IMG_6601

I also saw these cute little jars in B & M – not sure what the B & M stands for but their stores are popping up everywhere – another ‘snip’ at £1.00 each – not sure what I will use them for but they are very adorable.

Have you bought any pastel bargains lately, I need to see them if you have.

Happy shopping.

Much Love

Sarah xx


Craft Storage and Organisation – How to store Fabric.

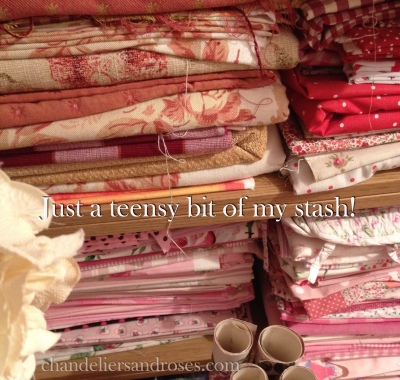
I have been buying fabric since I was 6 years old and it would be fair to say that I have a very large collection of most types of fabric, in vastly different sized pieces and in many different patterns and colourways.

IMG_5050

Over the years I have tried numerous different methods of storing it, usually with limited space.  My first ever solution – when it was tiny – was a basket.  Obviously, I very quickly outgrew ‘the basket’ and from thereon in, I always stored the majority of it on shelving of one kind or another.  The exception being my ‘scraps’ which, as they are so frequently used, have their own baskets which are broken down into colours.

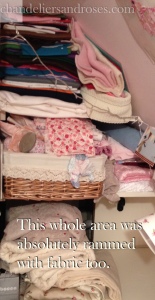
As at a few weeks ago, I had fabric rammed into what seemed like every corner of my studio.  It was mostly on various different shelves, although I had quite a bit in a large drawer, some in storage tubs, some in my ‘fabric filing tray’ quite a bit on the floor – actually quite a lot on the floor – and even some new fabric in bags both inside and outside my studio (naughty!)

IMG_5044

With all this ‘fabric chaos’, a considerable amount of ‘tripping over’ and a constant ‘fabric avalanche’ each time I tried to make something, I had a bit of a ‘fabric meltdown‘.

IMG_5115

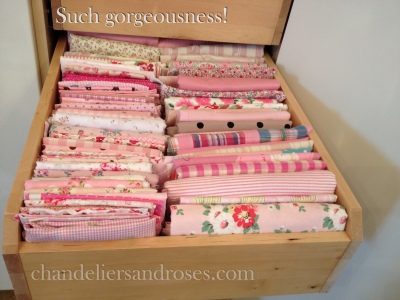
Although It was all (mostly) colour coded and all fabric such as felt, tulle, organza, ‘shimmeries’, etc. had their own departments, there was certainly order, but I couldn’t really see properly what I had, let alone access it in a hurry.  The reason for this was simple.  The problem with shelves is that whilst they are fine for large pieces of fabric, e.g. 4 or 5 metre pieces, when it is sorted by colour – which is how I work – you do tend to have lots of different sized pieces and this generates pyramid-shaped piles.  When space is an issue, one tends to slot more fabric into the gaps.  Fabric is heavy, particularly large pieces and with the best will in the world, it’s just not feasible to put it back exactly how it came out, especially if it is at the bottom of the pile.  I had also run out of space.

Something had to change.  I had been mulling over this problem for some time and had come to the conclusion that my ideal would be to put all the fabric into drawers as it is a lot easier to access, you can see exactly what you have and drawers can cope more readily with varying sizes.  I have also so outgrown my little ‘Narnia’ studio and would ideally like to store the fabric somewhere else – but where?  The house was already bursting at the seams and I really, really had nowhere else for it to go other than my bedroom.  So it was with great reluctance, that I finally accepted that I would have to give up a bit of bedroom space and add another single wardrobe to my run of units, which I could then dedicate to my ‘stash’.

IMG_4984

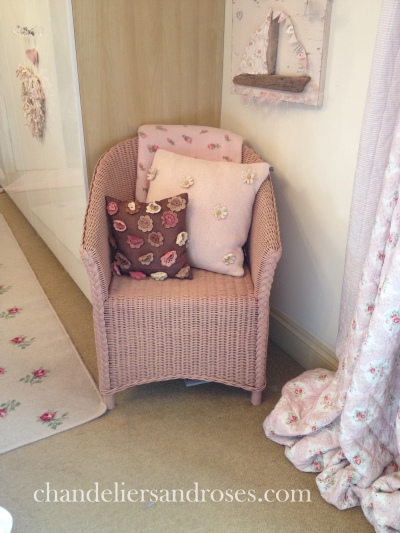
I so did not want to lose this sweet little corner, even though the chair is normally covered in clothes!

We bought the original units from Ikea as they are fantastic for internal storage within their wardrobes and have drawers and pull out jewellery trays and loads of other fab add-ons you can buy.  Originally, we had the intention of making our own wooden doors for them however, 5 years ago, after 2 years of living here and realising that the majority of the house was considerably higher priority and I would probably wait another 5 years at least for my doors, I decided that I would buy some rather nice high gloss ones from Ikea and add my own crystal handles as I really do love and look after my clothes and I didn’t want to wait any longer.

Unfortunately, they no longer do the internal colour units that we have already so good old Ebay came to the rescue.  I also needed at least 7 drawers to match so bided my time until exactly what I wanted came up. The door was wrong but it didn’t matter as they were still available to buy.  After a small amount of haggling Mr Chandelier went and collected the unit and drawers from the most delightful lady called Michelle, who even sent me a text the next day thanking me for my purchase and a message stating she hoped I enjoyed my wardrobe – how sweet is that!

IMG_5106

Anyway, after mumbling something about me “taking over yet another room in the house” Mr Chandelier very kindly put up my new wardrobe very quickly and adapted the bottom 2 drawers for me which had to be drilled and ‘faffed’ with, as the hinge brackets were in the way.  He then handed me the drill and screwdriver and said he would come back in 10 minutes as I should be finished by then – yeah right!  I put them all in and then realised that I had to do it all again because, although the bottom hinges could be worked round, the higher ones couldn’t.  So I took them all out again, re drilled new holes and reconfigured it to try to use every inch of space but those pesky hinges were causing me grief.  The problem was that Ikea has changed the hinge positioning on the new doors but I did of course have the old wardrobe shell.  By this time Sunday was well and truly over and I had come to the most annoying conclusion that if I swapped my new door with one of the old ones – where the drawer positioning isn’t so crucial – then I could literally use every single inch of space – which I so needed as I was never going to fit it all in anyway – Mr C really loved that idea – NOT!

I managed to persuade him to change them over and I did of course, much to Mr Chandeliers total and utter disbelief, take the whole lot out the next day and re-drill and reconfigure the lot – finally I was winning – or so I thought – Hmmm.

It then took me a good week or two to actually sort out and transfer all that fabric and I decided to try to be as ruthless with my fabric as I am being with the rest of the house, not an easy task.  I don’t think Mr Chandelier could actually believe a) the chaos and b) the time it took.  I think he thought he might be hallucinating!

IMG_5135

Whilst this was going on, Baby Chandelier set up the ‘Maileg Team’ to keep a watchful eye on progress whilst having a picnic on my bed.

However, I have just about managed to shoehorn in – and I really do mean shoehorn in – all the beautiful fabrics I want to keep and frankly they just make me want to randomly snatch them and run into my studio to create something – I just love it.  Having lived in such chaos for so many years, the feeling I have is indescribable to finally have such beautiful order.  It really will revolutionise my creative life.

IMG_5054

I can really see all my fabric stock (well most of it anyway) and it will make my life a lot easier, particularly when I am in a hurry or am wanting a particular print that I know I have.  Perhaps best not tell Mr C about the fur department, oilcloth dept, vintage linens dept, tulle and netting dept, organza dept, felt dept, denim dept (I know!), shimmery dept and a sneaky little Peony and Sage, Kate Forman, Susie Watson faded, vintagey kind of style dept which I still need to house within Narnia!  What he can’t fail to miss though, as it is as tall as me – honestly it really is – is that massive pile of fabric that I am getting rid of – it should only take me a couple of years to put on eBay, nooooo.

The moral of this story – Patience with a capital P – although I expect Mr C thinks a straight jacket would be somewhat more appropriate!

Now go sort your fabric out and ‘show and tell’ me how you’ve stored yours.

Happy sorting.

Much Love,

Sarah xx

Craft Storage and organisation – Wooden shapes

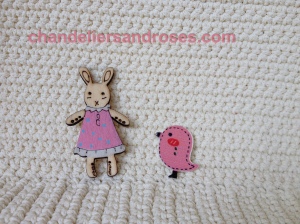
As promised, here is the first post showing some of the storage solutions I have in my studio for craft supplies.  I have started with wooden shapes as I have literally hundreds of them from IMG_4039bunnies and birds to cupcakes and fairies, from watering cans and flowers to hearts and stars, from buckets and spades to butterflies and chicks, from wooden letters to dolly pegs and so, so much more.

 Then of course, there is the Christmas wooden department, with dozens of angels and gingerbread men as I use absolutely loads of these from September onwards, reindeers and stag heads, Christmas trees and baubles, stockings and santa heads – I know – it’s madness but it all has to be housed.  I also have lots and lots of angel and fairy heads in different sizes, gorgeous wooden mushrooms, tiny clothes pegs, beads and wooden sticks – I use these for masts when I make driftwood boats – and       we won’t even mention the several bags of driftwood because frankly that would spin my head!!! IMG_3487

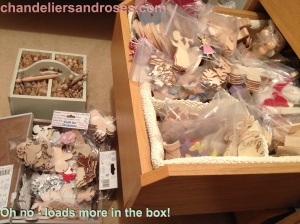
I already had loads pre-September but obviously I had to buy many more (yes really – I had no choice!) for all my Christmas making, so although it was semi organised into bags, all the new stock just caused bedlam and I really could not see what I had without pulling loads of stock out everywhere, adding to my already ‘Hoarder next Door’ roomset lookalike. Some items, like Angels, also needed sub dividing as I have angels for hanging, angels for bunting, angels for cards etc. and numerous styles and sizes.

So you see, when I said in my last post that everything snowballed and took hours and hours and hours, you can start to understand why. IMG_3490IMG_3497

IMG_4072

I bought some of these plastic storage boxes which you can find in lots of places such as The Range and Hobbycraft.  However, the cheapest place I have found them is in a store called Home Bargains and the tiny ones are approx 59p, the medium £1.49 and the large £2.49.  Do definitely shop around as some stores sell an identical product for £8.49 for the large one – madness.  Basically, they have loads of little storage compartments in them and you can take out some of the dividers.

IMG_3988

I also used a fabric jewellery tray on the right hand side as; firstly I needed something with larger compartments for all my hearts and stars and secondly, I wanted to utilise the space I had to the nearest centimetre.

IMG_3982

As you can see, I used a combination of different sizes as that suited me (large, back left and medium front left – I had a gap in the middle where I inserted the large hearts and white flowers) but it does of course depend on where you decide to keep them.  I put mine in the Alex chest of drawers from Ikea, mentioned in my last post.  I also decided to take the lids off carefully and keep them underneath the box itself – they all just fit nicely  That way if I do a workshop away from home, I could in principle take the whole box.  In reality, I probably wouldn’t as I would ‘cherry pick’ the items that I need but it’s good to know that I could!

IMG_4025

For the larger items such as dolly pegs, wooden mushrooms, angel and fairy heads etc., I used the existing drawer with a fabric inner divider (the Komplement drawer divider £15.00) – both are from Ikea – I have a run of drawer units which are actually the drawers designed to go inside Ikea wardrobes – Mr Chandelier cut the wardrobes down as we initially had them elsewhere,  (how amused was he with that one!) and we topped them with worktop.  I have several of the fabric dividers bought purely for my studio – I think they are meant to be used for bathroom supplies and underwear etc., but as with everything in life, they are, what you want them to be!

So there you have it, the first of many storage posts, but I can’t tell you how fantastic it is to be able to pull open a drawer and find what I need instantly – heaven!  It also makes ‘filing’ away everything I didn’t use so much quicker too.

Happy sorting!

Much love

Sarah xxx

Craft Storage Solutions

I don’t know about you, but January – March is my time to catch up and take stock after the complete madness of the Christmas Season, which for me, starts in late Summer / early September.

I have a massive ‘Open House / Christmas Sale’ every November at my house which is held over 3 days and grows each year as most of the people that came the previous year bring someone new, who then brings someone new and so on. It takes me months to make the stock and I make a lot of some things and a few of others and some items are very much one-offs.

IMG_0187

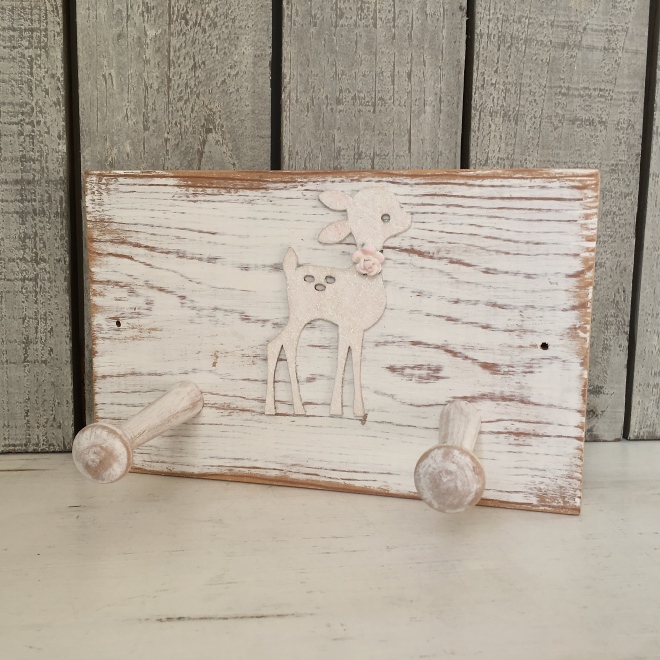
I make an absolute multitude of products from fairies to driftwood boats, from shabby chic handpainted hooks with birds, hearts or flowers to button jars, from cushions to distressed, fabric lined baskets and hampers, from exquisite velvet hair accessories to vintage corsages, from handpainted chairs and shelves to woodland garlands, from faux flowers in vintage pots with tumbling moss to fabric and driftwood collages, from decoupage roses storage boxes to bunny clothes and so very much more – the list is endless. I make whatever comes into my head (believe me, it’s mad in there) and it’s different every week, sometimes every day and I always love to make according to the season.

IMG_0417

I do a few select events as well and at the end of last year I also started creative workshops (I know – what was I thinking!) which were incredibly hard work but amazing fun.  I can’t begin to describe to you the immense feeling that washes over you when someone you have just taught a craft to, is so proud of what they have just made, they can’t believe they have done it and some even call you later to thank you and tell you how “thrilled” they are.  It almost makes you want to cry.   I learnt a lot myself – most people want the social aspect too and nearly every workshop went over time by about an hour (I know, I know!) – no matter how meticulously I planned it!  I have been asked for, and had planned to do anyway, many more workshops throughout the year and once I get order these will commence.

Anyway, the upshot of this, is that my bedroom and my ‘studio’, (which is a large cupboard off my bedroom) – frequently likened to Narnia (it so is!) – is total and utter chaos by Christmas, as after each workshop or making session everything is just dumped on trays or in piles literally everywhere.  No matter how much I promise myself it won’t happen, unfortunately, due to the ridiculous time constraints I place on myself and the sheer volume of products made, it quickly reaches a point where you have to tiptoe and ‘stepping stone’ your way through both rooms.  I also buy a lot of new materials and stock so it very soon looks as if I am filming an episode of ‘Hoarder Next Door’!!!   So, unfortunately, it takes me a few months to adapt my storage and re-install both calm and order. So where did I start?

IMG_3462

This is where I started. The Ikea Alex chest of drawers.

I knew that no amount of super storage techniques or clever tricks were going to resolve this one, oh no.  But then it turned into a bit of a nightmare – oh yes, it really did.  You know when you do something, which affects something else, and then something else which then has this massive snowball effect that you struggle to see an end to – well, that was so me.  I ended up relocating, sorting, dividing and sub-dividing the contents of nearly every drawer – Huge, Massive!  But all Mr Chandelier and the little chandeliers kept seeing was total chaos which really did seem to the average eye to literally get worse every day – no no no!!!        And breathe……

So, for those of you who have craft materials and are unsure how to store them, I will show you my space-saving solutions for each product over the next few weeks, as I slowly finish each category, ready for me to start creating again for my next event – Yay!!!  Believe me, I have a phenomenal amount of materials and a limited amount of space and I need to know exactly what I have and where to find it – if I can get order then absolutely so can you!

Hmmm, where shall we start; how about ribbons, fabric, fabric scraps, bells, bows, wooden shapes (nightmare), flowers (bigger nightmare), lace, cottons, string, wire, paper, card, card making, Christmas, pom-poms, paints, rubber stamps, trimmings, wool, embroidery threads, velvet flowers, jewellery making, beads, sequins, angel heads and angel hair, or simply SPARKLES in every shape and size!?  I could go on (ok, I won’t then!)  –  You’ll just have to wait and see!

Much Love,

Sarah xxx