Craft Storage & Organisation – How to Store Ribbon.

Ok, so I felt it was about time that I did another little storage post as I do have rather a lot of rolls of ribbon and a large amount of ribbon remnants and, as you have probably realised by now, I do buy the odd roll – rarely of course and it is not showing any signs of slowing down.  After doing a rough count a good year or two ago it was 2-300 so by now it will easily be at least 4-450.

Now, I know when we look on luscious pinterest, we see ribbons stored in the most beautiful manner, on wall mounted reels and adorable little shelving units amongst other things.  However, lets be realistic here;

  • Firstly, if you create for a living like me, or even if you are a serious hobbyist, it really does not take long at all to build up a decent stash of ribbon rolls and pieces of ribbon – you don’t see the remnants displayed so beautifully do you?
  • Secondly, in order to store a decent amount of ribbon, you would need to give up a fairly large amount of wall space and you would really want to keep all the ends pinned neatly, so they weren’t all swaying around in the breeze – well you would wouldn’t you!
  • Thirdly, I don’t have any vertical wall space to speak of as my little “Narnia Studio’ has been created from a large cupboard with sloped ceilings on both sides, and at present, it has no window or natural light.
  • Finally, even if I were fortunate enough to have wonderful wall space, I really don’t have the time, or indeed the inclination, to keep my ribbons that neat and tidy all the time – it would be chaos, I know it would – and I really wouldn’t want to give up that much wall space.

So, to that end, how do you store 450 rolls of ribbon and hundreds, if not thousands of ribbon pieces.

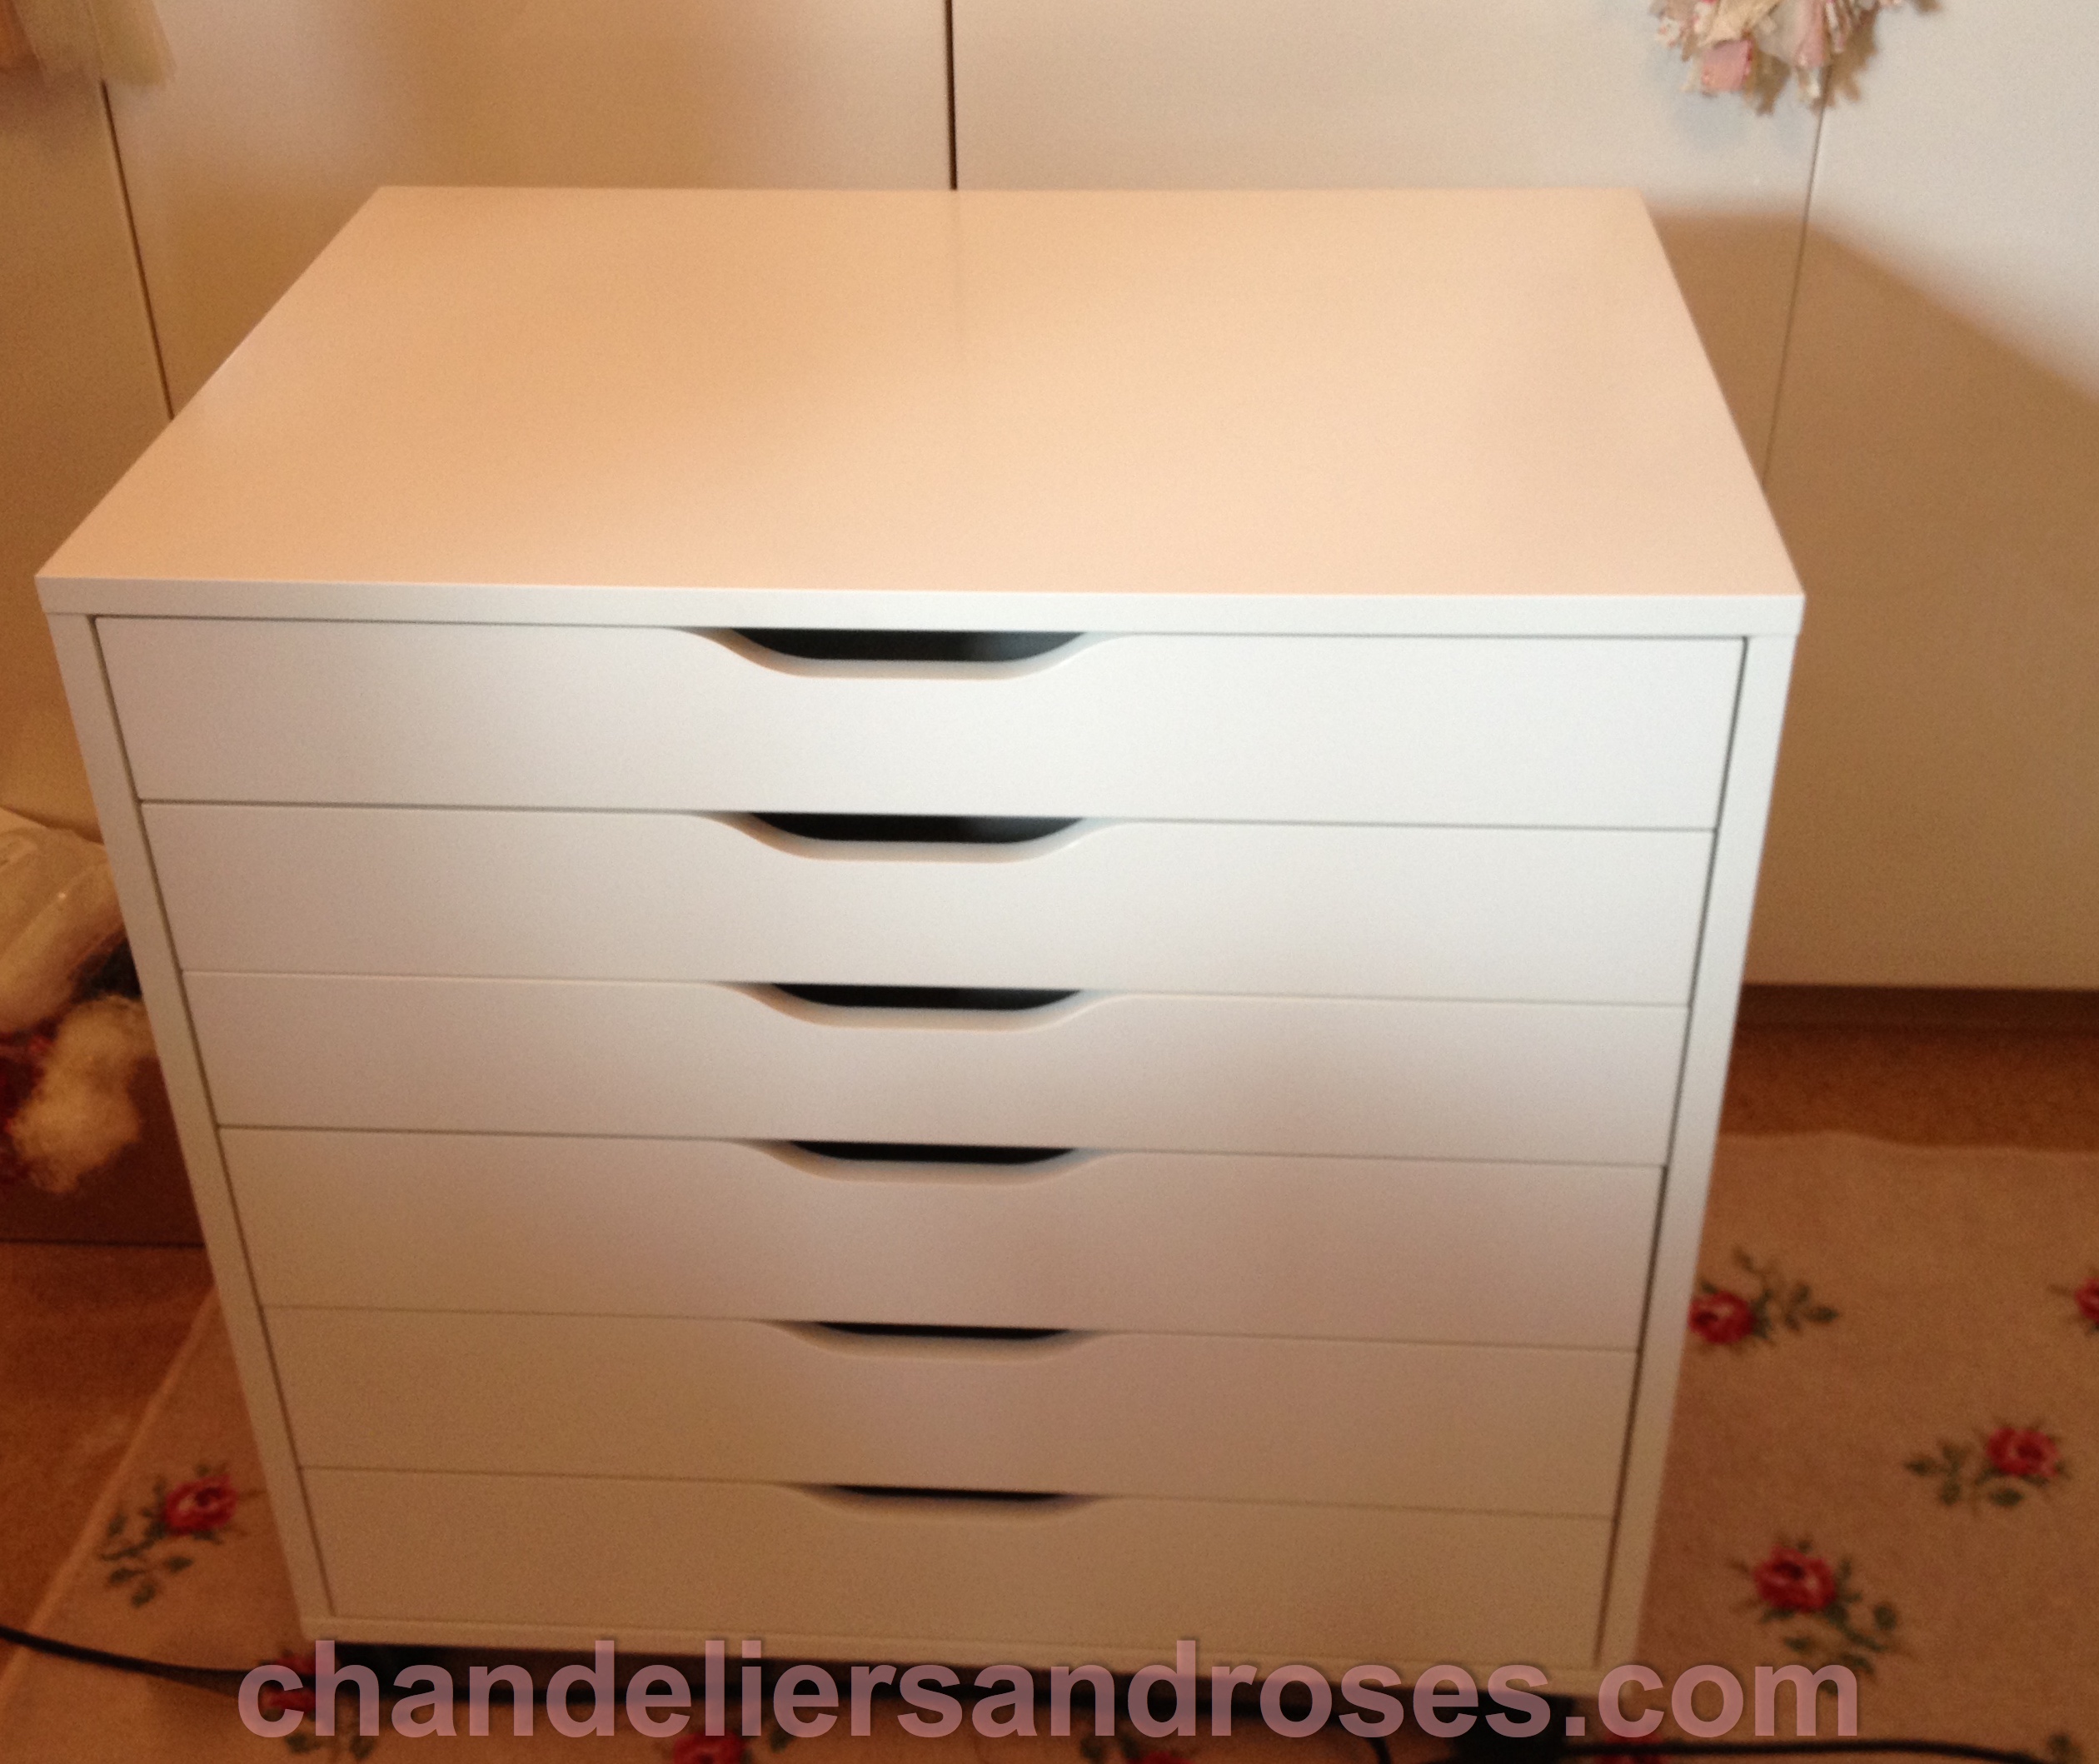
I have tried various different options over the years but to be honest what I have always gone back to, as it has always worked for me, is putting them all in drawers.

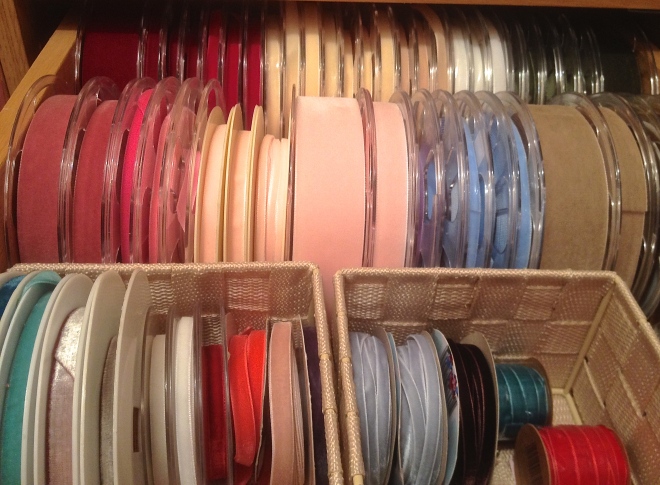
When I create, I tend to always work by colours so that is mostly how I store all the wonderful craft materials that I have collected over the years.

IMG_3437

Firstly I will give all the same type of product a ‘department’ (I know, Mr Chandelier finds all my ‘departments’ highly amusing too!)  Then, I will sub-divide into colours if there are big enough quantities.  So, with the ribbons, I sub-divided into colours and I have a drawer for each colour, or group of colours i.e;  Reds & Pinks each have their own drawer as they are massive for me, Taupes, Creams & Whites share but they really do desperately need their own drawer now, and the Blues,  Greys and Purples share which is just about ok.

Ribbon storage

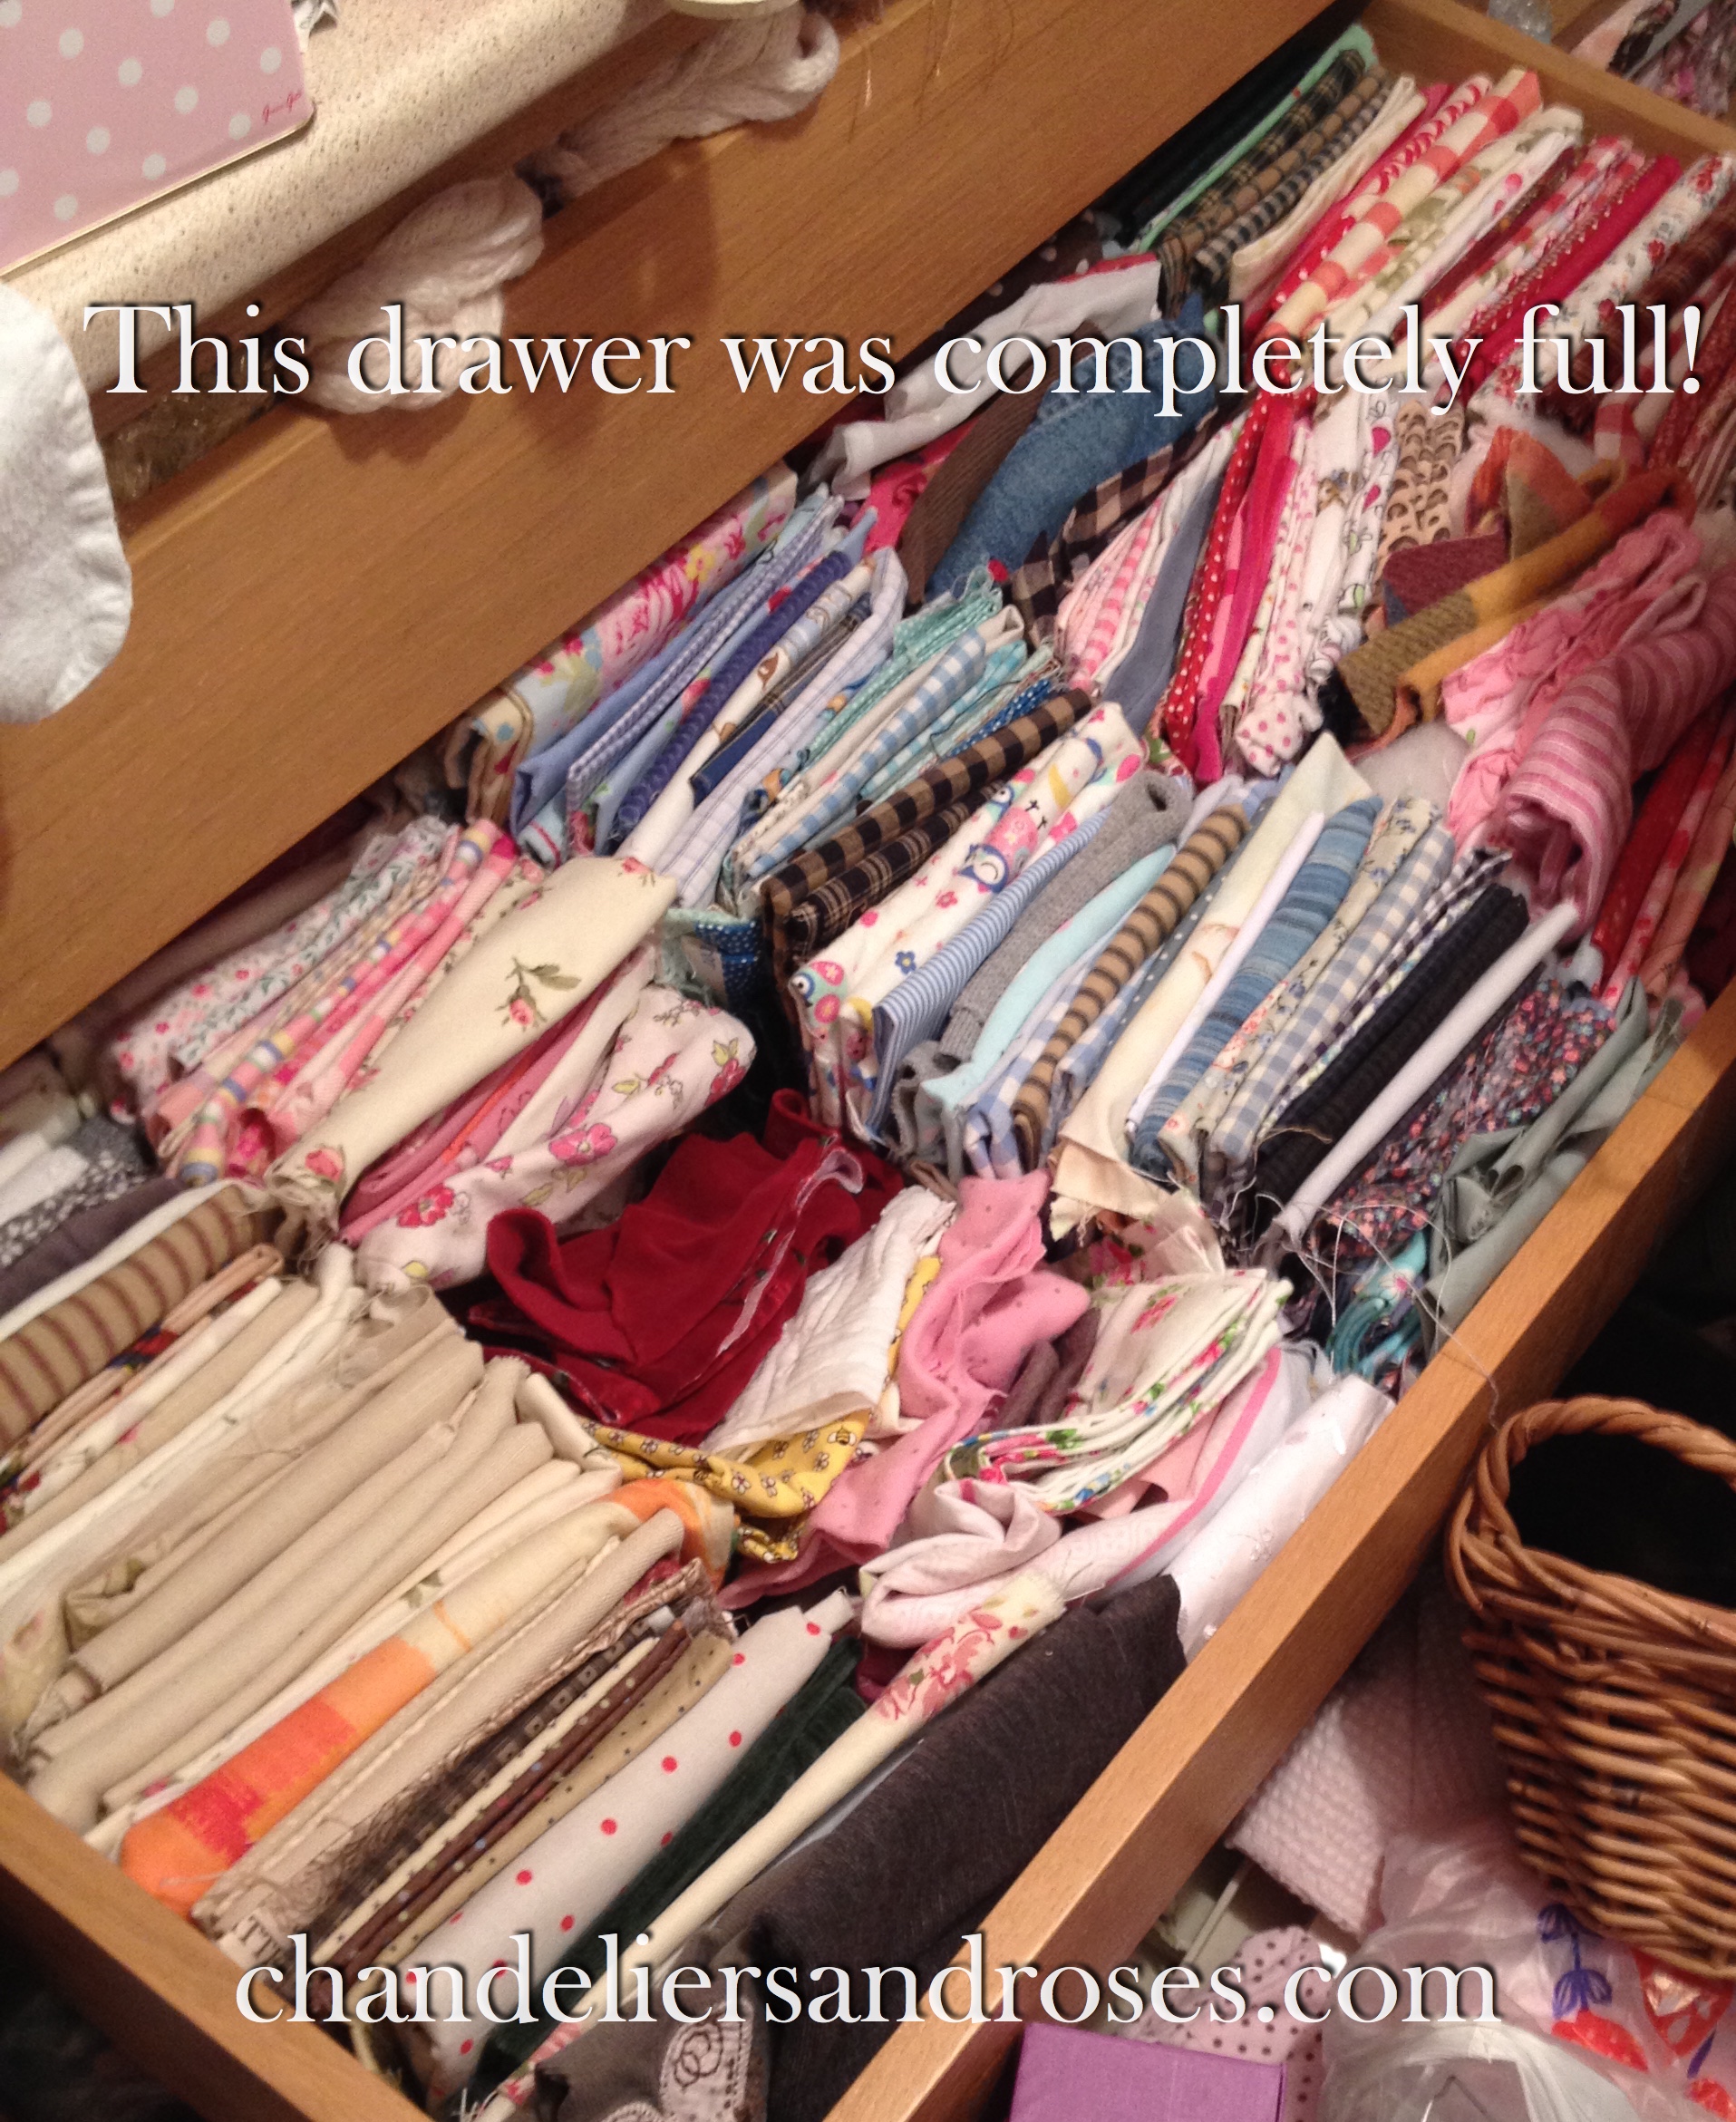
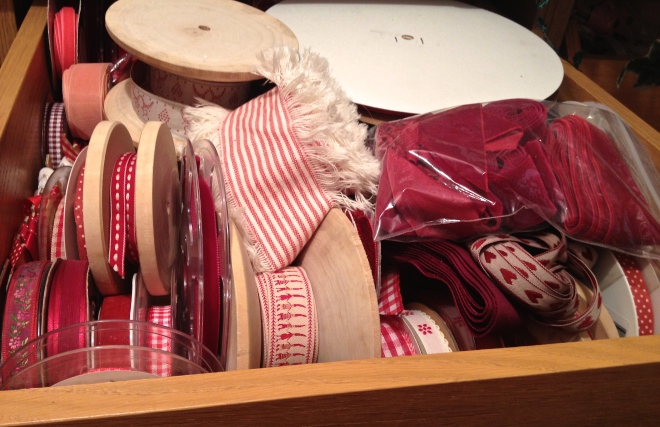
Ribbon storage – This drawer is sooo not going to close!

This all worked fine for years, but it did get to a point of no return a few months ago at Christmas, when each drawer slowly became more and more difficult to close due to the new rolls I had purchased.  When they practically ‘exploded’ like this one upon opening, I knew that a ‘Ribbon crisis point’ had been reached!  I really had to think about this as I totally did not have any more drawers and I just needed approximately one more row per colour.  I also was having real trouble and ‘annoyance’ getting to my velvet ribbons which I use all the time.  Most of them are large tall reels which I had to sit at the back of the drawers as they were so tall, hence the hassle when I needed them.

IMG_3445.JPGAfter yet another ‘Velvet tantrum’ it suddenly struck me!  How about creating an incredibly luscious ‘Velvets Department’  –  this was the perfect answer, as not only would that generate another row per drawer for the other ribbons, but I would be able to get to them easily in their own drawer, and as I use them so often, I felt they had totally ‘earnt’ their own space!  However, this did unfortunately mean I had to sacrifice a drawer which had some other materials and supplies in it, which still don’t have a home, but we will just ‘brush on over that’ and focus on our luscious velvets!

IMG_0929

Just look at these – they’re almost edible.

You so know how I feel about velvet ribbons so imagine opening a drawer full of them in loads of different colours…….Omg……..Ribbon Heaven……..Love Love Love it!

Now, how do you deal with all the remnants.  Again, it doesn’t take long when as I do, you use ribbons all the time, so I had to deal with these remnants many years ago.  If you don’t have that many, they do look really pretty stored into glass jars  –  ‘not that many’ however, does not seem to be in my vocabulary (Mr Chandelier would so agree with that!)

IMG_0939.jpg

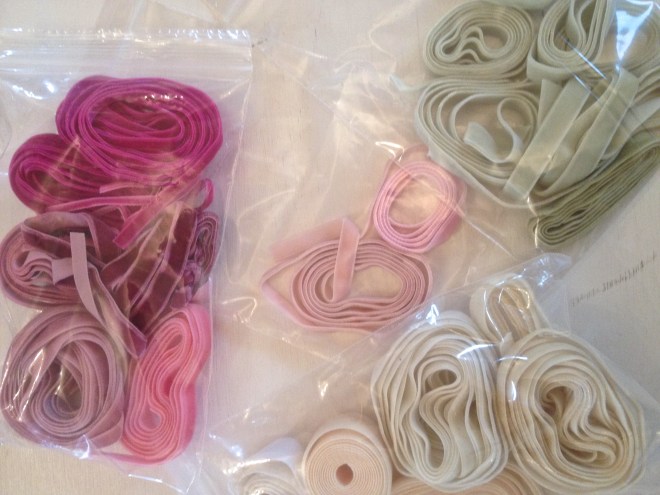
The most space saving, easy to find, easy to view solution was to store them rolled into small self closing, clear bags within their own colours.  They can then sit on top of the rolls of ribbon and when you want a certain colour you can pick them up really easily and see both what scraps you have and what the rolls of ribbon are underneath.  It also works really well when I have a workshop, as  I can just take down a few bags of remnants with some rolls and it gives everyone loads of different choices.

To roll the ribbon pieces up, trap the end between your two fingers and then wrap the rest around all your fingers, until it is all nicely rolled into a neat circle.

Obviously, in an Ideal world, (if such a world were to exist) I would have a drawer for just the remnants of each colour but frankly that is just a fantasy world – let’s aim for a window first!!!


Velvet ribbons

So here they are, all looking rather lush, screaming at me to touch them and use them and snip a bit off to enhance whatever project it is I am working on.  Incidentally, just between you and me, I don’t know why I make out I am working on ‘a project’ like a normal person when the reality is ‘a lot of half finished projects’, some dating back many years  –  ok ok, maybe just one or two are at least 10+ years old…….Nooooo!  We will just pretend I am normal shall we?……Hmmm…….

How do you store your ribbons – I would love to know – do you break down into colours and what about your remnants?

Go and have a ‘Happy Sorting Day’.

Much Love,

Sarah xx


Craft Storage and Organisation – How to store Fabric.

I have been buying fabric since I was 6 years old and it would be fair to say that I have a very large collection of most types of fabric, in vastly different sized pieces and in many different patterns and colourways.

IMG_5050

Over the years I have tried numerous different methods of storing it, usually with limited space.  My first ever solution – when it was tiny – was a basket.  Obviously, I very quickly outgrew ‘the basket’ and from thereon in, I always stored the majority of it on shelving of one kind or another.  The exception being my ‘scraps’ which, as they are so frequently used, have their own baskets which are broken down into colours.

As at a few weeks ago, I had fabric rammed into what seemed like every corner of my studio.  It was mostly on various different shelves, although I had quite a bit in a large drawer, some in storage tubs, some in my ‘fabric filing tray’ quite a bit on the floor – actually quite a lot on the floor – and even some new fabric in bags both inside and outside my studio (naughty!)

IMG_5044

With all this ‘fabric chaos’, a considerable amount of ‘tripping over’ and a constant ‘fabric avalanche’ each time I tried to make something, I had a bit of a ‘fabric meltdown‘.

IMG_5115

Although It was all (mostly) colour coded and all fabric such as felt, tulle, organza, ‘shimmeries’, etc. had their own departments, there was certainly order, but I couldn’t really see properly what I had, let alone access it in a hurry.  The reason for this was simple.  The problem with shelves is that whilst they are fine for large pieces of fabric, e.g. 4 or 5 metre pieces, when it is sorted by colour – which is how I work – you do tend to have lots of different sized pieces and this generates pyramid-shaped piles.  When space is an issue, one tends to slot more fabric into the gaps.  Fabric is heavy, particularly large pieces and with the best will in the world, it’s just not feasible to put it back exactly how it came out, especially if it is at the bottom of the pile.  I had also run out of space.

Something had to change.  I had been mulling over this problem for some time and had come to the conclusion that my ideal would be to put all the fabric into drawers as it is a lot easier to access, you can see exactly what you have and drawers can cope more readily with varying sizes.  I have also so outgrown my little ‘Narnia’ studio and would ideally like to store the fabric somewhere else – but where?  The house was already bursting at the seams and I really, really had nowhere else for it to go other than my bedroom.  So it was with great reluctance, that I finally accepted that I would have to give up a bit of bedroom space and add another single wardrobe to my run of units, which I could then dedicate to my ‘stash’.

IMG_4984

I so did not want to lose this sweet little corner, even though the chair is normally covered in clothes!

We bought the original units from Ikea as they are fantastic for internal storage within their wardrobes and have drawers and pull out jewellery trays and loads of other fab add-ons you can buy.  Originally, we had the intention of making our own wooden doors for them however, 5 years ago, after 2 years of living here and realising that the majority of the house was considerably higher priority and I would probably wait another 5 years at least for my doors, I decided that I would buy some rather nice high gloss ones from Ikea and add my own crystal handles as I really do love and look after my clothes and I didn’t want to wait any longer.

Unfortunately, they no longer do the internal colour units that we have already so good old Ebay came to the rescue.  I also needed at least 7 drawers to match so bided my time until exactly what I wanted came up. The door was wrong but it didn’t matter as they were still available to buy.  After a small amount of haggling Mr Chandelier went and collected the unit and drawers from the most delightful lady called Michelle, who even sent me a text the next day thanking me for my purchase and a message stating she hoped I enjoyed my wardrobe – how sweet is that!

IMG_5106

Anyway, after mumbling something about me “taking over yet another room in the house” Mr Chandelier very kindly put up my new wardrobe very quickly and adapted the bottom 2 drawers for me which had to be drilled and ‘faffed’ with, as the hinge brackets were in the way.  He then handed me the drill and screwdriver and said he would come back in 10 minutes as I should be finished by then – yeah right!  I put them all in and then realised that I had to do it all again because, although the bottom hinges could be worked round, the higher ones couldn’t.  So I took them all out again, re drilled new holes and reconfigured it to try to use every inch of space but those pesky hinges were causing me grief.  The problem was that Ikea has changed the hinge positioning on the new doors but I did of course have the old wardrobe shell.  By this time Sunday was well and truly over and I had come to the most annoying conclusion that if I swapped my new door with one of the old ones – where the drawer positioning isn’t so crucial – then I could literally use every single inch of space – which I so needed as I was never going to fit it all in anyway – Mr C really loved that idea – NOT!

I managed to persuade him to change them over and I did of course, much to Mr Chandeliers total and utter disbelief, take the whole lot out the next day and re-drill and reconfigure the lot – finally I was winning – or so I thought – Hmmm.

It then took me a good week or two to actually sort out and transfer all that fabric and I decided to try to be as ruthless with my fabric as I am being with the rest of the house, not an easy task.  I don’t think Mr Chandelier could actually believe a) the chaos and b) the time it took.  I think he thought he might be hallucinating!

IMG_5135

Whilst this was going on, Baby Chandelier set up the ‘Maileg Team’ to keep a watchful eye on progress whilst having a picnic on my bed.

However, I have just about managed to shoehorn in – and I really do mean shoehorn in – all the beautiful fabrics I want to keep and frankly they just make me want to randomly snatch them and run into my studio to create something – I just love it.  Having lived in such chaos for so many years, the feeling I have is indescribable to finally have such beautiful order.  It really will revolutionise my creative life.

IMG_5054

I can really see all my fabric stock (well most of it anyway) and it will make my life a lot easier, particularly when I am in a hurry or am wanting a particular print that I know I have.  Perhaps best not tell Mr C about the fur department, oilcloth dept, vintage linens dept, tulle and netting dept, organza dept, felt dept, denim dept (I know!), shimmery dept and a sneaky little Peony and Sage, Kate Forman, Susie Watson faded, vintagey kind of style dept which I still need to house within Narnia!  What he can’t fail to miss though, as it is as tall as me – honestly it really is – is that massive pile of fabric that I am getting rid of – it should only take me a couple of years to put on eBay, nooooo.

The moral of this story – Patience with a capital P – although I expect Mr C thinks a straight jacket would be somewhat more appropriate!

Now go sort your fabric out and ‘show and tell’ me how you’ve stored yours.

Happy sorting.

Much Love,

Sarah xx

Craft Storage and organisation – Wooden shapes

As promised, here is the first post showing some of the storage solutions I have in my studio for craft supplies.  I have started with wooden shapes as I have literally hundreds of them from IMG_4039bunnies and birds to cupcakes and fairies, from watering cans and flowers to hearts and stars, from buckets and spades to butterflies and chicks, from wooden letters to dolly pegs and so, so much more.

 Then of course, there is the Christmas wooden department, with dozens of angels and gingerbread men as I use absolutely loads of these from September onwards, reindeers and stag heads, Christmas trees and baubles, stockings and santa heads – I know – it’s madness but it all has to be housed.  I also have lots and lots of angel and fairy heads in different sizes, gorgeous wooden mushrooms, tiny clothes pegs, beads and wooden sticks – I use these for masts when I make driftwood boats – and       we won’t even mention the several bags of driftwood because frankly that would spin my head!!! IMG_3487

I already had loads pre-September but obviously I had to buy many more (yes really – I had no choice!) for all my Christmas making, so although it was semi organised into bags, all the new stock just caused bedlam and I really could not see what I had without pulling loads of stock out everywhere, adding to my already ‘Hoarder next Door’ roomset lookalike. Some items, like Angels, also needed sub dividing as I have angels for hanging, angels for bunting, angels for cards etc. and numerous styles and sizes.

So you see, when I said in my last post that everything snowballed and took hours and hours and hours, you can start to understand why. IMG_3490IMG_3497

IMG_4072

I bought some of these plastic storage boxes which you can find in lots of places such as The Range and Hobbycraft.  However, the cheapest place I have found them is in a store called Home Bargains and the tiny ones are approx 59p, the medium £1.49 and the large £2.49.  Do definitely shop around as some stores sell an identical product for £8.49 for the large one – madness.  Basically, they have loads of little storage compartments in them and you can take out some of the dividers.

IMG_3988

I also used a fabric jewellery tray on the right hand side as; firstly I needed something with larger compartments for all my hearts and stars and secondly, I wanted to utilise the space I had to the nearest centimetre.

IMG_3982

As you can see, I used a combination of different sizes as that suited me (large, back left and medium front left – I had a gap in the middle where I inserted the large hearts and white flowers) but it does of course depend on where you decide to keep them.  I put mine in the Alex chest of drawers from Ikea, mentioned in my last post.  I also decided to take the lids off carefully and keep them underneath the box itself – they all just fit nicely  That way if I do a workshop away from home, I could in principle take the whole box.  In reality, I probably wouldn’t as I would ‘cherry pick’ the items that I need but it’s good to know that I could!

IMG_4025

For the larger items such as dolly pegs, wooden mushrooms, angel and fairy heads etc., I used the existing drawer with a fabric inner divider (the Komplement drawer divider £15.00) – both are from Ikea – I have a run of drawer units which are actually the drawers designed to go inside Ikea wardrobes – Mr Chandelier cut the wardrobes down as we initially had them elsewhere,  (how amused was he with that one!) and we topped them with worktop.  I have several of the fabric dividers bought purely for my studio – I think they are meant to be used for bathroom supplies and underwear etc., but as with everything in life, they are, what you want them to be!

So there you have it, the first of many storage posts, but I can’t tell you how fantastic it is to be able to pull open a drawer and find what I need instantly – heaven!  It also makes ‘filing’ away everything I didn’t use so much quicker too.

Happy sorting!

Much love

Sarah xxx

Craft Storage Solutions

I don’t know about you, but January – March is my time to catch up and take stock after the complete madness of the Christmas Season, which for me, starts in late Summer / early September.

I have a massive ‘Open House / Christmas Sale’ every November at my house which is held over 3 days and grows each year as most of the people that came the previous year bring someone new, who then brings someone new and so on. It takes me months to make the stock and I make a lot of some things and a few of others and some items are very much one-offs.

IMG_0187

I make an absolute multitude of products from fairies to driftwood boats, from shabby chic handpainted hooks with birds, hearts or flowers to button jars, from cushions to distressed, fabric lined baskets and hampers, from exquisite velvet hair accessories to vintage corsages, from handpainted chairs and shelves to woodland garlands, from faux flowers in vintage pots with tumbling moss to fabric and driftwood collages, from decoupage roses storage boxes to bunny clothes and so very much more – the list is endless. I make whatever comes into my head (believe me, it’s mad in there) and it’s different every week, sometimes every day and I always love to make according to the season.

IMG_0417

I do a few select events as well and at the end of last year I also started creative workshops (I know – what was I thinking!) which were incredibly hard work but amazing fun.  I can’t begin to describe to you the immense feeling that washes over you when someone you have just taught a craft to, is so proud of what they have just made, they can’t believe they have done it and some even call you later to thank you and tell you how “thrilled” they are.  It almost makes you want to cry.   I learnt a lot myself – most people want the social aspect too and nearly every workshop went over time by about an hour (I know, I know!) – no matter how meticulously I planned it!  I have been asked for, and had planned to do anyway, many more workshops throughout the year and once I get order these will commence.

Anyway, the upshot of this, is that my bedroom and my ‘studio’, (which is a large cupboard off my bedroom) – frequently likened to Narnia (it so is!) – is total and utter chaos by Christmas, as after each workshop or making session everything is just dumped on trays or in piles literally everywhere.  No matter how much I promise myself it won’t happen, unfortunately, due to the ridiculous time constraints I place on myself and the sheer volume of products made, it quickly reaches a point where you have to tiptoe and ‘stepping stone’ your way through both rooms.  I also buy a lot of new materials and stock so it very soon looks as if I am filming an episode of ‘Hoarder Next Door’!!!   So, unfortunately, it takes me a few months to adapt my storage and re-install both calm and order. So where did I start?

IMG_3462

This is where I started. The Ikea Alex chest of drawers.

I knew that no amount of super storage techniques or clever tricks were going to resolve this one, oh no.  But then it turned into a bit of a nightmare – oh yes, it really did.  You know when you do something, which affects something else, and then something else which then has this massive snowball effect that you struggle to see an end to – well, that was so me.  I ended up relocating, sorting, dividing and sub-dividing the contents of nearly every drawer – Huge, Massive!  But all Mr Chandelier and the little chandeliers kept seeing was total chaos which really did seem to the average eye to literally get worse every day – no no no!!!        And breathe……

So, for those of you who have craft materials and are unsure how to store them, I will show you my space-saving solutions for each product over the next few weeks, as I slowly finish each category, ready for me to start creating again for my next event – Yay!!!  Believe me, I have a phenomenal amount of materials and a limited amount of space and I need to know exactly what I have and where to find it – if I can get order then absolutely so can you!

Hmmm, where shall we start; how about ribbons, fabric, fabric scraps, bells, bows, wooden shapes (nightmare), flowers (bigger nightmare), lace, cottons, string, wire, paper, card, card making, Christmas, pom-poms, paints, rubber stamps, trimmings, wool, embroidery threads, velvet flowers, jewellery making, beads, sequins, angel heads and angel hair, or simply SPARKLES in every shape and size!?  I could go on (ok, I won’t then!)  –  You’ll just have to wait and see!

Much Love,

Sarah xxx