Craft Storage and organisation – Wooden shapes

As promised, here is the first post showing some of the storage solutions I have in my studio for craft supplies.  I have started with wooden shapes as I have literally hundreds of them from IMG_4039bunnies and birds to cupcakes and fairies, from watering cans and flowers to hearts and stars, from buckets and spades to butterflies and chicks, from wooden letters to dolly pegs and so, so much more.

 Then of course, there is the Christmas wooden department, with dozens of angels and gingerbread men as I use absolutely loads of these from September onwards, reindeers and stag heads, Christmas trees and baubles, stockings and santa heads – I know – it’s madness but it all has to be housed.  I also have lots and lots of angel and fairy heads in different sizes, gorgeous wooden mushrooms, tiny clothes pegs, beads and wooden sticks – I use these for masts when I make driftwood boats – and       we won’t even mention the several bags of driftwood because frankly that would spin my head!!! IMG_3487

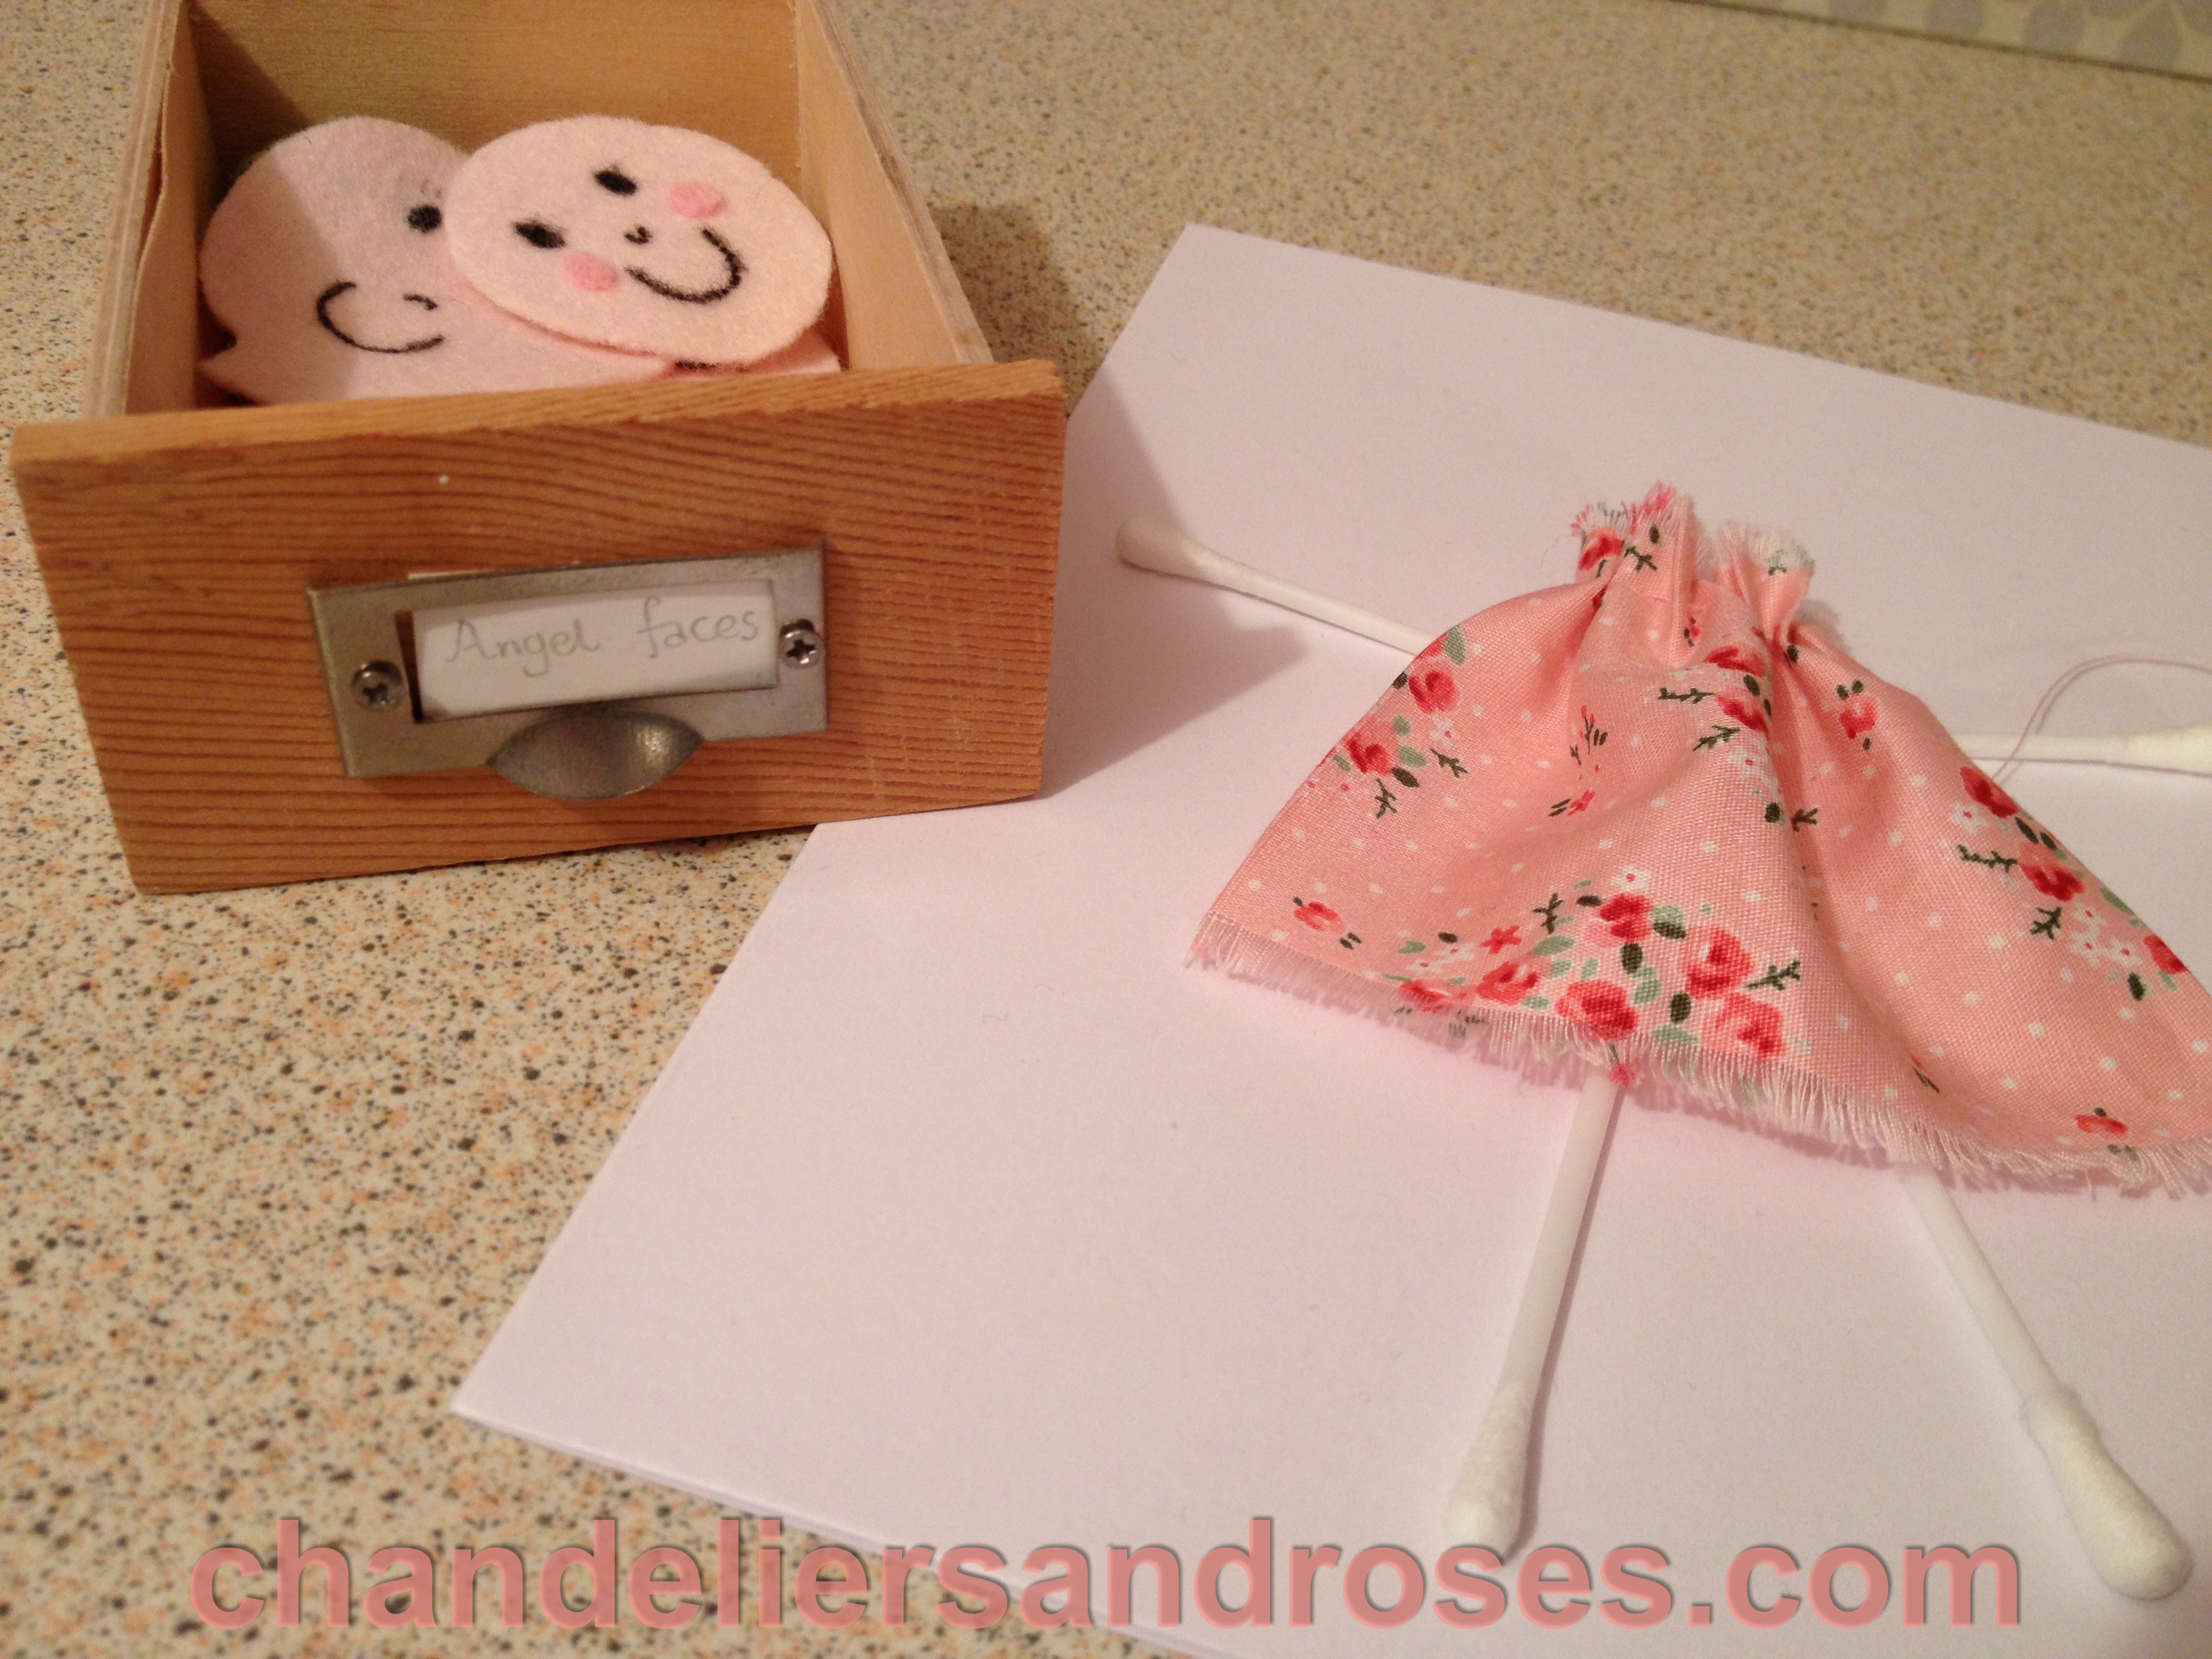
I already had loads pre-September but obviously I had to buy many more (yes really – I had no choice!) for all my Christmas making, so although it was semi organised into bags, all the new stock just caused bedlam and I really could not see what I had without pulling loads of stock out everywhere, adding to my already ‘Hoarder next Door’ roomset lookalike. Some items, like Angels, also needed sub dividing as I have angels for hanging, angels for bunting, angels for cards etc. and numerous styles and sizes.

So you see, when I said in my last post that everything snowballed and took hours and hours and hours, you can start to understand why. IMG_3490IMG_3497

IMG_4072

I bought some of these plastic storage boxes which you can find in lots of places such as The Range and Hobbycraft.  However, the cheapest place I have found them is in a store called Home Bargains and the tiny ones are approx 59p, the medium £1.49 and the large £2.49.  Do definitely shop around as some stores sell an identical product for £8.49 for the large one – madness.  Basically, they have loads of little storage compartments in them and you can take out some of the dividers.

IMG_3988

I also used a fabric jewellery tray on the right hand side as; firstly I needed something with larger compartments for all my hearts and stars and secondly, I wanted to utilise the space I had to the nearest centimetre.

IMG_3982

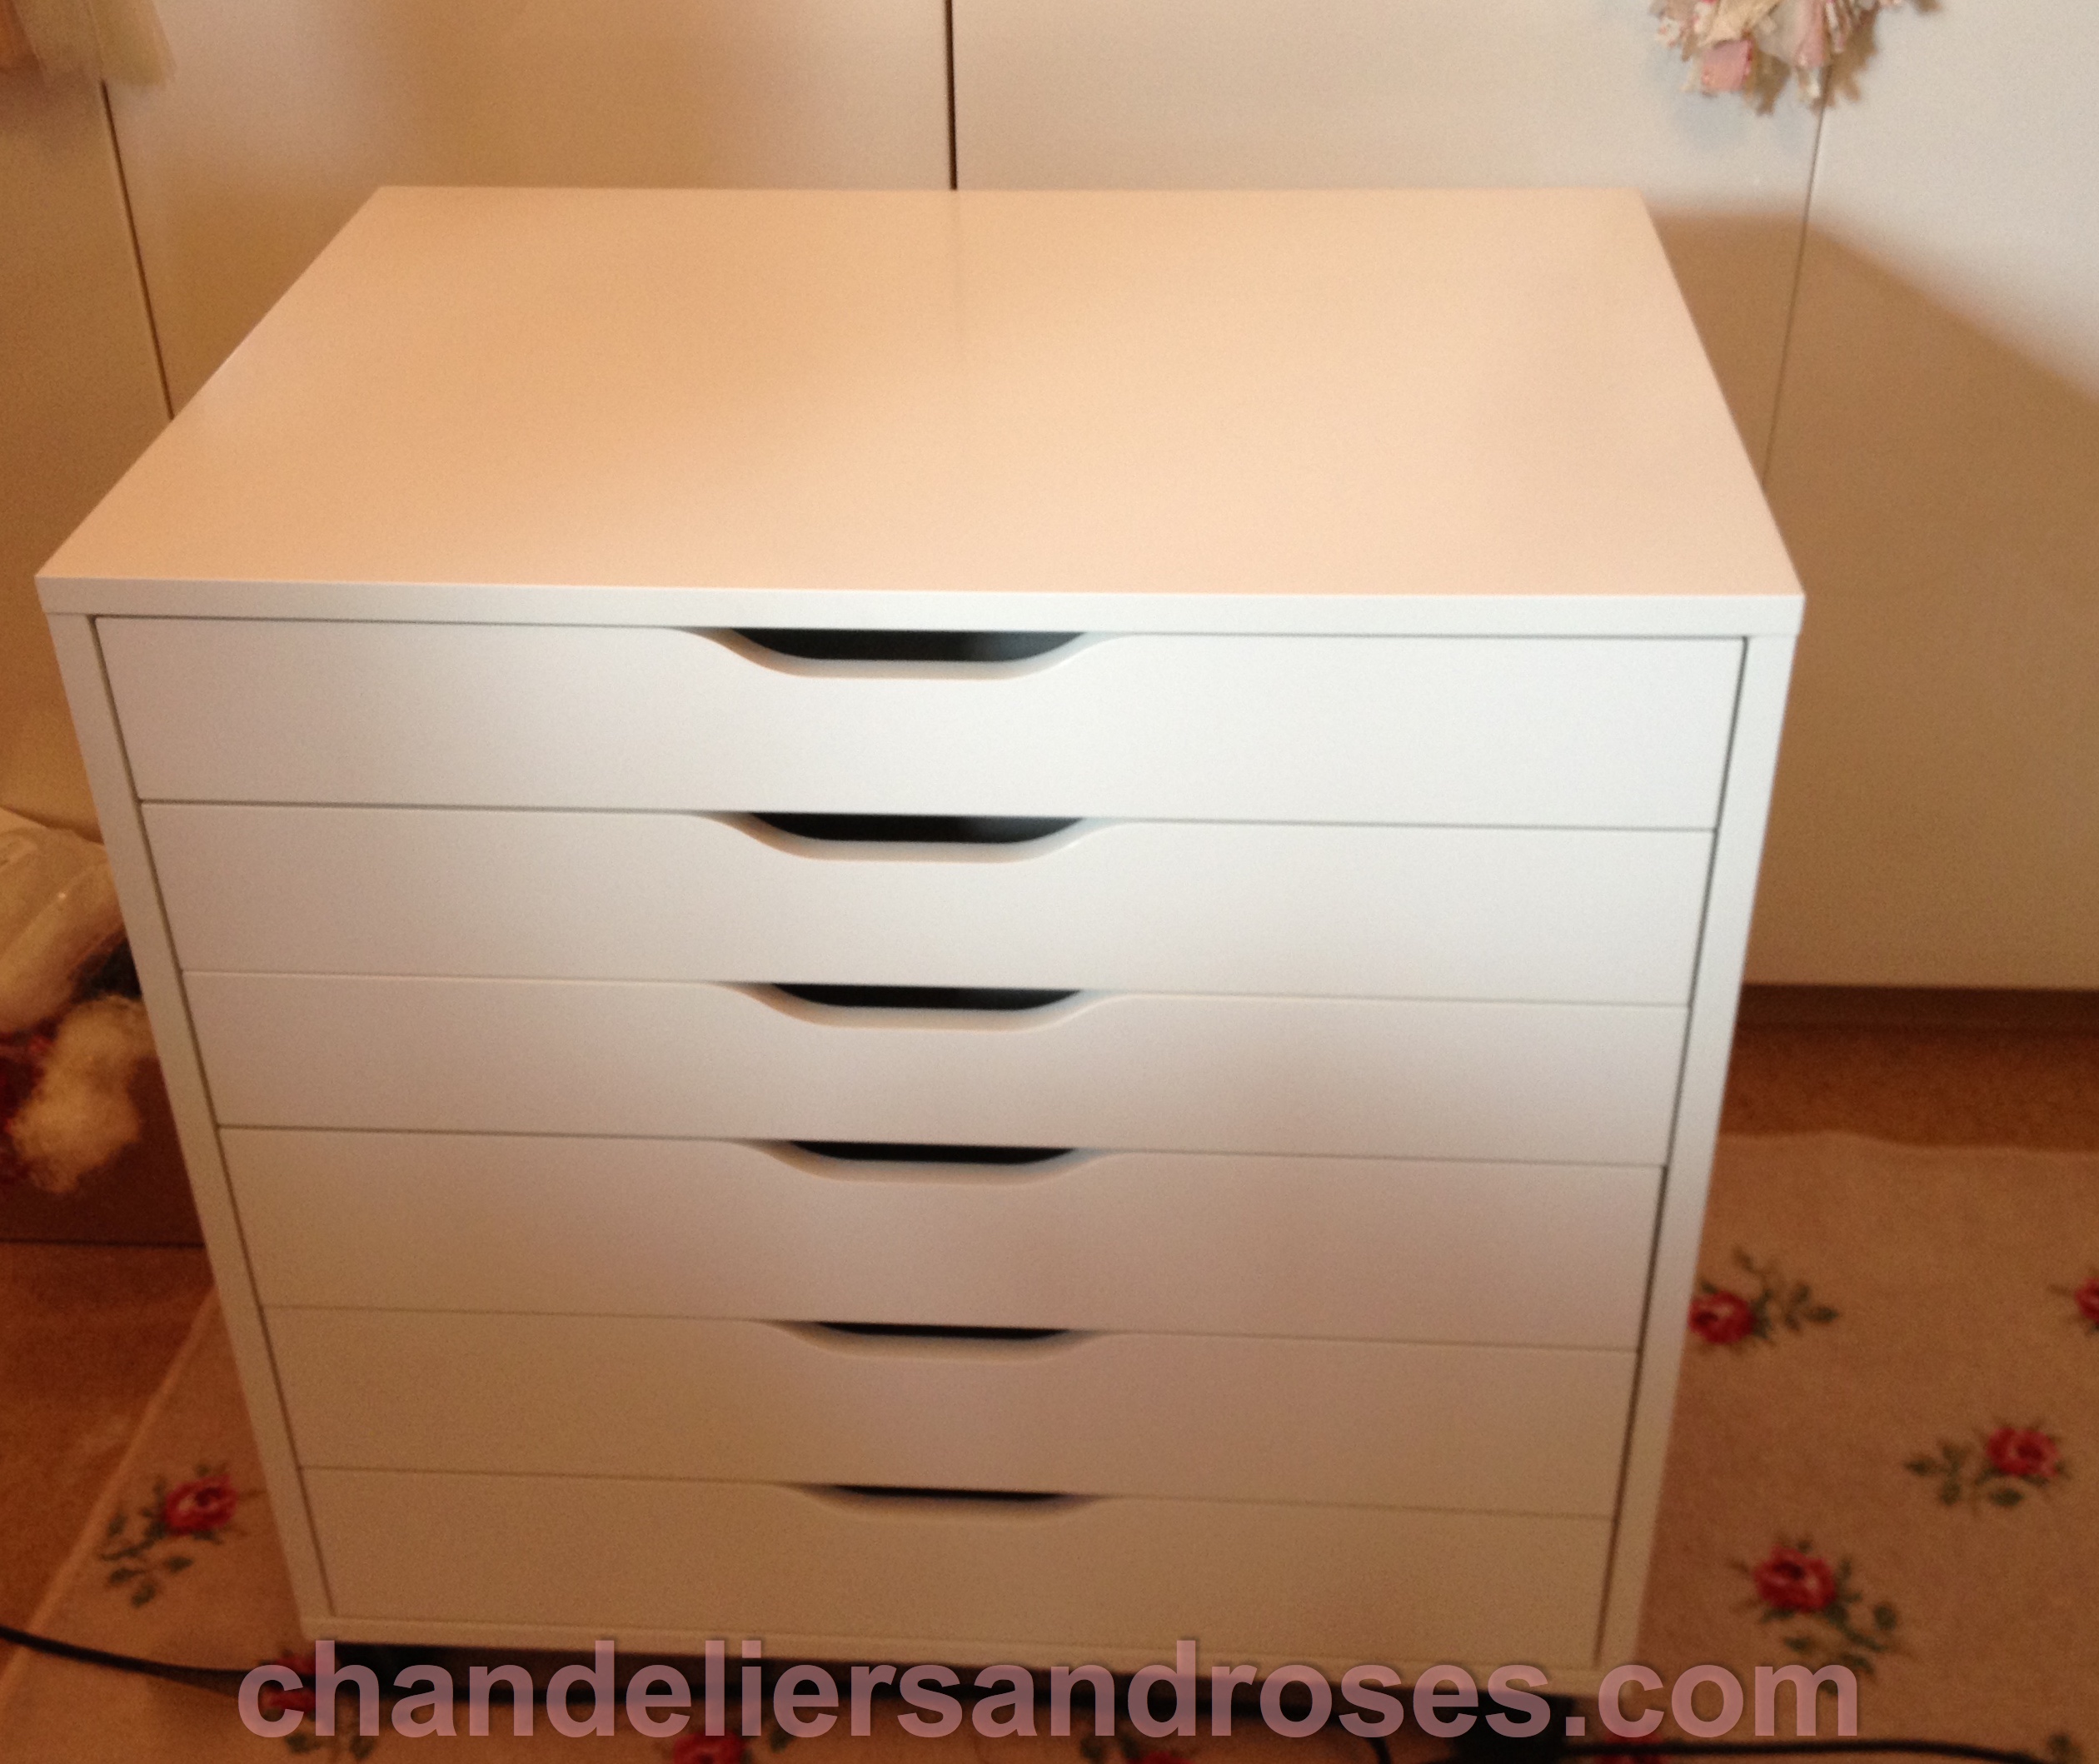
As you can see, I used a combination of different sizes as that suited me (large, back left and medium front left – I had a gap in the middle where I inserted the large hearts and white flowers) but it does of course depend on where you decide to keep them.  I put mine in the Alex chest of drawers from Ikea, mentioned in my last post.  I also decided to take the lids off carefully and keep them underneath the box itself – they all just fit nicely  That way if I do a workshop away from home, I could in principle take the whole box.  In reality, I probably wouldn’t as I would ‘cherry pick’ the items that I need but it’s good to know that I could!

IMG_4025

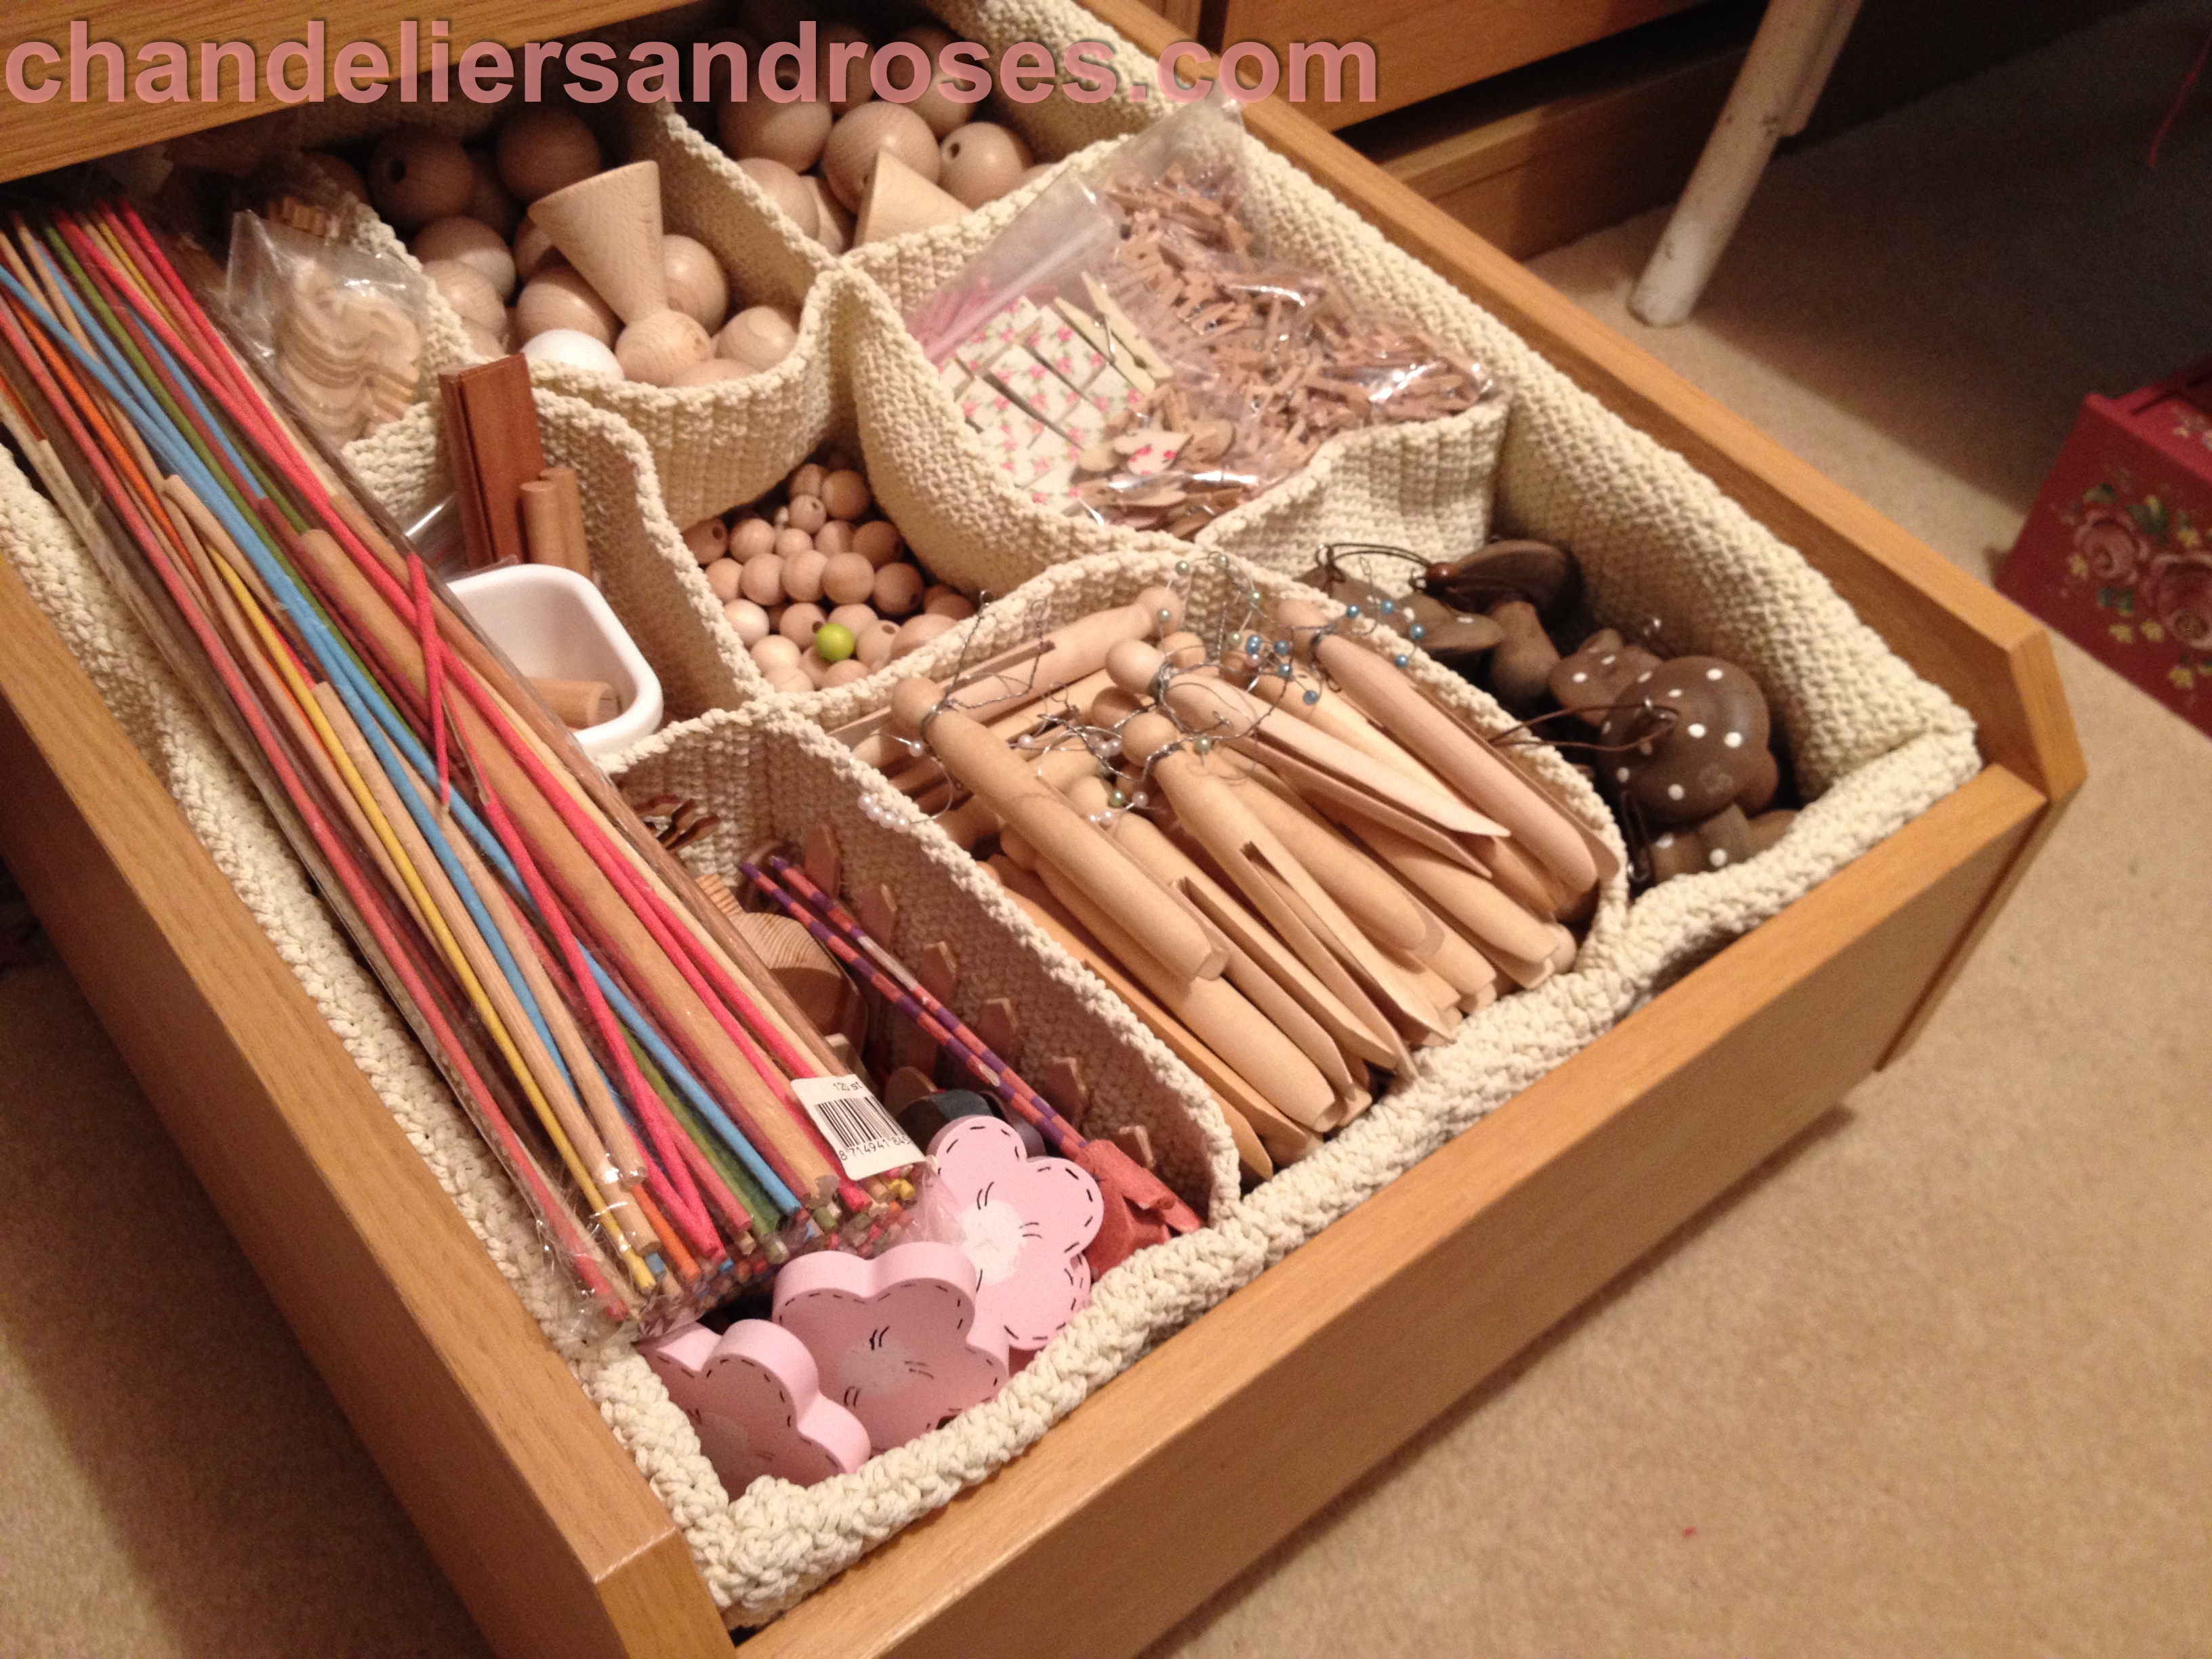
For the larger items such as dolly pegs, wooden mushrooms, angel and fairy heads etc., I used the existing drawer with a fabric inner divider (the Komplement drawer divider £15.00) – both are from Ikea – I have a run of drawer units which are actually the drawers designed to go inside Ikea wardrobes – Mr Chandelier cut the wardrobes down as we initially had them elsewhere,  (how amused was he with that one!) and we topped them with worktop.  I have several of the fabric dividers bought purely for my studio – I think they are meant to be used for bathroom supplies and underwear etc., but as with everything in life, they are, what you want them to be!

So there you have it, the first of many storage posts, but I can’t tell you how fantastic it is to be able to pull open a drawer and find what I need instantly – heaven!  It also makes ‘filing’ away everything I didn’t use so much quicker too.

Happy sorting!

Much love

Sarah xxx

Craft Storage Solutions

I don’t know about you, but January – March is my time to catch up and take stock after the complete madness of the Christmas Season, which for me, starts in late Summer / early September.

I have a massive ‘Open House / Christmas Sale’ every November at my house which is held over 3 days and grows each year as most of the people that came the previous year bring someone new, who then brings someone new and so on. It takes me months to make the stock and I make a lot of some things and a few of others and some items are very much one-offs.

IMG_0187

I make an absolute multitude of products from fairies to driftwood boats, from shabby chic handpainted hooks with birds, hearts or flowers to button jars, from cushions to distressed, fabric lined baskets and hampers, from exquisite velvet hair accessories to vintage corsages, from handpainted chairs and shelves to woodland garlands, from faux flowers in vintage pots with tumbling moss to fabric and driftwood collages, from decoupage roses storage boxes to bunny clothes and so very much more – the list is endless. I make whatever comes into my head (believe me, it’s mad in there) and it’s different every week, sometimes every day and I always love to make according to the season.

IMG_0417

I do a few select events as well and at the end of last year I also started creative workshops (I know – what was I thinking!) which were incredibly hard work but amazing fun.  I can’t begin to describe to you the immense feeling that washes over you when someone you have just taught a craft to, is so proud of what they have just made, they can’t believe they have done it and some even call you later to thank you and tell you how “thrilled” they are.  It almost makes you want to cry.   I learnt a lot myself – most people want the social aspect too and nearly every workshop went over time by about an hour (I know, I know!) – no matter how meticulously I planned it!  I have been asked for, and had planned to do anyway, many more workshops throughout the year and once I get order these will commence.

Anyway, the upshot of this, is that my bedroom and my ‘studio’, (which is a large cupboard off my bedroom) – frequently likened to Narnia (it so is!) – is total and utter chaos by Christmas, as after each workshop or making session everything is just dumped on trays or in piles literally everywhere.  No matter how much I promise myself it won’t happen, unfortunately, due to the ridiculous time constraints I place on myself and the sheer volume of products made, it quickly reaches a point where you have to tiptoe and ‘stepping stone’ your way through both rooms.  I also buy a lot of new materials and stock so it very soon looks as if I am filming an episode of ‘Hoarder Next Door’!!!   So, unfortunately, it takes me a few months to adapt my storage and re-install both calm and order. So where did I start?

IMG_3462

This is where I started. The Ikea Alex chest of drawers.

I knew that no amount of super storage techniques or clever tricks were going to resolve this one, oh no.  But then it turned into a bit of a nightmare – oh yes, it really did.  You know when you do something, which affects something else, and then something else which then has this massive snowball effect that you struggle to see an end to – well, that was so me.  I ended up relocating, sorting, dividing and sub-dividing the contents of nearly every drawer – Huge, Massive!  But all Mr Chandelier and the little chandeliers kept seeing was total chaos which really did seem to the average eye to literally get worse every day – no no no!!!        And breathe……

So, for those of you who have craft materials and are unsure how to store them, I will show you my space-saving solutions for each product over the next few weeks, as I slowly finish each category, ready for me to start creating again for my next event – Yay!!!  Believe me, I have a phenomenal amount of materials and a limited amount of space and I need to know exactly what I have and where to find it – if I can get order then absolutely so can you!

Hmmm, where shall we start; how about ribbons, fabric, fabric scraps, bells, bows, wooden shapes (nightmare), flowers (bigger nightmare), lace, cottons, string, wire, paper, card, card making, Christmas, pom-poms, paints, rubber stamps, trimmings, wool, embroidery threads, velvet flowers, jewellery making, beads, sequins, angel heads and angel hair, or simply SPARKLES in every shape and size!?  I could go on (ok, I won’t then!)  –  You’ll just have to wait and see!

Much Love,

Sarah xxx

How to make a Fairy Birthday card or Mother’s Day card

Well now, here we at the beginning of my blog and at the end of the week and I’m thinking that I had better make a Mother’s Day card as it is on Sunday.  Hmmm!

Love me, Make me!

IMG_3776

Let’s start with some fabric scraps – I think I will go with pink as it’s one of mine and my mum’s fave colours – you could pick your mum’s favourite colour.  Ditsy fabrics are best, you need a tiny print as you use such a small amount of fabric.

IMG_3693

Then we need some wool for her hair (match your mama’s!) and some cotton buds for her arms and legs.  If you don’t have cotton buds you could use whatever you do have in stock; string, wool, pipe cleaners or whatever – she’s your creation, use whatever makes you smile.

IMG_3709

Now we need to make her dress.  Cut a rectangle of fabric approx 9 x 7cms.  Cut the top and bottom 9cm edges nice and straight so they fray evenly then fray them.  Pull strands of thread from left to right (not on 7cm sides) – I tend to go to about 4mm.  Then I pull at it and ‘scruff it up’ a bit as I want it to look a little vintage.  Next, sew a tack line of stitches about 1cm from the top of her dress turning the sides under approx 3-4mm as you go.  Gather her dress by pulling on the stitches when you have finished and do a double stitch to secure.

IMG_3722

Now we have to bring her to life and make her face.  The best fabric for this is flesh coloured felt but use whatever fabric you have or, if you are reading this ‘the night before’ and really don’t have anything you could paint directly onto your card (raiding your children’s paintbox if necessary) mixing your colour yourself.  Believe me, your mum will absolutely love it no matter what, because YOU made it with such love.

Cut an oval shape from the felt approx an inch high and sew some tiny beads on for the eyes (black pen could suffice!).  Next sew her a teeny, tiny nose from dark grey or black cotton by sewing 3 stitches into an upside down u shape.  Now for her mouth, the hardest part.  Using crimson or red cotton sew a little mouth by using tiny stitches into a big U shape.  Don’t worry about being too perfect – the handmade look is part of the charm.  Just take your time, be patient and draw a fine pencil line if you really need to.

IMG_3738

See now – isn’t it exciting when you sew her little mouth and she starts to come alive!  You’ve made her into a little person –  I bet she’s adorable – you might want to name her at this point – it could be rude not too!!!  Lastly her cheeks.  I use pink felt for these and you will need some very sharp and small scissors – snips are best.  Just cut some tiny circles for her cheeks.

We are almost ready for glueing but her arms and legs need some colour.  Off to the paint department.  Pick a colour to match her dress and hand paint her cotton bud arms and legs – you might need 2 coats as the plastic is slippery.  Let these dry.

IMG_3736

Now we are ready for glueing.  Start by using a fabric glue to stick her cheeks on.  Next, align everything up just to check proportions etc., – don’t forget to leave space at the top for your message.  Firstly, glue the face down with fabric and paper glue. For the rest of the card, I use a glue gun as it is instant and I feel there is less chance of the card bending and warping but you certainly can use pva or a similar glue suitable for fabric and card.  Glue her arms and legs down next  – check the positioning of the dress first to ensure your glue does not show once the dress is placed on top – then glue her dress down by glueing along the neckline and carefully down the sides only – make sure the sides of her dress are turned under for neatness.  Next, glue her hair on.  Cut the wool to the  length you want her hair and use approx 2/3 strands – again it is whatever looks right dependent on the thickness of the wool.

IMG_3774

Finally, give her a little bow and a flower in her hair and omg, how adorable is she now – just look what you have done.  I absolutely love my little fairy girl and don’t want to give her away, bet you don’t either!

Hope your mum loves her as much as you do!

Much love,

Sarah  xxx