How to make a Patchwork Heart Card Tutorial

So, here we are, February already and Valentine’s day literally just around the corner.  Every year I struggle to be organised with this day and this year is no exception.

IMG_5513.JPG

As you know, September to Christmas is my absolutely manic time of year and from January until at the very least the end of February I am still dealing with the aftermath of that frantic time.  I have only just found a permanent home for my 4 very large boxes of Christmas Decorations which has caused bedlam  –  nothing new there then!  We also launched full-scale into loads of work on the house the very minute all our guests went home but that is another story and a whole load more blog posts.

IMG_5309.jpg

During last season’s events, I was approached by no less than 3 lovely WI ladies who run groups locally.  I was so flattered to be asked to go and talk about myself (really it’s true!) and my creative life and perhaps do a demonstration.  My first one was on Wednesday and I thought as Valentine’s day is almost upon us, and I create a lot of heart products, it would be rather lovely to do a tutorial for a pretty Patchwork Heart Valentine Card.  The fabulous thing about this is, that it would look even better on fabric or even on a canvas and the process is exactly the same.  What a lovely birthday gift it would make for someone special – I would be so touched if someone spent the time to make me one of these and I would keep it forever.

First of all, you need to choose your card.  I love to make cards with a lovely scalloped edge and especially as it is Valentine’s day I feel this adds to the Romantic look and feel of this theme.  I find it easier to work on it with the card open flat, as it won’t keep ‘bouncing’ open whilst you are working on it which is rather annoying, especially when it is so fiddly and time-consuming.

IMG_5348.jpg

Secondly, either cut from paper or find a heart shape that works for the front of your card.  Remember to allow a little space at the top for either stamping or hand writing your message.  If your stamping skills are a little dubious to say the least, (you know who you are!) then do your stamping or message writing now, so that you do not ruin your beautiful card.  If you have been on one of my workshops, then frankly you have no excuses whatsoever……….Hmmm.

I have chosen to use one of the wooden heart blanks I make a lot of, as it is the perfect size for my card.  I sell a lot of these so if you have bought one from me then draw round the edge very carefully, making sure it is both central and there is room for your message.
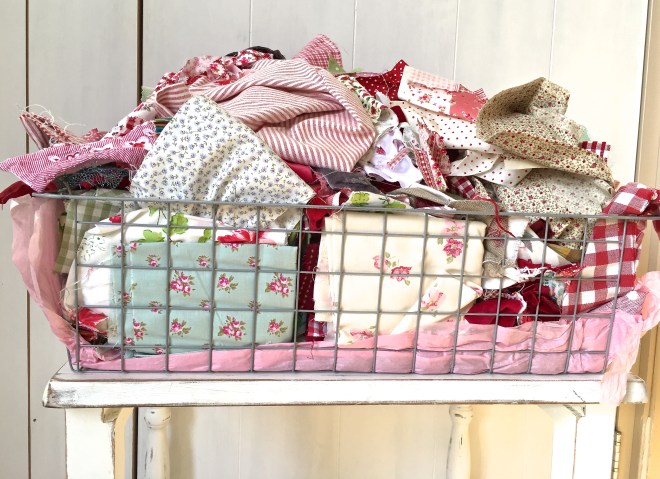
IMG_5411.JPG

Red scraps basket

Now we are ready to start applying the fabric.  I have chosen, rather obviously, red.  This is brilliant for using up your little scraps of fabric, of which I have far, far too many.  This is just my ‘reds’ department, with a little bit of green sneaked in to the corner but I have a basket like this for each colour and 2 overflowing ones for pink!

The idea is to hand cut each patchwork piece in lots of different fabrics to fit your heart exactly.  And no, you cannot cheat and just ‘stick and overlap’ each piece of fabric because it will look like your child has made it  –  you know I am right.

IMG_5424.jpg

Here is a pink patchwork bird my now not so ‘little man’ Ben, made for me when he was around 7 and below is a red patchwork elephant Charlotte made for her baby sister when I was in hospital in labour with Ruby, she was 11 at the time.  I think they are absolutely adorable, although I am somewhat biased, but I do think you can tell that they have been done by a child.

Valentine Heart Blog

Try and pick co-ordinating fabrics whereby the ‘tone’ is the same – i.e; don’t put a deep raspberry or burgundy (no-one uses that word anymore but you know what I mean) with a scarlet or bright red unless of course you love it in which case, carry right on!  Make sure you have a variety and bear in mind that if you use all different weights of fabric, such as cottons and canvas, it will have a much more uneven look and be a little more rustic.  I do tend to use all different weights, generally because I love all the different fabric patterns that I have.  I also try to ensure that I have a stronger piece like a dark background with a tiny dot next to a less strong piece such as a flower on a white background.  If you follow this throughout, when finished, this will give a far more cohesive and even look.  You could also just use say 2 or 3 different fabrics, say blue stripe and blue and white dotty and the simplicity of that design can look stunning.  You could also use scraps of ribbon too if they work with your colour scheme.  Always remember, it’s whatever makes you smile.

Valentine Heart Blog

Here is a large patchwork elephant I haven’t quite finished!

Valentine heart

I always start in the middle and work outwards.  I tend to cut a few first, into little squares or rectangles and see how they gel together.  Use little tiny ‘snips’, embroidery or very small scissors.  Once you have quite a few cut and you are happy with the ‘flow’ of the colours then stick those down.  You may need to lightly trim the edges so they sit neatly side by side.  You are not necessarily aiming for them all to be the same size, just no overlapping and nice straight edges on the middle pieces of fabric. If a fabric piece overlaps slightly once glued, gently nudge it with your fingernail or something like scissors or the wrong end of your brush to move it over a millimetre or two so it lays nice and straight.  Don’t put too much glue out at once, as you will soon realise, it is very time-consuming and the glue dries out.

Patchwork Heart Tutorial. - chandeliersandroses.com.jpg

Use a nice little flat bristled brush if you have one as it will be much easier to paste with.  I tend to use this very sticky glue a lot as it is fab but any PVA glue is absolutely fine.  Do not put too much glue on – use just a thin layer – as you do not want to soak the card as it will want to warp and bend.  If that happens, keep it flat and put a book or heavy object on it whilst it dries.

I should make you very aware at this point, that it is far too easy to get lost into a rather lovely creative little world and you really could take all day to play around with the positioning of your little squares.  It really is rather therapeutic and is now being widely recognised as such, especially when recovering from illness.

Valentine Heart

Once you get to the edges, place your fabric square onto your card and draw a pencil line onto the fabric so you know where to cut.  Try to be as neat as you can but don’t fret too much if you struggle, as we will be putting a trim around the edge to hide any rather dubious cutting!

You will inevitably be left with some teeny tiny gaps which are minuscule to cut, as you can see on the bottom of my heart.  Try to use fabrics which are a contrast to the pieces used around them as otherwise they will just blend in.  You are best to apply the glue to the card when you do these and you may well need to get the tweezers out!!  However, if you really cannot cope with these teeny areas then you could always colour them in with pen, however, practice really does make perfect.

IMG_3528.JPG

Once your, now rather beautiful looking heart is complete, it is time to add a trim around the edge to finish it off.  You really can use anything for this but one of the easiest trims to use is ric rac.  Firstly, it is quite widely available in a large amount of scrumptious colours and indeed widths, secondly, due to the fact that it is ‘wavy’, it not only adds interest and depth but it is easy to bend and shape, particularly along the curved edges.  It probably goes without saying that I have rather a lot of it so, after just a teensy amount of deliberation as to quite which tone of red I was going to use, out came the narrow crimson ric rac.

IMG_5476.JPG

Again, start at the top in the centre and try to cut a nice mitred edge (as you would find on the corner of a picture frame) so that when you have gone right round your heart and you join the trim at the top it will sit nicely together.  Whatever you do, do not cut at this stage, what you feel is the right length of trim, as it is far too easy to cut it too short, only realising when it is too late!

You might wish to change your brush at this stage, as your nice flat one will probably be too big.  Choose a little pointed brush head no wider than your trim.  Only glue approximately 2cms at a time, as the fabric trim will readily absorb the glue and dry really quickly, causing you to re-glue.  When you lift the trim to glue the next section, hold the part you have just glued down with one or two fingers as it will want to lift.  Again, do not use too much glue as it will squeeze out the sides.  Try not to get it onto the card.

When you get to the bottom point of the heart you can either bend the trim into a v-shape and carry on or, if it does not sit well like this and the back is the same as the front, you can bend it back on itself so you are effectively now using the back as I have done.

chandeliersandroses.com.JPG

Once finished, you can decide if you would like to add a little embellishment such as a button or a flower etc.  Remember, if you are creating this as a card and you wish to post it, don’t choose an embellishment that is too high.  I have chosen a tiny sparkly flower.

Finally, choose what, if any, message you would like to stamp or write on the top  –  or indeed wherever else you would like your message to appear.  After deliberating over these stamps, as much as I love the top large stamp,  I felt it was too fussy and would have detracted from the patchwork heart.  Less is more!

img_5513

So there you have it, I so want to make a pink one on fabric and put it in a little frame but alas, I must move rapidly on to Mother’s Day and Easter.

I would like to say a huge thank you to all the lovely WI ladies for having me.  I was a little nervous that they may not find it interesting but I need not have worried, as they listened avidly and lots of sweet and delightful ladies came up to me afterwards and told me how fascinating they found my talk and demonstration.  I could have stayed and chatted for ages………..Hmmm……..nothing new there then.

I am booked in to do another talk and demonstration to make little Handmade Christmas Trees in the Autumn with another group and I can’t wait!

I would really love to see your creations and see what you think.

Happy Valentines Day.

Much Love,

Sarah xx

Open House /Christmas Sale

IMG_4192.jpg

For those of you that don’t know it is that time of year again where I have a huge Open House / Christmas Sale.

I open up my house to all my lovely customers and to the delightful people who I have met at fairs and events throughout the year and to whoever else would like to come.

As always, I will have 2 rooms full of my handmade items, lots of fabulous scarves – most of them £6.99, pretty jewellery  – most of it under £10, loads of fabric remnants – much of it Vintage Laura Ashley, Cath Kidston and Designers Guild and lots of other lovely things too including some Vintage goods.

This year it will be held over 2 days at the end of next week – the location and opening times are detailed below:

Fri 18th Nov     –     9am – 5pm

Sat 19th Nov     –     10am – 5pm

Rick Cottage

Blind Lane

Chipping Campden

Glos, GL55 6ED

Hope to see you there   –   friends, family and children are welcome.

Much Love,

Sarah xx

Hallway Storage – Building a coat & shoe cupboard.


IMG_3658.jpg

Hallway cupboard

A large majority of the projects we have done in this house have been designed to precision around us and our needs as a family, and our hallway is no exception.  Being a family of 5, we have a large amount of coats, shoes, hats & scarves and general paraphernalia that most families have.

img_3923

The Front door

When we made the decision to knock through from our snug to our kitchen to make one large room, I had to make a very important decision as to which doorway to keep.  Both doors lead off from the hallway but the original kitchen door was a little nearer to the front door by a couple of metres and I guess easier access and would be the ‘logical’ one to keep.   If we kept that one, it would mean a shorter journey into the kitchen which is always a plus, particularly if you are loaded up with shopping.  However, we do have double doors leading from outside into the kitchen from the Aga/cupboards end, which can be, and indeed are, used for that purpose.

chandeliersandroses.com.JPG

Hallway – Front door on left and Kitchen doorway on right

This picture, taken one Easter, shows the front door on the left of the photo and the original kitchen door on the right – as you can see, it would have been more logical to keep this one.

The other access which was the original Snug doorway, was also semi-opposite the stairs and I don’t know why, but it just seemed so much more hassle to ‘go that way’ when entering the new kitchen space.  We could also have put a small piece of furniture in that area of the hallway if we had blocked up the Snug doorway.

I also had to consider our kitchen table position, our kitchen seating/chill/play area and our current and future fridge/freezer and furniture – dressers etc., – locations as well.  I should possibly mention at this point that when we purchased our house, it was originally designed as a holiday cottage with disabled access and did not even have a proper entrance or doorway into the kitchen from the hall.  We did therefore have to build one, which was all beautifully done and finished, but we will just brush that thought right on under the carpet (or sisal!) shall we, as I could not allow that to influence my decision.

img_4736

The start of ‘The Cupboard’ –  dismantling the old  doorway (and Ruby’s temporary play shop!)

I really gave this many hours of thought and planning, especially as it would impact on so many areas of our main living spaces and, you know me, much to Mr Chandeliers utter despair, I am never one to ‘just go with anything because it seems logical’ or indeed because it would undo building work we have beautifully done and finished.   So, after much deliberation, lots of sketches, detailed drawings, measuring and general faffing about which Mr Chandelier finds both amusing and tiresome in equal measure, I decided to block in the original kitchen doorway………you so knew that was coming didn’t you!


Hallway cupboard blog

Blocked in, plastered and ‘starting to take shape’


One of the biggest deciding factors for me, was that it did of course mean we could have a giant coat and shoe cupboard, although if we had given that space to the kitchen it would have meant a fabulous recess for a giant fridge/freezer or indeed a wider table area or numerous other things which I won’t go into.  However, with our coat and shoe collections growing by the day and the fact that we could no longer keep a large proportion of our coats on the back of the Snug door as the snug would no longer exist, the thought of such wonderful Hallway order won me over.  I did however realise at this point, that it was going to be quite a painful process to bring my ‘grand cupboard’ to fruition…….Hmmm……..we started it last year and have still not quite finished.

img_6738

Our original shoe storage.

The biggest issue was ‘shoehorning’ – yes really – all that stuff in, and not just the physical act of squishing it in there, but the fact that it really needed to be functional and easy to get to everything because, as I am sure those of you with children (especially teenagers) will appreciate, it is hard enough to get them to do any kind of clearing up as it is, let alone if there is any kind of hassle attached.  We originally had a lovely old ‘merchant’s chest’ and each family member had one large drawer – lined with oilcloth – for their shoes and footwear and a small drawer for hats, scarves and gloves.  This left a couple of drawers for Ruby’s pram blankets and other Baby bits and pieces.  There was however, one member of the family who had far more than could ever fit in there (42 pairs of shoes at last count and 12 pairs of boots plus trainers and so on!) but that is a whole other story with a whole other cupboard and I don’t think we need to both shame and highlight that person do we?!

Out came my drawings and in came the start of a major search for containers/baskets/boxes which would bring my drawings to life.  As always, the biggest problem was the measurements for all of these things had to be very precise and I knew it would, and indeed it did, take a lot of searching to find what I needed.  Fortunately for me, and my family, especially Mr C, we are all very patient and as we have lived in chaos for what seems like forever, what is another few months between friends……….or family!  The only problem was Mr Chandelier did constantly keep asking me for measurements as he wanted to know the exact location of the shelves and the rail so I did really need to find my ‘storage vessels’ so we could move forward.

Hallway cupboard blog

OMG – a coat rail – an exciting moment!

Now you know how much I love Christmas and whilst on a visit to one of my local fabulous garden centres, I found these rather gorgeous faux fur baskets with leather type handles.  My mind started ticking somewhat, actually it was almost exploding, and after being in there for hours  –  even little Ruby who loves looking at all the Christmas loveliness with me for ages was wanting to go home  –  therein began the start of what the garden centre genuinely thought was a major ‘faux fur fetish’.  It started with I think, just one rectangular basket in two different sizes in a scrumptious grey/brown faux fur and ended with me going back there about 5 or 6 times, with an incredibly patient and helpful lady called Elllie phoning round other branches. I think I have now ended up with around 18  different fur baskets in different shapes and sizes and 2 colours (I know  you’re thinking ‘fur fetish’ and I did wonder myself!)  However, once they came home, they seemed to fill up ludicrously quickly and they started sneaking off to other rooms.  Both ‘my girls’ have sweet little cream ones as laundry baskets – you see, you are starting to understand now aren’t you – they are really cute and extremely useful!

IMG_3648.jpg

Such Incredible order!

Fortunately, I could just about squish 5 large baskets in a row on the first bottom shelf.  There is one for each person for hats, scarves and gloves and as each basket is so much bigger than the original small drawer we all had, they can also accommodate other garments such as waterproofs for Ruby’s outdoor wet play and so much more.  The next shelf up then has Ruby’s ‘coat cardigans’ in one fur basket and her baby blankets in the other.

I now also have a Packing & Sending parcels Department, a Paper & carrier bag Department and an Outdoor Lantern & Tea light Department – I mean come on, is that cool or what?  It just brings me such order to my frantic life when I need to mail something, or find a bag, although I do agree it is a tad spoilt to have an Outdoor Lantern & Tea Light Department but really, they do ‘need’ to go somewhere!  As you can see, I can also fit the outdoor garden chair and bench cushions in there too which is just brilliant.  I will probably move them up to the top shelf soon, now that Autumn has arrived, as they won’t be used until next spring.  This means that the Packing Department can come down and with Christmas rapidly approaching, this makes more sense over winter.

This just left the final, but biggest hurdle  –  what to do with all the shoes?  I had always thought, even before the cupboard was built, that the ‘Drona’ boxes you can see sitting on the floor would be perfect, but quickly realised that because in due course we plan to put doors on our cupboard, the frame would be in the way and not allow me to have the 5 boxes for each family member that I needed.  Although they would just squish in, they would be a nightmare to manoeuvre in and out to get to the shoes.

I then subsequently spent many hours searching and looking for a solution.  I had finally resigned myself to having some bespoke wooden boxes on wheels made to my spec, when one day Mr Chandelier asked me a really simple question that made me rethink things.  It was a typical ‘completely innocent man comment’ which had I not been in such an ‘open minded mood’ could have easily got an ‘are you actually an alien type look!’   You want to know now don’t you?  Ok, he simply asked “Why do all the shoe boxes have to be on the same row?”  Hmmm……………where do I start, space, practicality, it’s not aesthetically pleasing or simply – it’s just plain wrong!  But, really, why – especially when I was struggling to fit them all in and, each box needed to be pretty spacious as we all had a fair few pairs of shoes and footwear to accommodate.  I pondered his question for a few days and resigned myself to the fact that right now, it would be sensible to not be so pedantic about the visual aspect of my scrumptious cupboard and go with one box on the shelf, however much it ‘jars’ with me!

So, we decided that as he has the least amount of shoes, Mr Chandelier would have the shoe box on the shelf and not the floor and off to the ‘Kingdom of Storage’ (namely Ikea) we went.

We purchased 6 of the Drona boxes in the most perfect taupe colour, which incredibly, totally matches the hallway woodwork which is painted in Farrow & Ball’s Archive.  See how perfect they are for the shoes – they fit loads of pairs in too.  We initially bought 6 so we could have 1 to spare, thinking that the children might ruin them but once they were built, I thought it looked better visually to put 2 on the shelf so used the spare one for cushions.  However, at just £2.50 each, I think we could cope if we needed to replace one or two!

Now they were fine to pull in and out on the sisal flooring but, fully loaded (some more than others!), although they were ok, because of the weight they were harder to push in straight and I couldn’t have that could I.  So I asked Mr Chandelier to cut some squares of hardboard for the floor boxes and we silicone glued them on to the bottom of each box, with the shiny side of the hardboard facing the floor, so that when you pull each shoe box out, the shiny hardboard slides rather nicely on the sisal.  If we ever change the flooring to tiles, then I will rethink and probably put fabric  –  Ooh we could even have fur – omg – underneath instead.

Since the cupboard has been finished, something absolutely shocking and unbelievable has happened that I never envisaged – all the children actually put their shoes away ……….Without being hounded…………Every Day…………Omg…………Incredible…….. I can assure you it has nothing to do with ‘the look‘ they get when they come in!    Sooo hope it continues.

The final job is to make the doors, a feat in itself, as there was a lot that need to be thought about.  They have been well and truly started……….Hmmm…….Christmas maybe?……It’s on ‘the list‘……but it’s a very long one……..Watch this space!

Where do you keep all your coats, hats and shoes – do you have a special cupboard or are they all over the place, a bit like ours were……….I would love to know.

Happy organising.

Much Love,

Sarah xx


Large Wooden Freestanding/Hanging Personalised Letters

I have just added these gorgeous Large 30cm high Letters to my Etsy shop today.

I have been making rather a lot of these lately and have lots more different designs to photograph and then add to my shop, including lots more floral ones and the most adorable Vintage Style letters I have designed for children’s rooms with little wooden stars and bunnies added to them.

I really can’t wait to share them with you but right now I definitely do not have enough hours in my day!

IMG_2795

IMG_5714.JPG

Some of my Vintage Style Velvet Bookmarks

Firstly, I have this Cotswolds Vintage and Handmade Fair I am frantically making stock for.  I have only ever been as a customer in the past and have always spent lots of money on the genuinely fabulous stalls they have.  It is predominantly Vintage with some Handmade stalls whose goods all have a Vintage style.  I will of course be sharing that style with my handmade products, which is mostly my style anyway, and I will also have some Vintage pieces with me too.  I will also take some Vintage Laura Ashley and Cath Kidston fabrics with me to sell, probably as fat quarters and will try to have some of the new Creative Kits ready to take that I am currently designing and creating.  I am really looking forward to it and, as a shopper, I can’t recommend it highly enough  –  I just hope I get a chance to shop too!

IMG_3121

I am also running a few painting and distressing workshops right now and it is of course the wonderful Summer holidays and I am trying to prepare for a holiday.  Added to that Prince Chandelier Ben, my 18 year old is, under my constant supervision, painting all the outside windows and doors on our cottage.  He has actually been working for Mr Chandelier and I for several years and is doing an excellent job and I am just about managing to keep any teenage tantrums at bay (phew!).  I am also doing numerous different house refurbishment jobs around the house, as is Mr Chandelier, and I am trying to help him as well as doing my own stuff, kind of running between the two of them, Princess Chandelier Charlotte and my Littlest Chandelier Ruby Blue, who are thankfully being as good as gold……..Hmmm…..so hope I haven’t spoken too soon……don’t read this out loud!

Lots to share with you soon, including some fabulous makeovers, scrumptious new products and exciting new workshops coming up.

Happy holidays.

Much Love,

Sarah xx

Where to buy gorgeous but cheap Craft Supplies – June


Craft supplies

Sparkly Threads

So where shall I start?  Hmmm, Hobbycraft I think.

All their Gutermann sewing threads are half price at present so I felt it would be a little rude not to purchase a few reels as I do go in there a lot and I can’t not buy anything at all can I?  (Shh don’t tell Mr Chandelier as he would probably be utterly horrified at that statement!).

I will also admit to being just a little bit seduced by the sparkly threads shimmering in the sunlight calling for me to take them home!  Also, at £1.55 instead of £3.10 for the sparkly threads and just 77p instead of £1.55 for the non sparklies they were a bargain.


IMG_2752

Another half price product that I purchased was this fat quarter bundle in pinks and purples.  They are by Kirstie Allsopp and were reduced from £11.00 – which I would not have paid as I only really loved the floral ones  –  down to £5.50 which worked for me.  If each fabric had been available by the metre, I would have happily paid more and bought bigger quantities of the 2 florals but they aren’t available by the metre, so half price worked for me.  Although as you know, I have thousands of different fabrics, I am a little lacking in my purple and lilac departments so they had to come home with me!  I think they are going to stop selling her fabrics which is why they are half price.

chandeliersandroses.com


In the same purple and lilac vein, I did have to purchase this rather lovely ‘Violet Marguerites’ (what a fab name) fat quarter which, to be honest doesn’t really belong on this post as it was certainly not cheap at £6.00 but it is gorgeous and I kept looking at it every time I went in and as I so need more of this colour I bought it.

Craft supplies

Heart Embellishments


Still in Hobbycraft, I bought some of these little heart embellishments for just £1.00 a pack.  I do have them in lots of different colours but I had white and not cream so I needed cream ones too.  They are shimmery on one side and matt on the other which is perfect I always work with both.


Add a description…Craft


I also had to have this tiny tray of little wooden shapes which have birds and birdhouses, hearts and flowers and watering cans and butterflies.  They were just £2.00 for the whole pack which is brilliant value.

Craft supplies

Lilac Heart Buttons

I did also genuinely need these Hemline little lilac heart buttons as I made an angel garland the other day and was searching for small lilac heart shapes and struggled to find lots of choices.  Hard to believe I know, with all my materials, but true!  At £2.00 for 17 they weren’t that cheap but I needed them.

Talking of Dunelm, I bet you don’t associate them with Fabric and Craft Supplies do you?  Well the sad part is that they did used to have a fab craft department selling all sorts of supplies from artists brushes to ribbons, from paper craft products to beads and sequins and much more in-between.  I presume it didn’t sell well for them as they have stopped doing most of it however, they do have a fabric department with good prices on the fabrics that they do sell.  They do quite a good selection of oilcloth too.

They also have fabulous reductions on sale fabrics and I really only purchased this Newport fabric in Hibis (pink) because it was half price.  It was reduced from £10.99 per metre to £5.50 but I only purchased half a metre for £2.75 as I like, but don’t totally love, the colour.  However, I do absolutely love it in the faded blue, so I also bought half a metre in that colourway too.  The only thing to bear in mind with Dunelm fabrics is that they only sell in half metre lengths so you cannot have for example, 3/4 metre, which is marginally annoying but do keep an eye out for remnants as I have bought quite a few in the past and they are brilliant value.

Even though, as I said above, they have stopped selling a lot of craft materials they do still have a very good habadashery department which again, is fairly priced, and has a good selection of trimmings, cottons, glues, ribbons and buttons etc., far more than you would expect, so hunt down those aisles!

june blog

Moving on to The Range, these paper flowers above, in pretty pinks and lilacs are £1.00 per pack, which is what most of their craft materials are, but I thought these were faulty as a lot of the gold flower centres are missing.  However I bought them in blues too and they are the same so I figured that was probably how they were meant to be.  I also tend to change or add to the centres when I create anyway so it doesn’t really matter to me, but if you are bothered don’t buy these.

June blog

Finally on to The Works, this three pack of Glitter craft tapes, (like washi tape) is excellent value at £1.50 for all three.

I will confess to perhaps buying a little more than appears on this page but sometimes I get home and literally tear my new materials open straight away as I just can’t wait to ‘play’.  I also buy materials from Antique Fairs and Sales and Boot Fairs and anywhere else my magpie eye spots something pretty or sparkly!

What craft supplies and materials have you bought lately?  Were they bargains or didn’t you care as ‘you just had to have them!’

Happy Hunting.

Much Love

Sarah xx


Oilcloth Lined Vintage Shopping/Storage Baskets

IMG_1890.JPG

Vintage Shopping Basket lined with Floral Oilcloth           £45                       Click to buy

For a very long time I have wanted to do a little batch of Vintage Wicker Shopping Baskets and line them with oilcloth.

As you are probably aware, I have been creating since I was a very little girl and one of my first businesses as a teenager  (yes, you did read that right, I did start very young)  was making baby items.

I used to make really beautiful broderie anglaise moses baskets with elaborate hoods and canopies and gorgeous trimmings and I even made tiny little quilts and fitted sheets.  I also made little children’s rocking chair covers, teddy bear mobiles and nursery decor such as fabric balloon wall hangings from different coloured pastel fabrics, which I padded out and strung with ribbon and made them look like they were floating across the wall.

Another product I made was a gift basket full of gifts such as socks and bibs and various other useful items which I would adorn with little bows and embellishments.  The basket which they all came in was a gift in itself, as I used to line them with wadding and then broderie anglaise fabric and trimming as well.  They would always be adorned with at least 1 bow and were meant to be used as Nursery storage for things like nappies.

Pink Paisley Fabric Lined Basket  SOLD

Pink Paisley Fabric Lined Basket  –  SOLD

Much as I have come on an incredibly long journey with my creativity since then, I find it slightly amusing that all these years on, I am still making and selling fabric lined baskets which lots of my customers love.

IMG_0707

Taupe Gingham Fabric Lined Basket   –     SOLD

Nowadays, I paint and distress the baskets and use many other beautiful fabrics and my customers and I use them for all sorts of storage from papers to toiletries, from children’s toys to hair accessories, varied kitchen storage, books and magazines and also as picnic baskets where I have lined them with oilcloth, as the oilcloth can be wiped clean.

IMG_9007

Cupcake Fabric Lined Basket    £25     Click to buy


In my own house, they are used for Doll’s Tea Sets, Bedroom Storage and Papers and I use my oilcloth lined Vintage Shopping Baskets for Ruby’s Lego and shopping locally in my village.  I do love a basket and, as Mr Chandelier will confirm, I definitely do have far too many – with a rather large percentage of those hanging in abundance from my summerhouse ceiling.


IMG_0715

Pink Paisley Fabric Lined Vintage Hamper    –    SOLD

IMG_0720

Taupe Roses Fabric Lined Vintage Hamper    –    SOLD


I also transform Vintage Picnic Hampers and Old Fishing Baskets but the few that I have had time to do have sold very quickly, so I there are very few photographs of them – these two being no exception.  I sold the Taupe Roses Hamper to my hair colourist whilst having my hair done and telling her about them, she didn’t even see it and said she had to have it – how fab was that!


IMG_6188

Vintage Baskets waiting to be loved and used again.


It did however, take me over a year to find and gather enough Vintage Shopping Baskets so that I could create a batch of 5.  I did have one more, but unfortunately it was damaged, which I did not notice when I purchased it so that has been relegated to the garden and will be painted and filled with something, probably flowers – I will show you what I do with it when I finally get round to dealing with it!

As they are shopping baskets, I had decided a long time ago before I started trying to find them, to line them with oilcloth so that they could be wiped clean which hugely increases what they can be used for.

chandeliersandroses.com Vintage Shopping Basket.JPG

Vintage Shopping Basket          £45          Click to buy

I knew they would be hard work and I was right – I really dislike sanding down but unfortunately the process I use means they need to be sanded 2 or 3 times.  I also knew that working with the oilcloth was going to be grief and I was so right.  It is an absolute nightmare to iron  –  which you have to keep doing  –  and an even bigger nightmare to line each basket and work with oilcloth, particularly when you need perfectly folded corners.  I have lined hundreds of baskets with normal fabrics over the years so I don’t say that lightly.

Vintage shopping basket

Vintage shopping basket       £45       Click to buy

However, I never give up and I persevered with them and I am so delighted with how they have turned out.  They all look so pretty in their soft colours, Shabby Chic paint and lovely oilcloths.  The problem is, as always, I make them as if they were for my own home so of course, they look as if they belong with me and I never want to sell them!   Hmmm…………I wonder how many will make it to my Etsy shop!

Do you have lots of baskets in your home and what do you use yours for, I would love to know?

Happy Shopping!

Much Love,

Sarah xx

Craft Storage & Organisation – How to Store Ribbon.

Ok, so I felt it was about time that I did another little storage post as I do have rather a lot of rolls of ribbon and a large amount of ribbon remnants and, as you have probably realised by now, I do buy the odd roll – rarely of course and it is not showing any signs of slowing down.  After doing a rough count a good year or two ago it was 2-300 so by now it will easily be at least 4-450.

Now, I know when we look on luscious pinterest, we see ribbons stored in the most beautiful manner, on wall mounted reels and adorable little shelving units amongst other things.  However, lets be realistic here;

  • Firstly, if you create for a living like me, or even if you are a serious hobbyist, it really does not take long at all to build up a decent stash of ribbon rolls and pieces of ribbon – you don’t see the remnants displayed so beautifully do you?
  • Secondly, in order to store a decent amount of ribbon, you would need to give up a fairly large amount of wall space and you would really want to keep all the ends pinned neatly, so they weren’t all swaying around in the breeze – well you would wouldn’t you!
  • Thirdly, I don’t have any vertical wall space to speak of as my little “Narnia Studio’ has been created from a large cupboard with sloped ceilings on both sides, and at present, it has no window or natural light.
  • Finally, even if I were fortunate enough to have wonderful wall space, I really don’t have the time, or indeed the inclination, to keep my ribbons that neat and tidy all the time – it would be chaos, I know it would – and I really wouldn’t want to give up that much wall space.

So, to that end, how do you store 450 rolls of ribbon and hundreds, if not thousands of ribbon pieces.

I have tried various different options over the years but to be honest what I have always gone back to, as it has always worked for me, is putting them all in drawers.

When I create, I tend to always work by colours so that is mostly how I store all the wonderful craft materials that I have collected over the years.

IMG_3437

Firstly I will give all the same type of product a ‘department’ (I know, Mr Chandelier finds all my ‘departments’ highly amusing too!)  Then, I will sub-divide into colours if there are big enough quantities.  So, with the ribbons, I sub-divided into colours and I have a drawer for each colour, or group of colours i.e;  Reds & Pinks each have their own drawer as they are massive for me, Taupes, Creams & Whites share but they really do desperately need their own drawer now, and the Blues,  Greys and Purples share which is just about ok.

Ribbon storage

Ribbon storage – This drawer is sooo not going to close!

This all worked fine for years, but it did get to a point of no return a few months ago at Christmas, when each drawer slowly became more and more difficult to close due to the new rolls I had purchased.  When they practically ‘exploded’ like this one upon opening, I knew that a ‘Ribbon crisis point’ had been reached!  I really had to think about this as I totally did not have any more drawers and I just needed approximately one more row per colour.  I also was having real trouble and ‘annoyance’ getting to my velvet ribbons which I use all the time.  Most of them are large tall reels which I had to sit at the back of the drawers as they were so tall, hence the hassle when I needed them.

IMG_3445.JPG
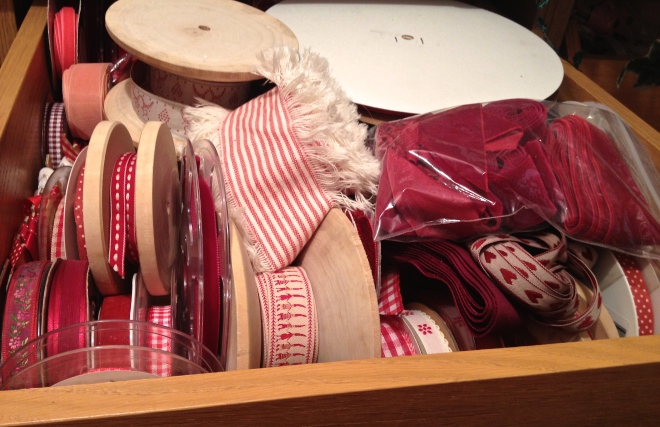
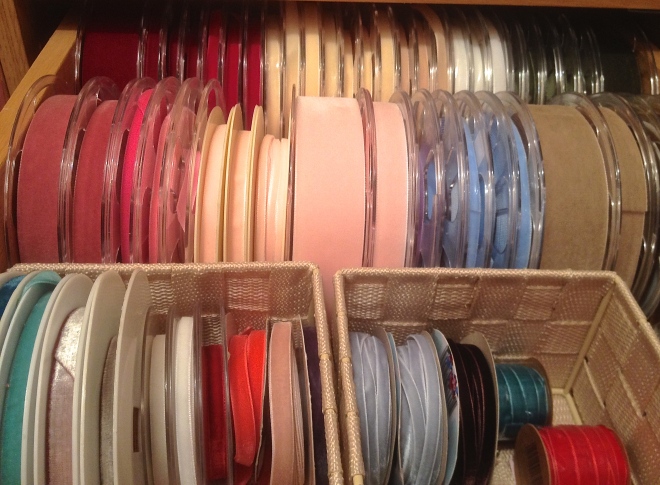
After yet another ‘Velvet tantrum’ it suddenly struck me!  How about creating an incredibly luscious ‘Velvets Department’  –  this was the perfect answer, as not only would that generate another row per drawer for the other ribbons, but I would be able to get to them easily in their own drawer, and as I use them so often, I felt they had totally ‘earnt’ their own space!  However, this did unfortunately mean I had to sacrifice a drawer which had some other materials and supplies in it, which still don’t have a home, but we will just ‘brush on over that’ and focus on our luscious velvets!

IMG_0929

Just look at these – they’re almost edible.

You so know how I feel about velvet ribbons so imagine opening a drawer full of them in loads of different colours…….Omg……..Ribbon Heaven……..Love Love Love it!

Now, how do you deal with all the remnants.  Again, it doesn’t take long when as I do, you use ribbons all the time, so I had to deal with these remnants many years ago.  If you don’t have that many, they do look really pretty stored into glass jars  –  ‘not that many’ however, does not seem to be in my vocabulary (Mr Chandelier would so agree with that!)

IMG_0939.jpg

The most space saving, easy to find, easy to view solution was to store them rolled into small self closing, clear bags within their own colours.  They can then sit on top of the rolls of ribbon and when you want a certain colour you can pick them up really easily and see both what scraps you have and what the rolls of ribbon are underneath.  It also works really well when I have a workshop, as  I can just take down a few bags of remnants with some rolls and it gives everyone loads of different choices.

To roll the ribbon pieces up, trap the end between your two fingers and then wrap the rest around all your fingers, until it is all nicely rolled into a neat circle.

Obviously, in an Ideal world, (if such a world were to exist) I would have a drawer for just the remnants of each colour but frankly that is just a fantasy world – let’s aim for a window first!!!


Velvet ribbons

So here they are, all looking rather lush, screaming at me to touch them and use them and snip a bit off to enhance whatever project it is I am working on.  Incidentally, just between you and me, I don’t know why I make out I am working on ‘a project’ like a normal person when the reality is ‘a lot of half finished projects’, some dating back many years  –  ok ok, maybe just one or two are at least 10+ years old…….Nooooo!  We will just pretend I am normal shall we?……Hmmm…….

How do you store your ribbons – I would love to know – do you break down into colours and what about your remnants?

Go and have a ‘Happy Sorting Day’.

Much Love,

Sarah xx


Shabby Chic Heart Wreaths – featured on another blog!

Even though I have been creating and selling things I make since I was very young, it still makes me soooo happy when anyone loves and admires my work.  As well as events, I sell so many things just as a result of people visiting my house, either from my children’s friends mummy’s or our friends and family and it secretly thrills me to visit their houses and see my items on their walls or sitting on the side.


Even though I should be used to it by now after all these years, it is just such a wonderful feeling to think that they love it that much they want to see it all the time and I really don’t think I will ever ‘grow out of that feeling!’  I do however, resist the urge to squeal and point whilst shouting “That’s mine – I made that – it was me!” like a child (even though my family frequently tell me I do behave like a child, Hmmm……..)

So how wonderful to wake up to a lovely message from Lilybelshomedecor saying that she really loved my work and had featured me on her blog in a post about ‘things you absolutely must buy!’

She featured my Shabby Chic Hearts and this is the post here – go check out her really beautiful pictures, my favourite is the love birds!

Go create some hearts  –  I am creating Easter Bunny things today – Love them so much   –  show you soon!

Much Love,

Sarah xx


Where to buy gorgeous but cheap Craft Supplies!

As you know, I use a massive amount of craft supplies and although I do buy a lot of them in large quantities through my trade contacts, I am also constantly picking up all sorts of materials and supplies from retail shops on a weekly basis.

Blog fabric

Divine Trimmings!

I am constantly asked where I purchase my craft supplies from and if I can remember…… Hmmm…., I will always share, as I want the shops I frequent, to carry on stocking all these wonderful materials. The more that we all buy from them, the more they will stock, and the better the prices will be – it’s a win, win!

To this end, I am going to do a regular featureshowcasing the supplies I have bought in the last week or two.  Wherever possible I will do a link to that product to make your life even easier – do you need to traipse around the shops in all weathers – No, you don’t!  I will have done that for you, gosh what a chore!  Obviously, there will be a lot of products that are not available online or are ‘one-off’ items, or possibly even sale but I will still let you know where they are from and how much they were.

I do love a button (or 60 pack) and ribbons are a bit irresistible to me, especially velvets (can cause palpitations), fabric is a weakness obvs – check out this fabric storage post – little wooden pieces and rubber stamps jump off the shelf into my basket (that so happens!).  As for Trimmings, actually, let’s stop now and not even go there.  Who am I kidding, I adore all Haberdashery (my love – no not obsession – started age 6), always have and always will.

Ok, where shall I begin…..Hmmm…

blog ribbon

Let’s start with The Range.  I just ‘popped in’ to see if I could pick up some art books for the teens schoolwork (yes really!).  I ‘bumped’ into a tub of ribbons which were ALL priced  at £1.00 per roll.  I think I have approx  350-400 reels of ribbon and thousands of ribbon pieces so I didn’t think I would find anything but I had to have a little rummage and……  No – OMG – 12.5m  of Duck-egg velvet ribbon for £1.00  Nooooo…. My heart seriously started beating faster and I actually started furtively looking around to make sure no-one else was near me, that might see my unbelievable bargain ribbon and run over! (I know, I do actually think I have a problem too).  Well, here’s what I found; 2 reels of duck-egg velvet (I did actually leave a few reels behind) and 1 reel of brown velvet.  1 pretty gathered lilac ribbon reel – I could see this on dolls clothes and lots of my customers love lilac, 1 reel of simple ribbed lilac and lastly 1 fabulous reel of white ribbon with a silver glitter edge which, ‘I absolutely had to have’ for all the fairies and angels I make.  I know you won’t believe me but I really was being ‘restrained’!!!

IMG_9983.JPG

IMG_0039.jpg


Then, whilst looking at the oilcloths I saw this gorgeous duck-egg fabric which was a perfect match for the ribbon.

I rarely know what I am going to use my materials for but I just ‘see’ things in my head and I could ‘see’ Easter bows.  I don’t know why these things just ‘pop’ into my head but they just do and look, how gorgeous is that bow – it’s almost edible.

It was £3.20 per metre and I just bought 1/2 metre.


IMG_0030.jpg


Can you see how wispy it is, like hessian?  Duck-egg hessian, love it.  They call it Slub Linen Voile.  Do you think they might have some in pink next time I go?


I probably should have left at this point as I hadn’t picked up a basket and actually couldn’t carry any more but no, I was in a wonderful trance of prettiness and sparkle, my imagination was in overload and I was having far too much fun.

Then, I spotted some roses trimming strips in 3 different colour ways.  I actually made a gift for a friends daughter with the multicoloured one and used up my stock, so was pleased to find it as I have been on the look out for about absolutely ages for some more – yes I really have.
IMG_9990.JPG


Again, just £1.00 per pack, fabulous and soooo pretty.

IMG_9996.jpg

Finally, whilst trying to pick up all the things I kept dropping on my way to the tills, I saw these buttons which for just, you guessed it, £1.00 would simply have to come home with me  – I ‘needed’ them, no question, none whatsoever!

IMG_0005

Blog buttons

Pretty Buttons

IMG_0065


I also visited The Works this week and purchased some more brilliant inexpensive craft supplies, some more buttons – well I do use a lot and some of them are very sparkly, which you just don’t see……anywhere…….ever…… and again just £1.00!  Mr Chandelier raised his eyebrows too…….Hmmm…..!

IMG_0070.JPG

IMG_0049.jpg


I also purchased these pretty little flower petals to add to my faux flower department – I felt sure they would be used very soon!

IMG_0062.jpg

At present they only have them in pink but I will keep my eyes peeled in case other colours come in as my flower department will need them.


It is all business you understand, poor me, all that visual stimulation is exhausting, really! I don’t know why Mr Chandelier has no sympathy for my exhaustion!

Where do you buy your craft supplies from, can they compete with these prices?

Happy shopping!

Much Love,

Sarah xx